Setup a CLAID Flutter Mobile App
Information on Tutorials 1a, 1b and 1c
Tutorials 1a, 1b, and 1c are meant as alternatives. Choose one based on the type of application you want to create:
Tutorial 1a: For creating a cross-platform application (works on both Android and iOS).
Tutorial 1b: For creating an Android/WearOS only application
Tutorial 1c: For creating an iOS only application.
Welcome to this tutorial on setting up a mobile app using CLAID and Flutter. Using CLAID with Flutter is our preferred way to create mobile applications because:
- Flutter allows you to build UIs fast for both Android and iOS from a single codebase.
- CLAID supports various languages and systems, making it easy to integrate different Modules with your Flutter UI.
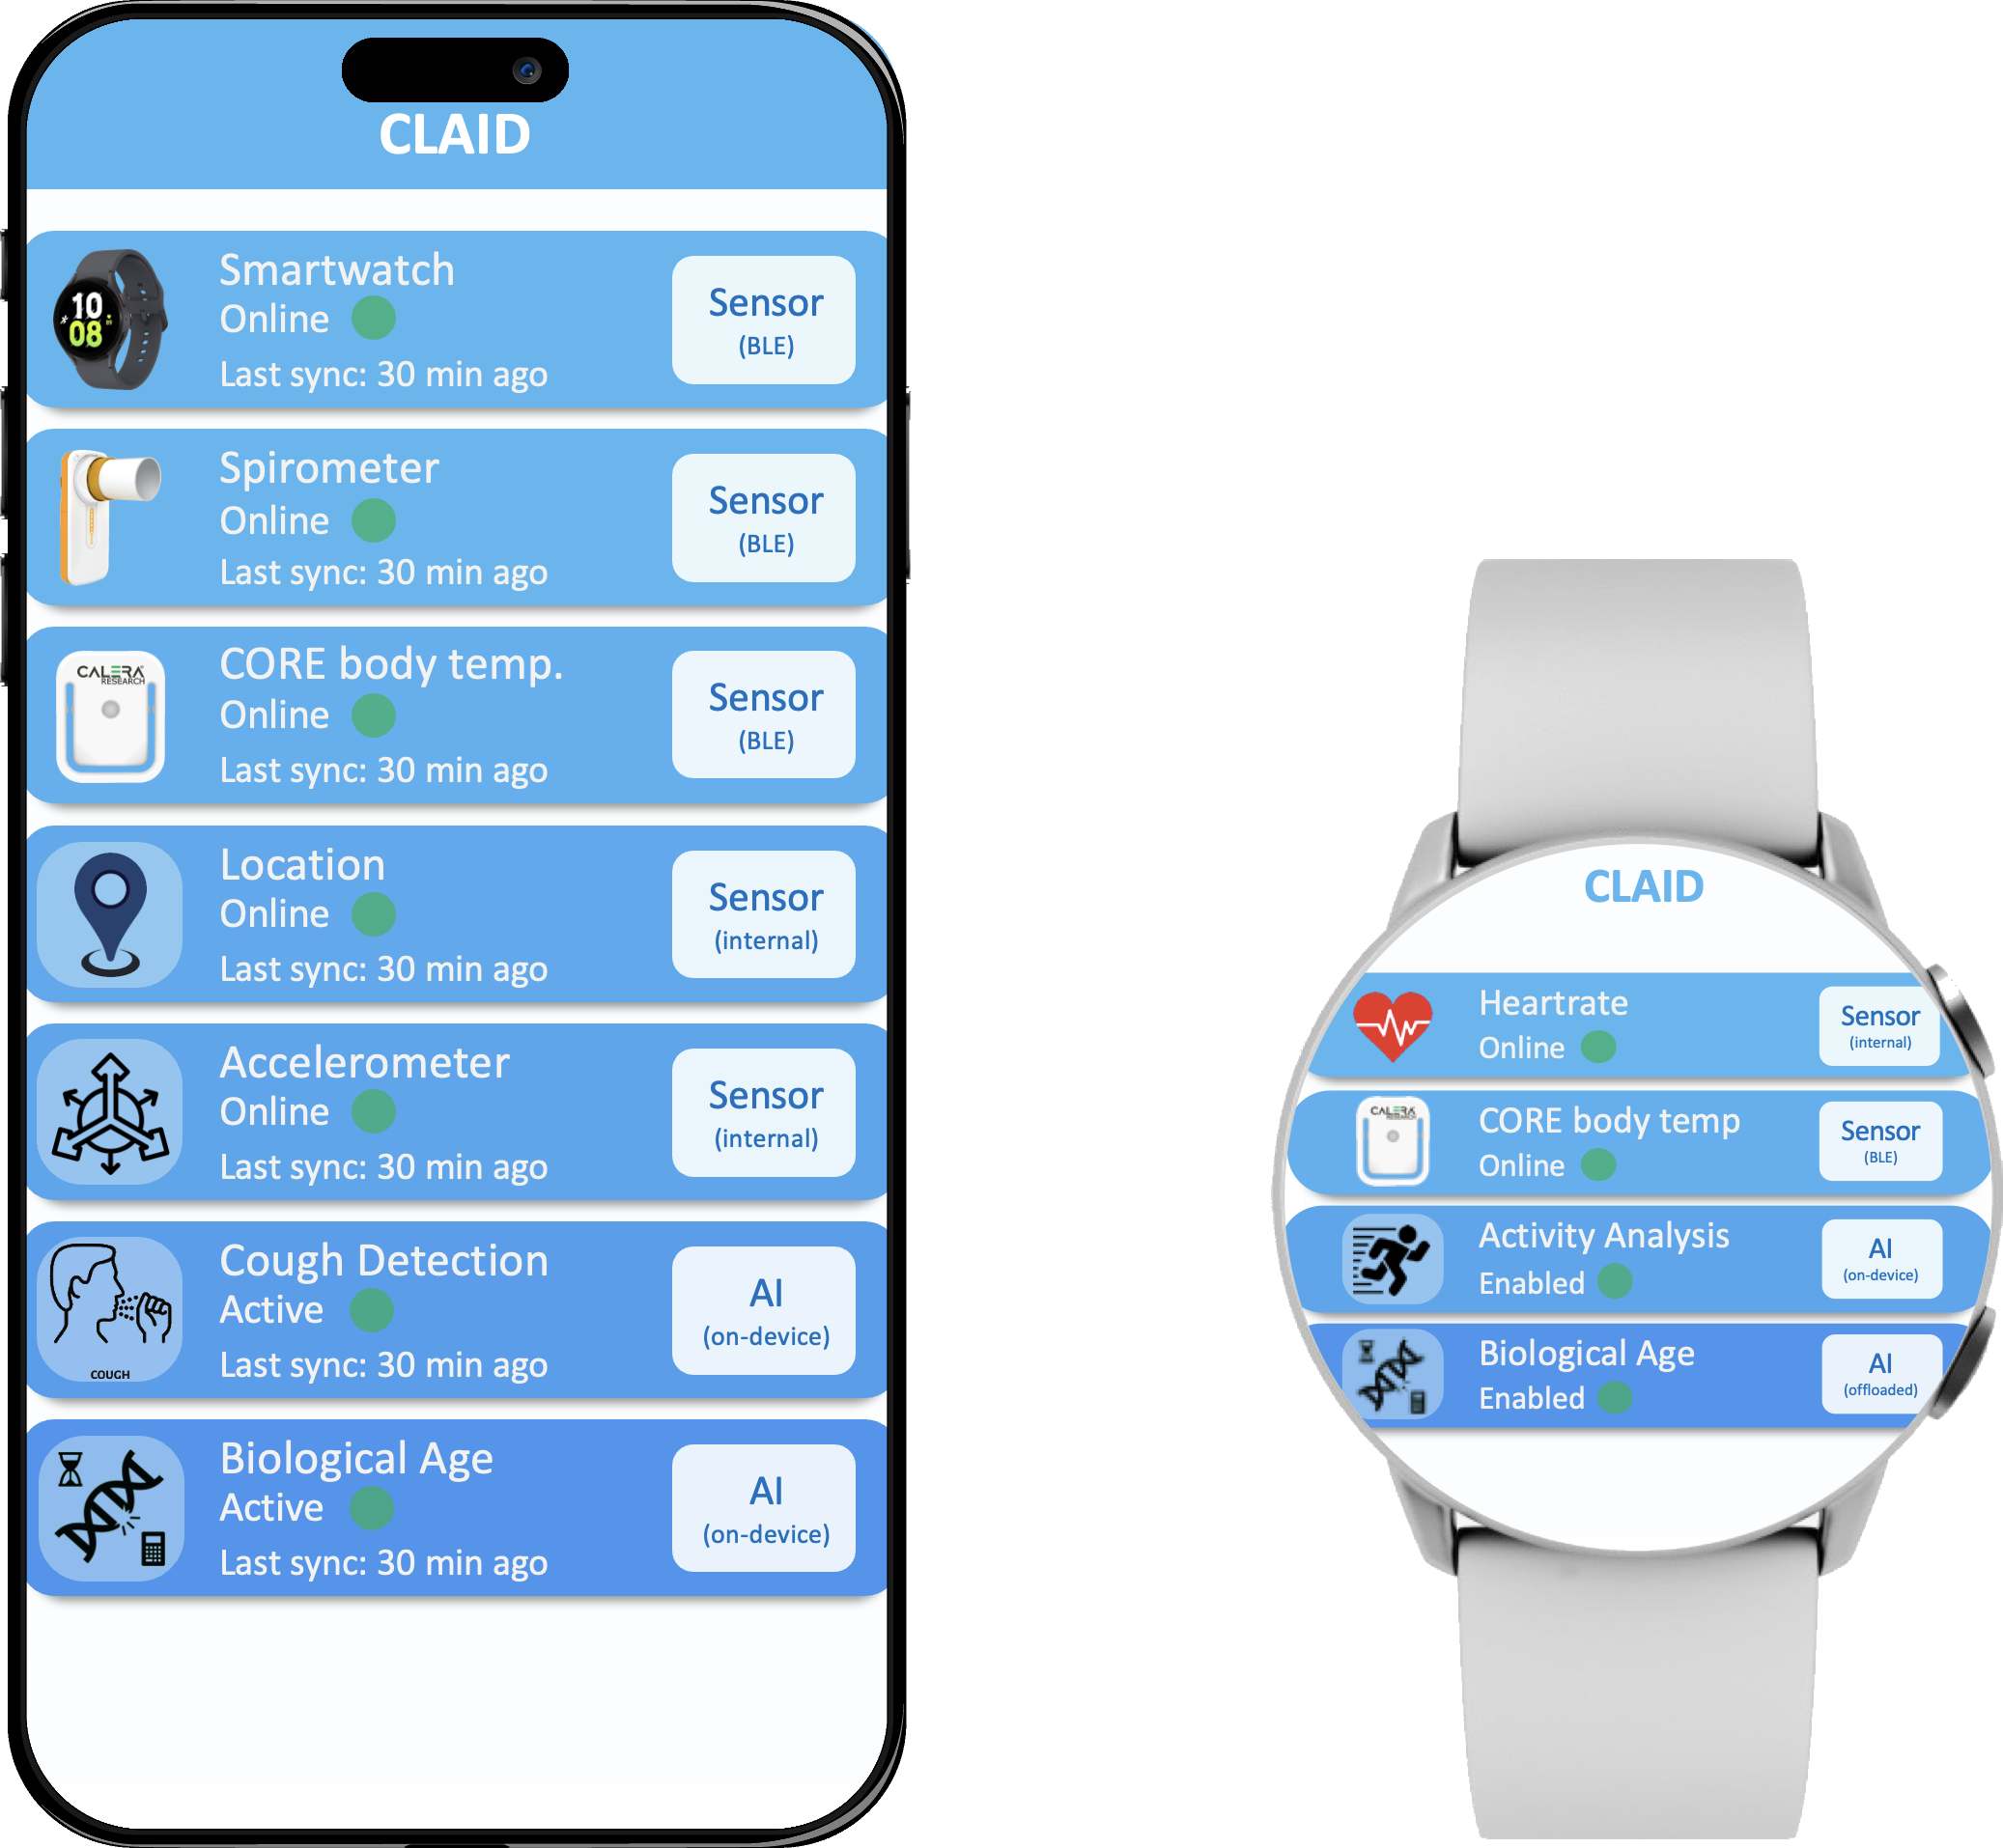
This combination helps you build powerful apps quickly. Flutter allows to build user interfaces fast, given the variatey of ready-to-use packages available online. CLAID enables you to write Modules in native languages for Android and iOS, which gives you access to all native features (in contrast to Flutter). You can visualize CLAID Modules via Flutter. Check it out:
You can either create a new CLAID Flutter application from scratch using one of our templates, or integrate CLAID into an existing application. Check out the options below.
Prerequisite: Setting up Android Studio and Flutter
For the following steps you require Android Studio as well as Flutter. We assume that you have set up and installed Android Studio and have basic knowledge on how to use it (e.g., how to open projects). If not, check out the Android Studio beginner tutorials. Also, make sure to install Flutter and the Android Studio Flutter Plugin.
Option1: Creating a new CLAID application using a template
If you are starting a new application from scratch, it is easiest to simply clone our template application for Flutter.
Cloning the CLAID Flutter template application
You can simply clone or download the existing template application from Github and adapt it as required. CLAID is already configured and ready to use.
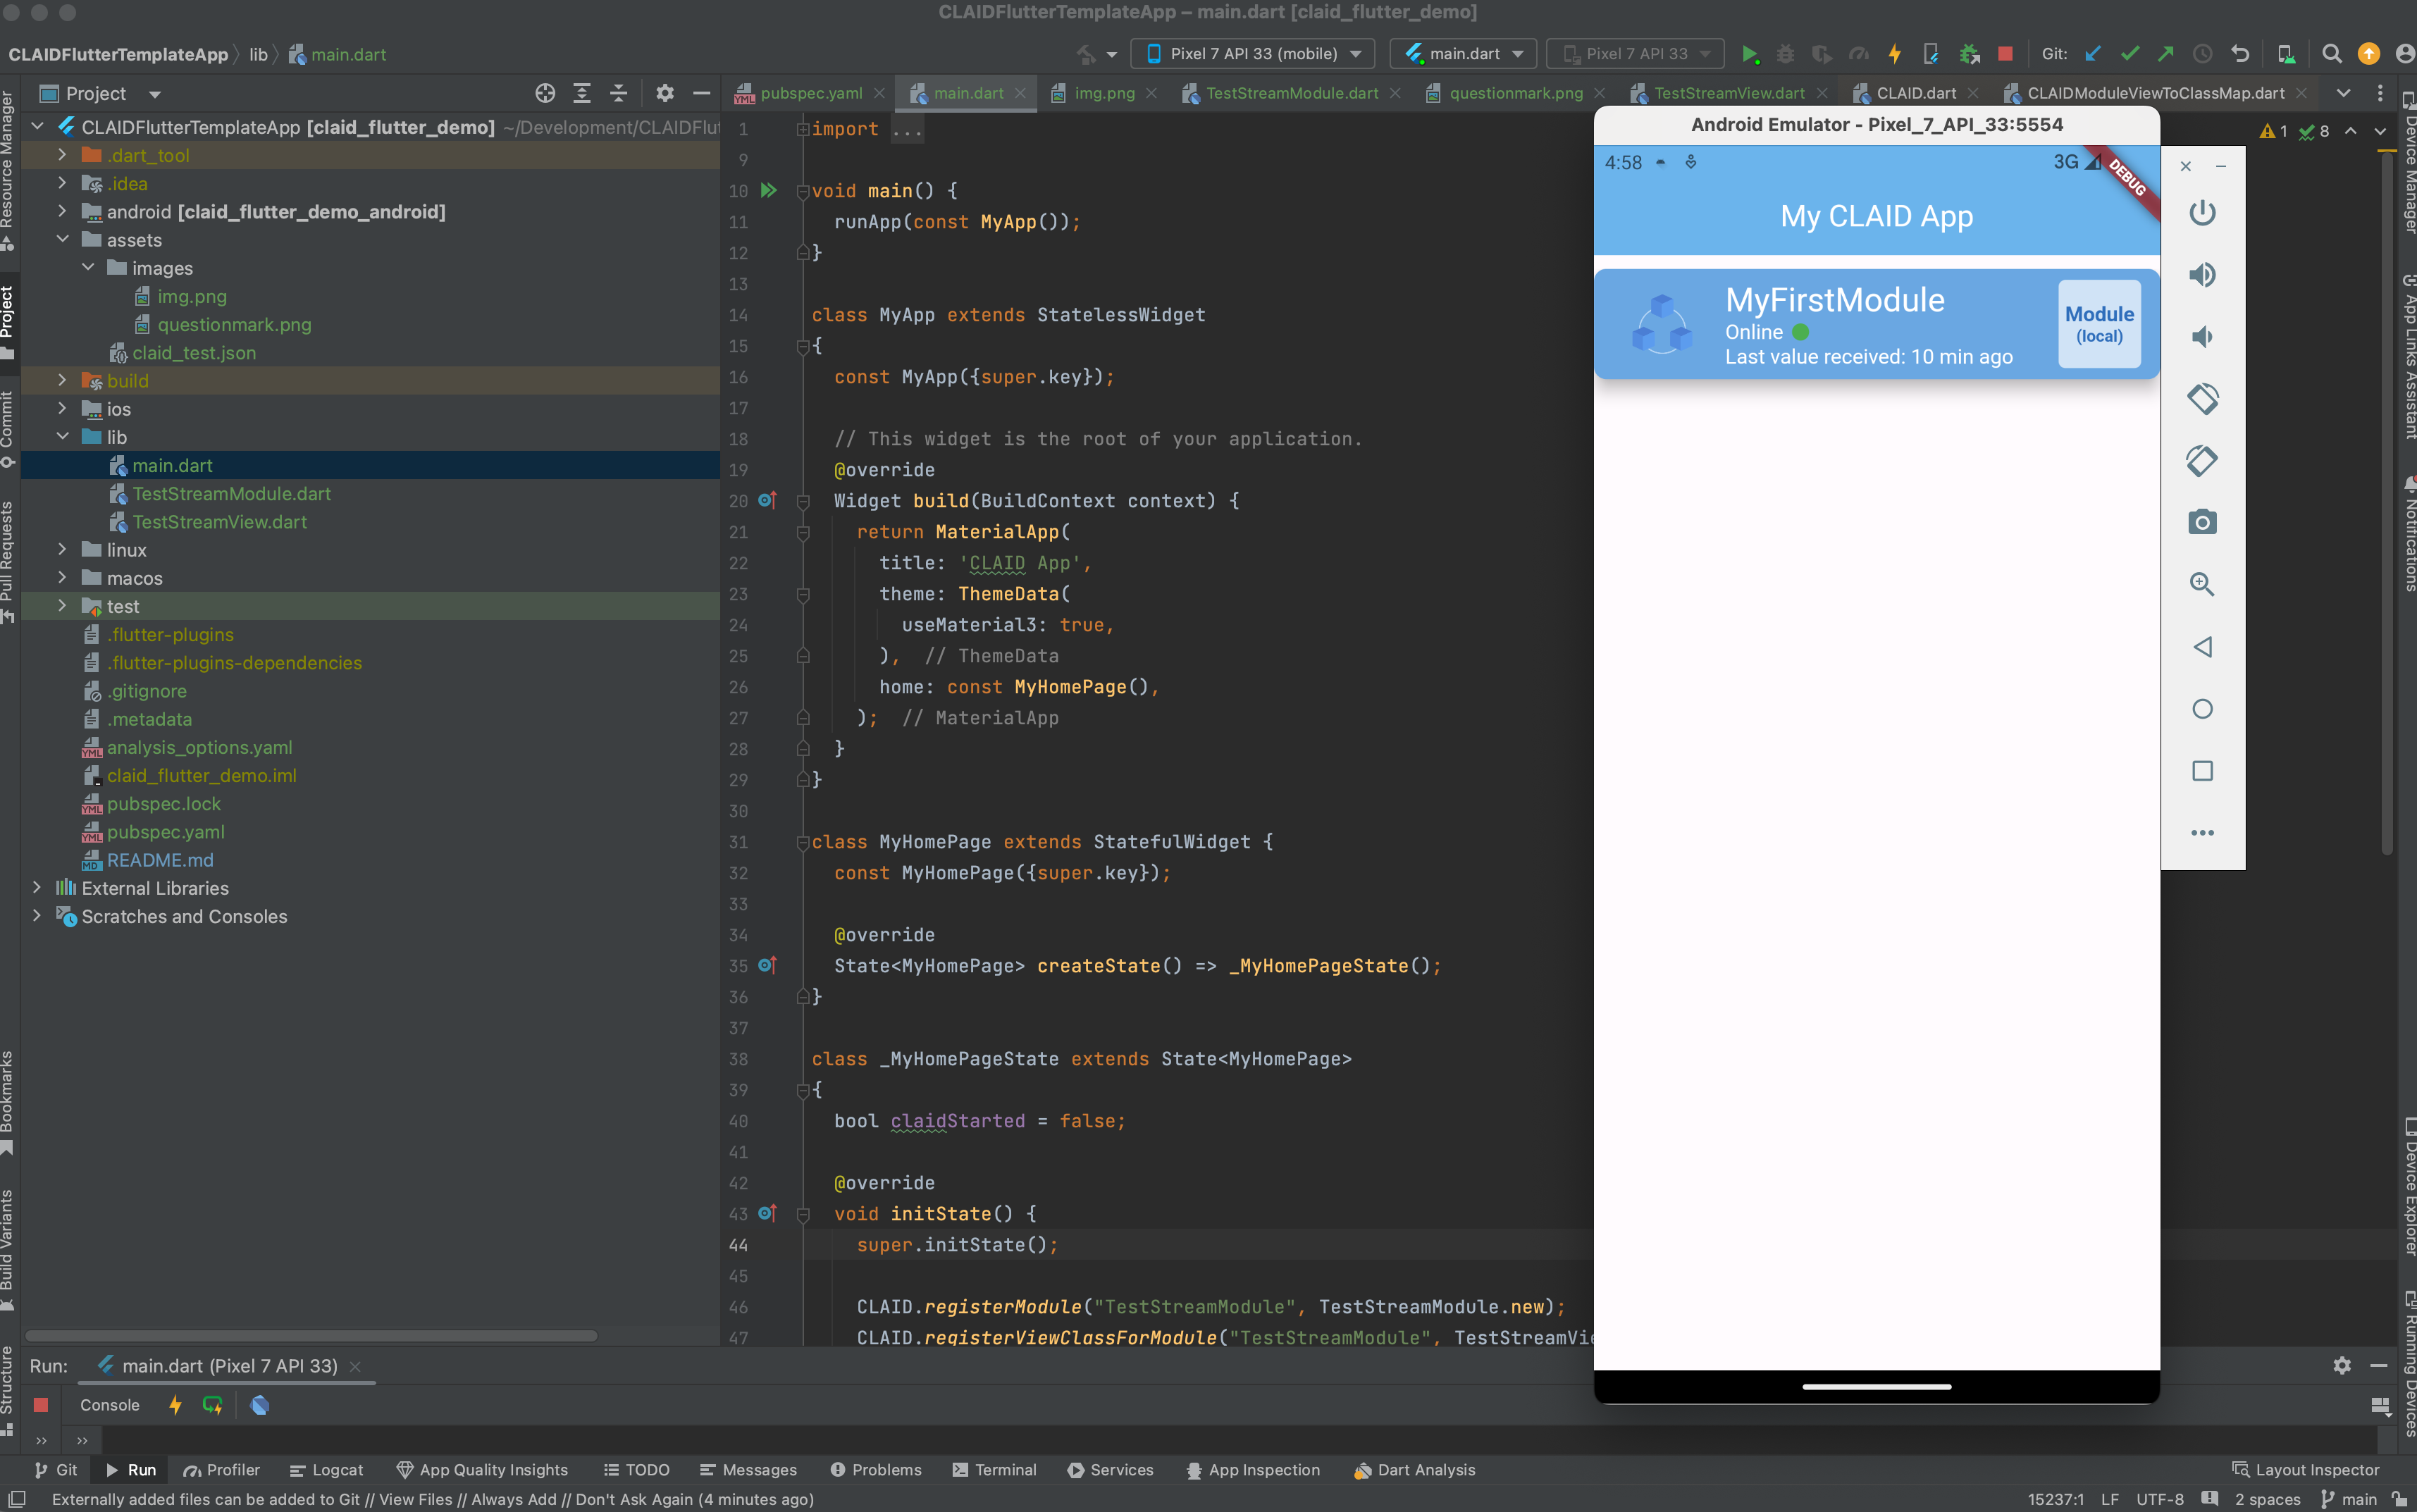
After you cloned/downloaded the template App, you can open the folder with Android Studio and load the project. If you build and run the application, it looks as follows.
Want to know more?
In case you are interested in how CLAID is integrated into the existing template application, check out the next section below. The next section covers how CLAID can be integrated into Flutter applications. If you want to know what you now can do with the CLAID App, check out the next tutorial series!
Option2: Integrating CLAID into an existing Flutter application
CLAID is available as Flutter (pub) package via pub.dev. Thus, CLAID can simply be added as dependency to existing Flutter projects. Setting up CLAID for use in an existing application requires four steps:
- Adding CLAID as dependency to the pubspec.yaml file.
- Creating a CLAID configuration file in the assets folder.
- Changing the Android activity class from FlutterActivity to CLAIDFlutterActivity.
- Starting CLAID to run in the foreground or background.
Minimum Android SDK Version
CLAID requires a minimum Android SDK Version >= 26.
You might need to change the minumum SDK level of your app.
2.1 Adding CLAID as dependency to the pubspec.yaml file
To add CLAID as dependency to your Flutter project, you simply have to include it in the dependencies section of the pubspec.yaml file. Check out the instructions below.
Adding CLAID to the Flutter app dependencies
Open the pubspec.yaml file and find the "dependencies" section. Check the picture below for reference:
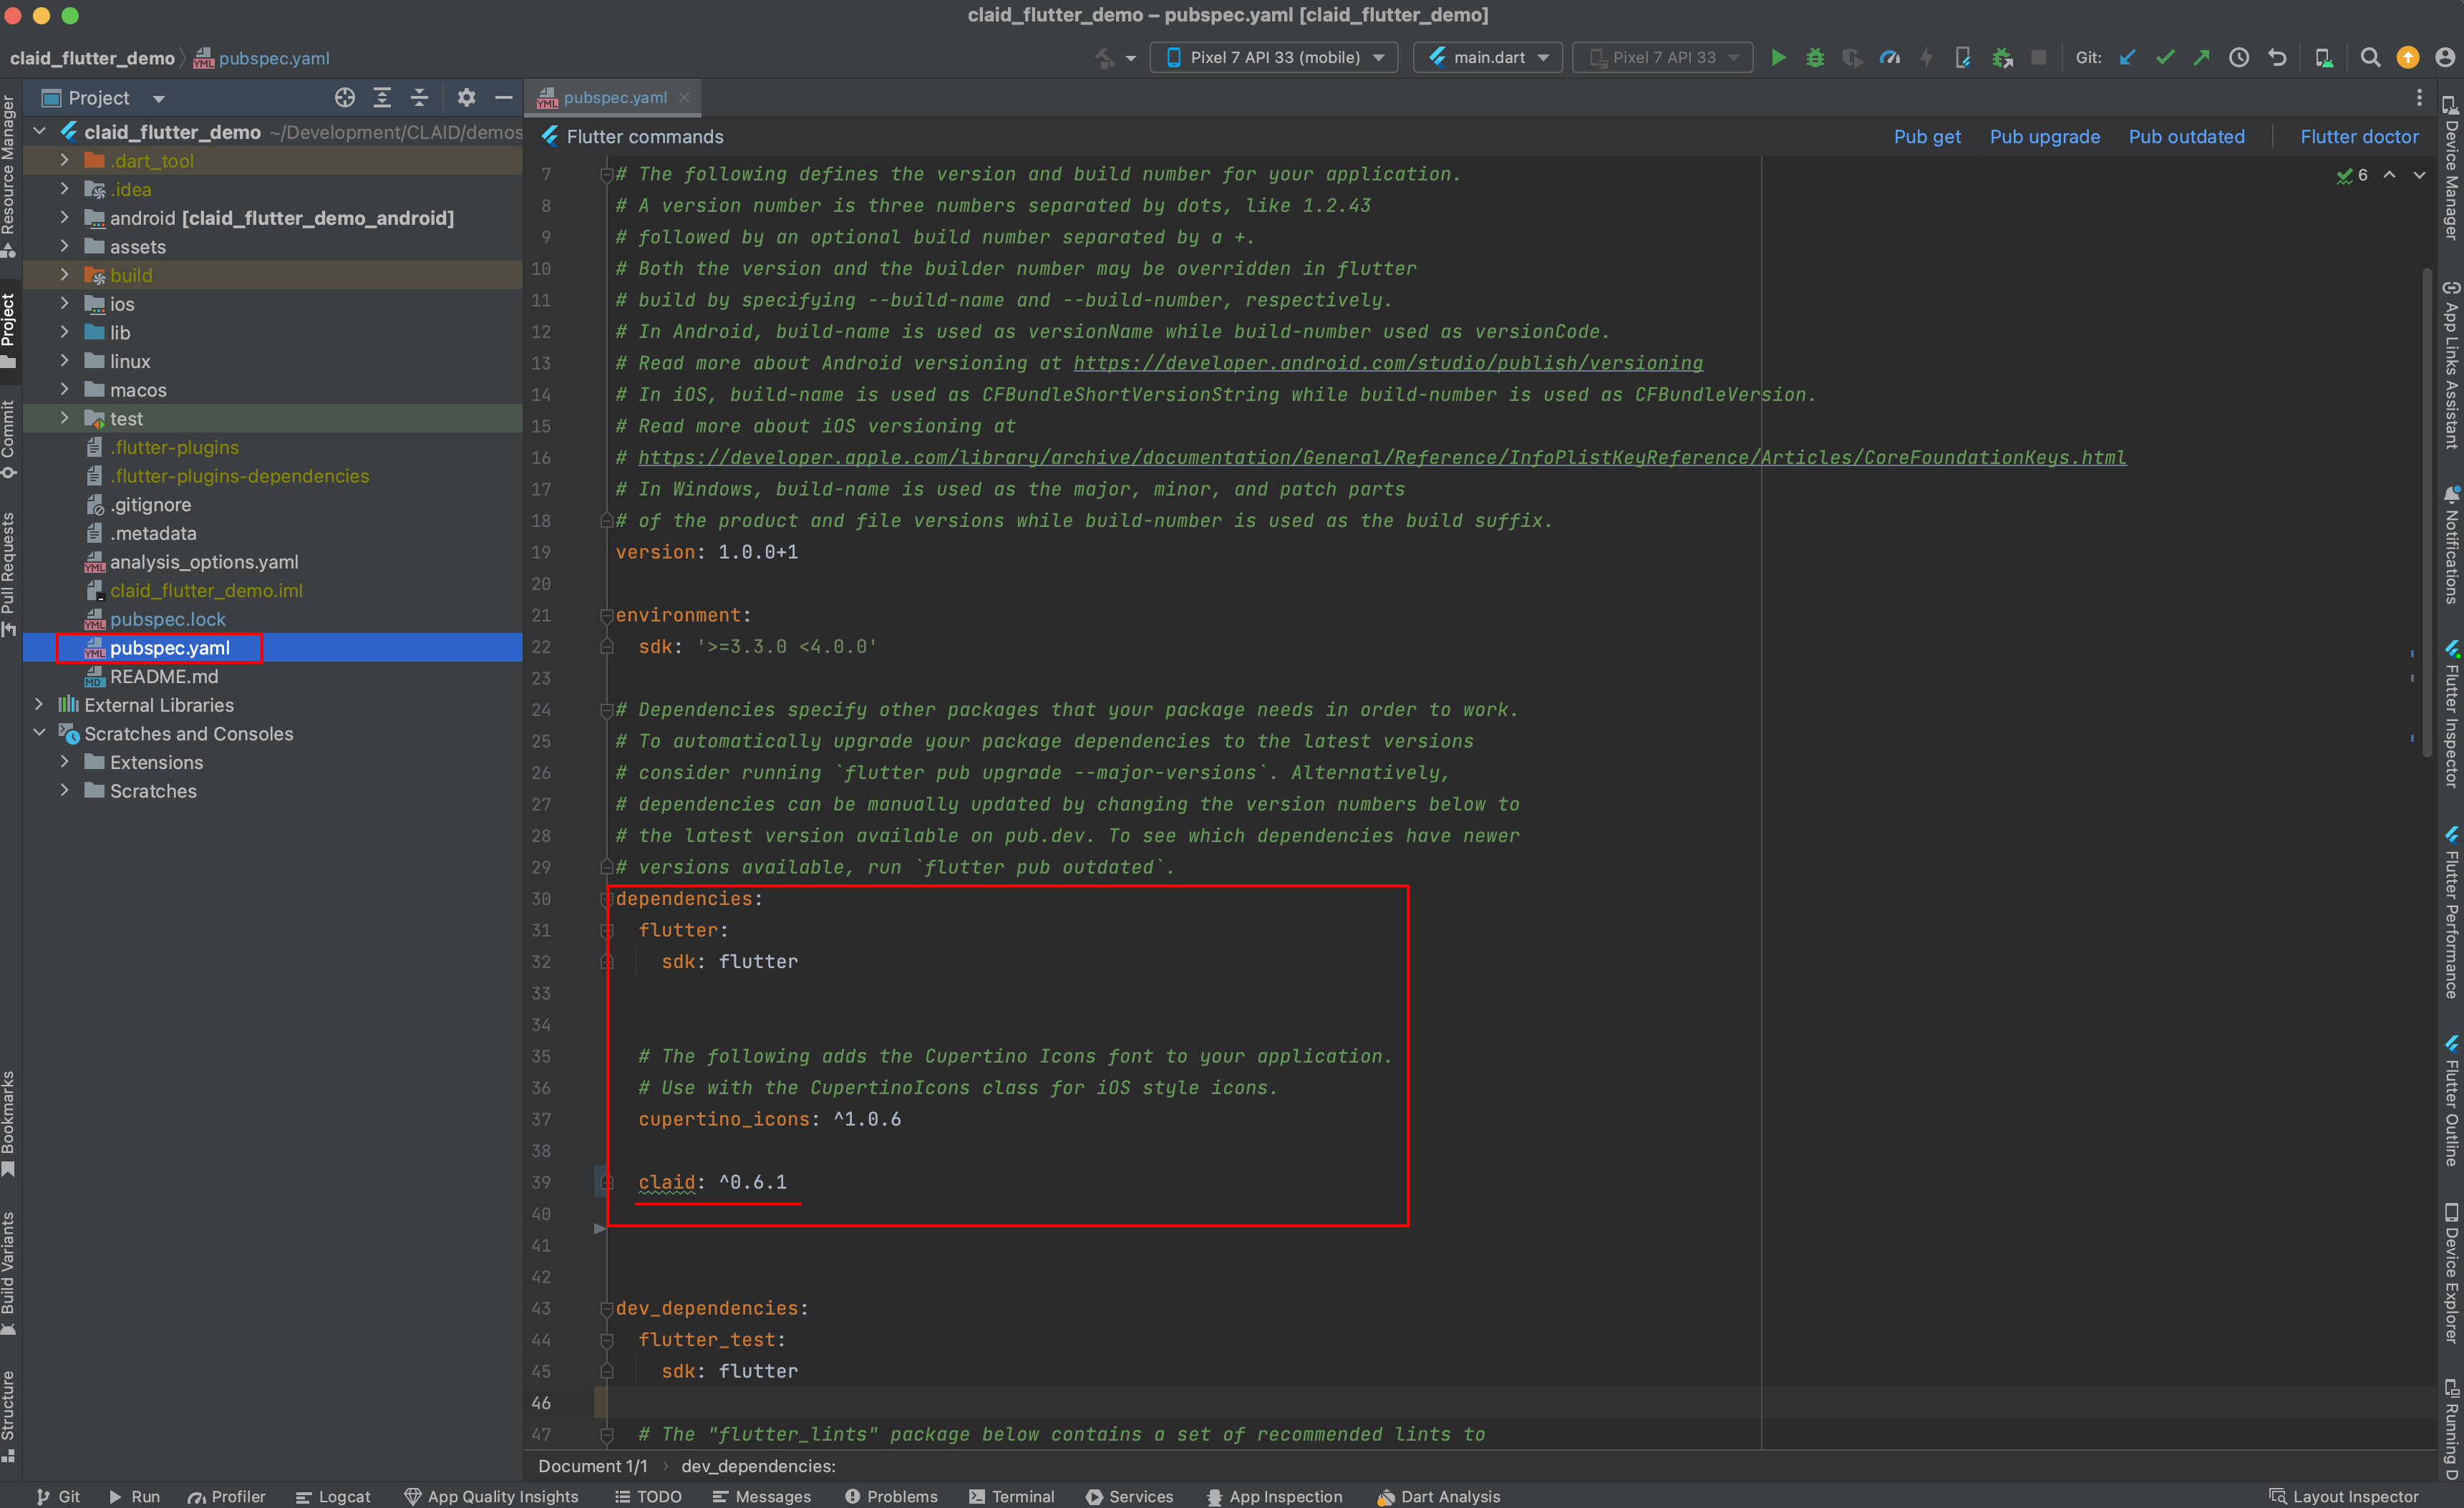
Add CLAID to the dependencies using the code below:
2.2 Creating a CLAID configuration file in the assets folder
You can configure CLAID applications using configuration files. Those configuration files allow you to load, configure and connect the Modules you would like to use. We typically add a configuration file in the assets folder, so that it is packaged with the application (you can, however, also put them in other folders, like in the documents directory etc.). Check out the instructions below on how to add a configuration file to the assets:
Adding a configuration file to the assets
If you do not have an assets folder yet: Please add an assets folder to your flutter application by adding it to the pubspec.yaml file. You can find instructions here and an example of an assets folder added to the pubspec file here.
Once you have added an assets folder, create a new file called "claid_config.json", and paste the following content: Open the claid_config.json file and paste the following content:
{
    "hosts": [
        {
          "hostname": "Smartphone",
          "isServer": false,
          "modules": [
          {
            "type": "TestStreamModule",
            "id": "MyFirstModule",
            "output_channels": {"MyData" :  "MyData"}
          }
        ]
      }
    ]
}
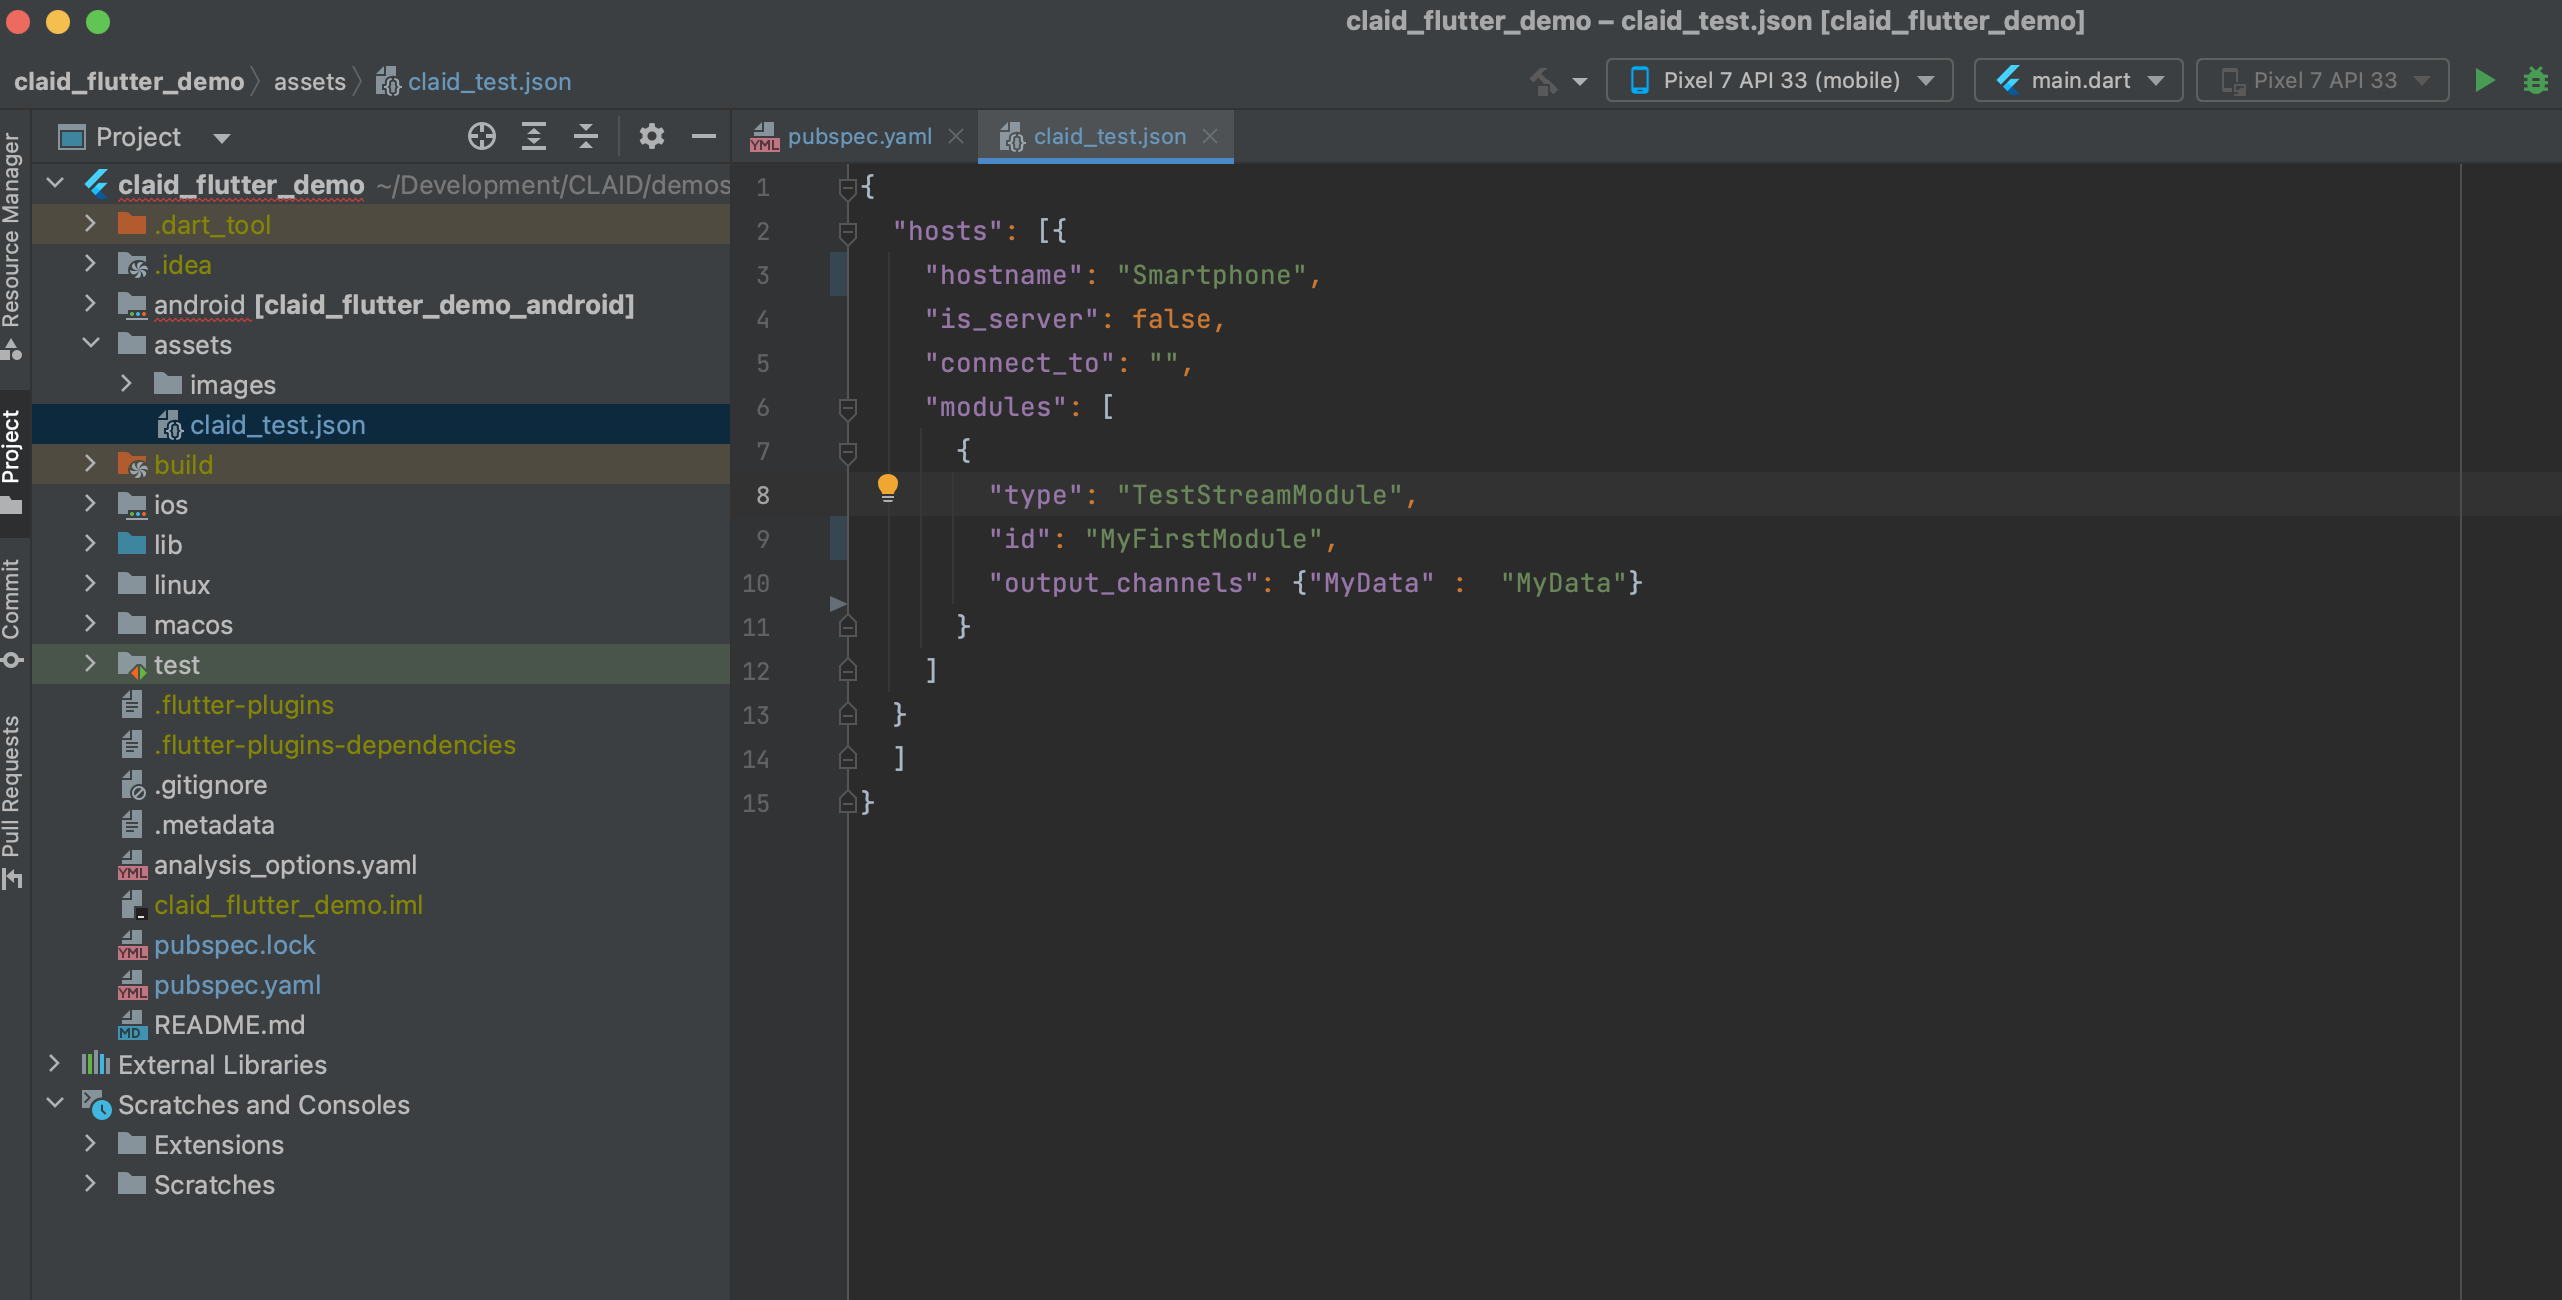
The file should look as follows:
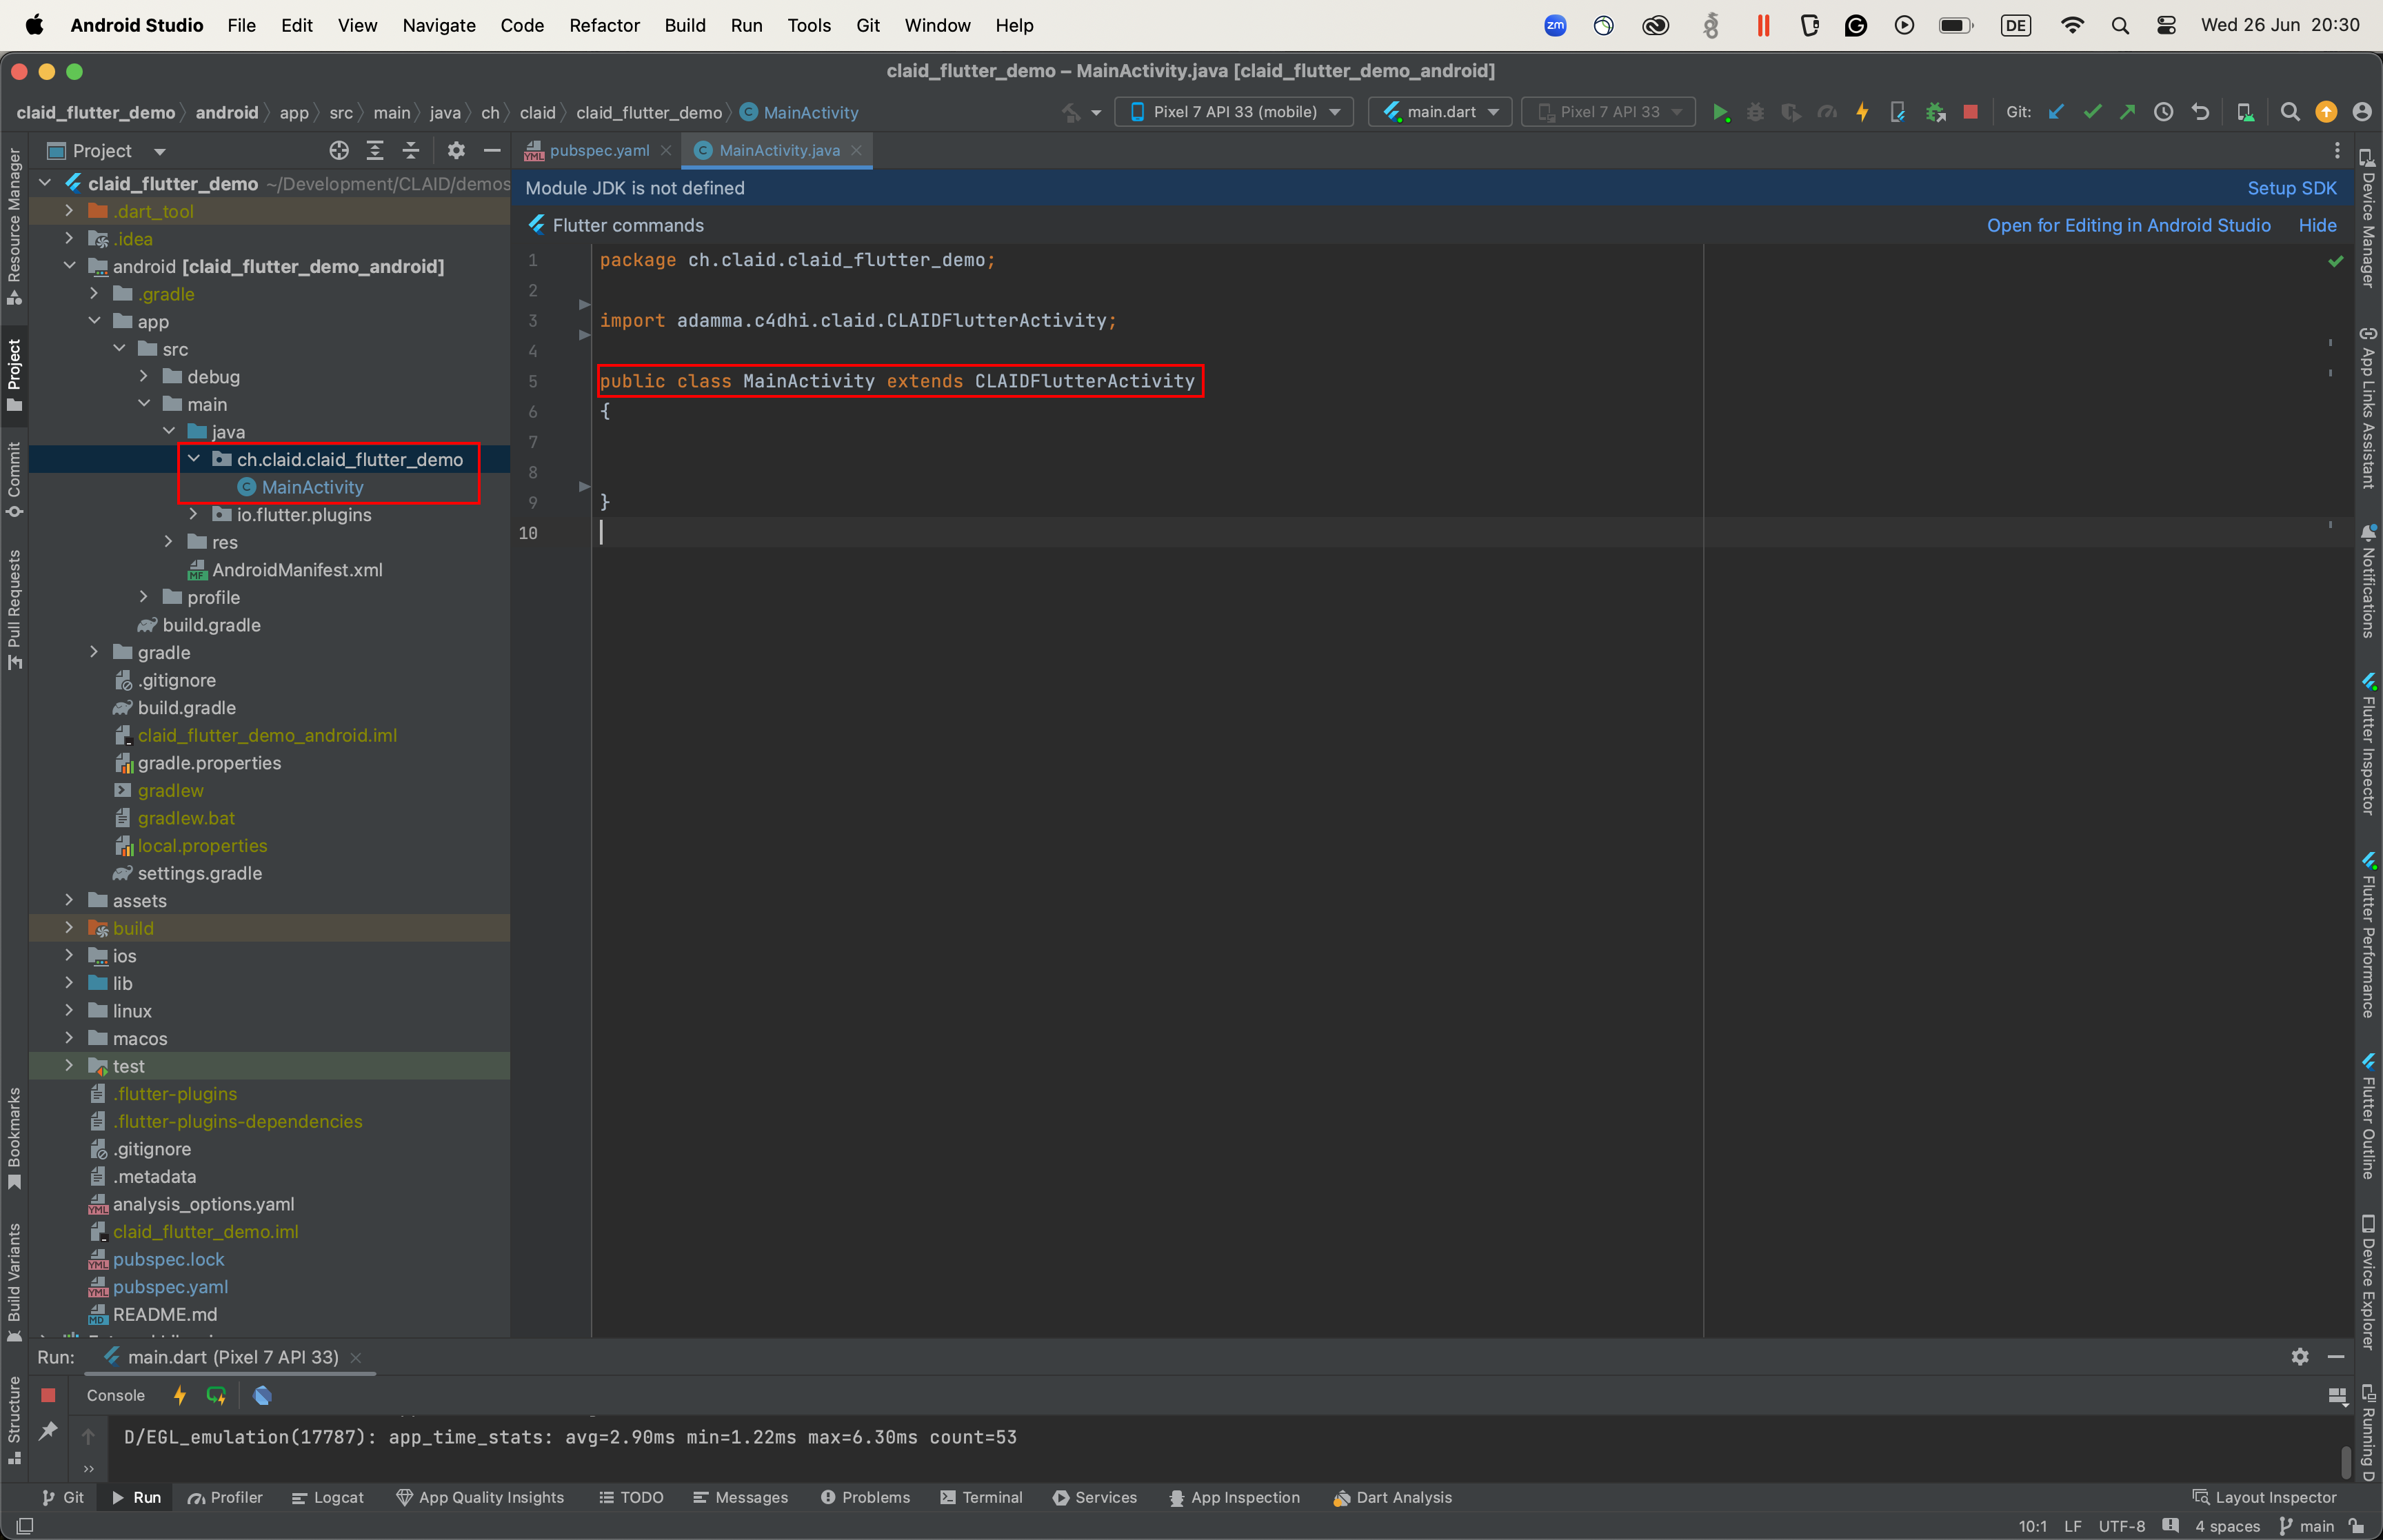
2.3 Changing the Android activity class from FlutterActivity to CLAIDFlutterActivity
To use CLAID Android Modules like collectors for sensors (audio, image, acceleration, ...), you need to connect CLAID of the native Java/Kotlin part of the Android application to the Flutter environment. To do so you can use the CLAIDFlutterActivity class. Check out the instructions below:
Adding the CLAIDFlutterActivity
Open the MainActivity file inside the android part of your Flutter application. Normally it looks as follows:
To include CLAID, simply change the FlutterActivity to CLAIDFlutterActivity. The CLAIDFlutterActivity is the same as a FlutterActivity, but additionally includes CLAID:
package package.android.yours;

import adamma.c4dhi.claid.CLAIDFlutterActivity;

public class MainActivity extends CLAIDFlutterActivity
{


}
It should look as follows:
2.4 Starting CLAID to run in the foreground or background
- Starting in foreground: Same as for regular applications, the execution of the App is paused when the App moves to the background. Choose this if you only want to use CLAID when the App is open. Not suitable for data collection or continuous tasks.
- Start in background: CLAID starts a service and keeps running in the background even if the App is minimized. CLAID implements best practices to keep running in the background as long as possible. Using DeviceOwnerFeatures, CLAID applications are (almost) unkillable. Check out the box at the end of this page for more details. Preferred option for continuous data collection and tasks.
About runtime permissions of CLAID Apps
CLAID automatically handles required permissions for it's Modules, even when it is running in the background. CLAID requests some permissions at startup, and might request additional permissions when more Modules are loaded. In the previously created claid_config, we only specified one Module which requires no extra permissions. Thus CLAID will only ask for a limited number of permissions.
To start CLAID in either the foreground or background, follow the instructions below (mind the tabs to choose between the two alternatives):
Starting CLAID
To start CLAID in the foreground, you can paste the code below into the state of your HomePage class.
class _MyHomePageState extends State<MyHomePage>
{
  bool claidStarted = false;

  @override
  void initState() {
    super.initState();

    CLAID.startInForeground(
        configFilePath: "assets://flutter_assets/assets/claid_test.json",
        hostId: "Smartphone", // Same as in the config file
        userId: "test_user", // Choose a user name / hash
        deviceId: "test_id", // Choose a device id / hash
        specialPermissionsConfig: CLAIDSpecialPermissionsConfig.regularConfig(),
        claidPackages: []
    ).then((value) => setState(() {
      claidStarted = true;
    }));
  }

  @override
  Widget build(BuildContext context)
  {
    return  claidStarted ?
      const CLAIDView(title: 'My CLAID App') :
      const CircularProgressIndicator();
  }
}

To start CLAID in the background, you can paste the code below into the state of your HomePage class. On Android, this code will start a service to run CLAID continuously, even if the the App is minimized.
class _MyHomePageState extends State<MyHomePage>
{
  bool claidStarted = false;

  @override
  void initState() {
    super.initState();

    CLAID.startInBackground(
        configFilePath: "assets://flutter_assets/assets/claid_test.json",
        hostId: "Smartphone", // Same as in the config file
        userId: "test_user", // Choose a user name / hash
        deviceId: "test_id", // Choose a device id / hash
        specialPermissionsConfig: CLAIDSpecialPermissionsConfig.regularConfig(),
        persistanceConfig: CLAIDPersistanceConfig.maximumPersistance(),
        claidPackages: []
    ).then((value) => setState(() {
      claidStarted = true;
    }));
  }

  @override
  Widget build(BuildContext context)
  {
    return  claidStarted ?
      const CLAIDView(title: 'My CLAID App') :
      const CircularProgressIndicator();
  }
}
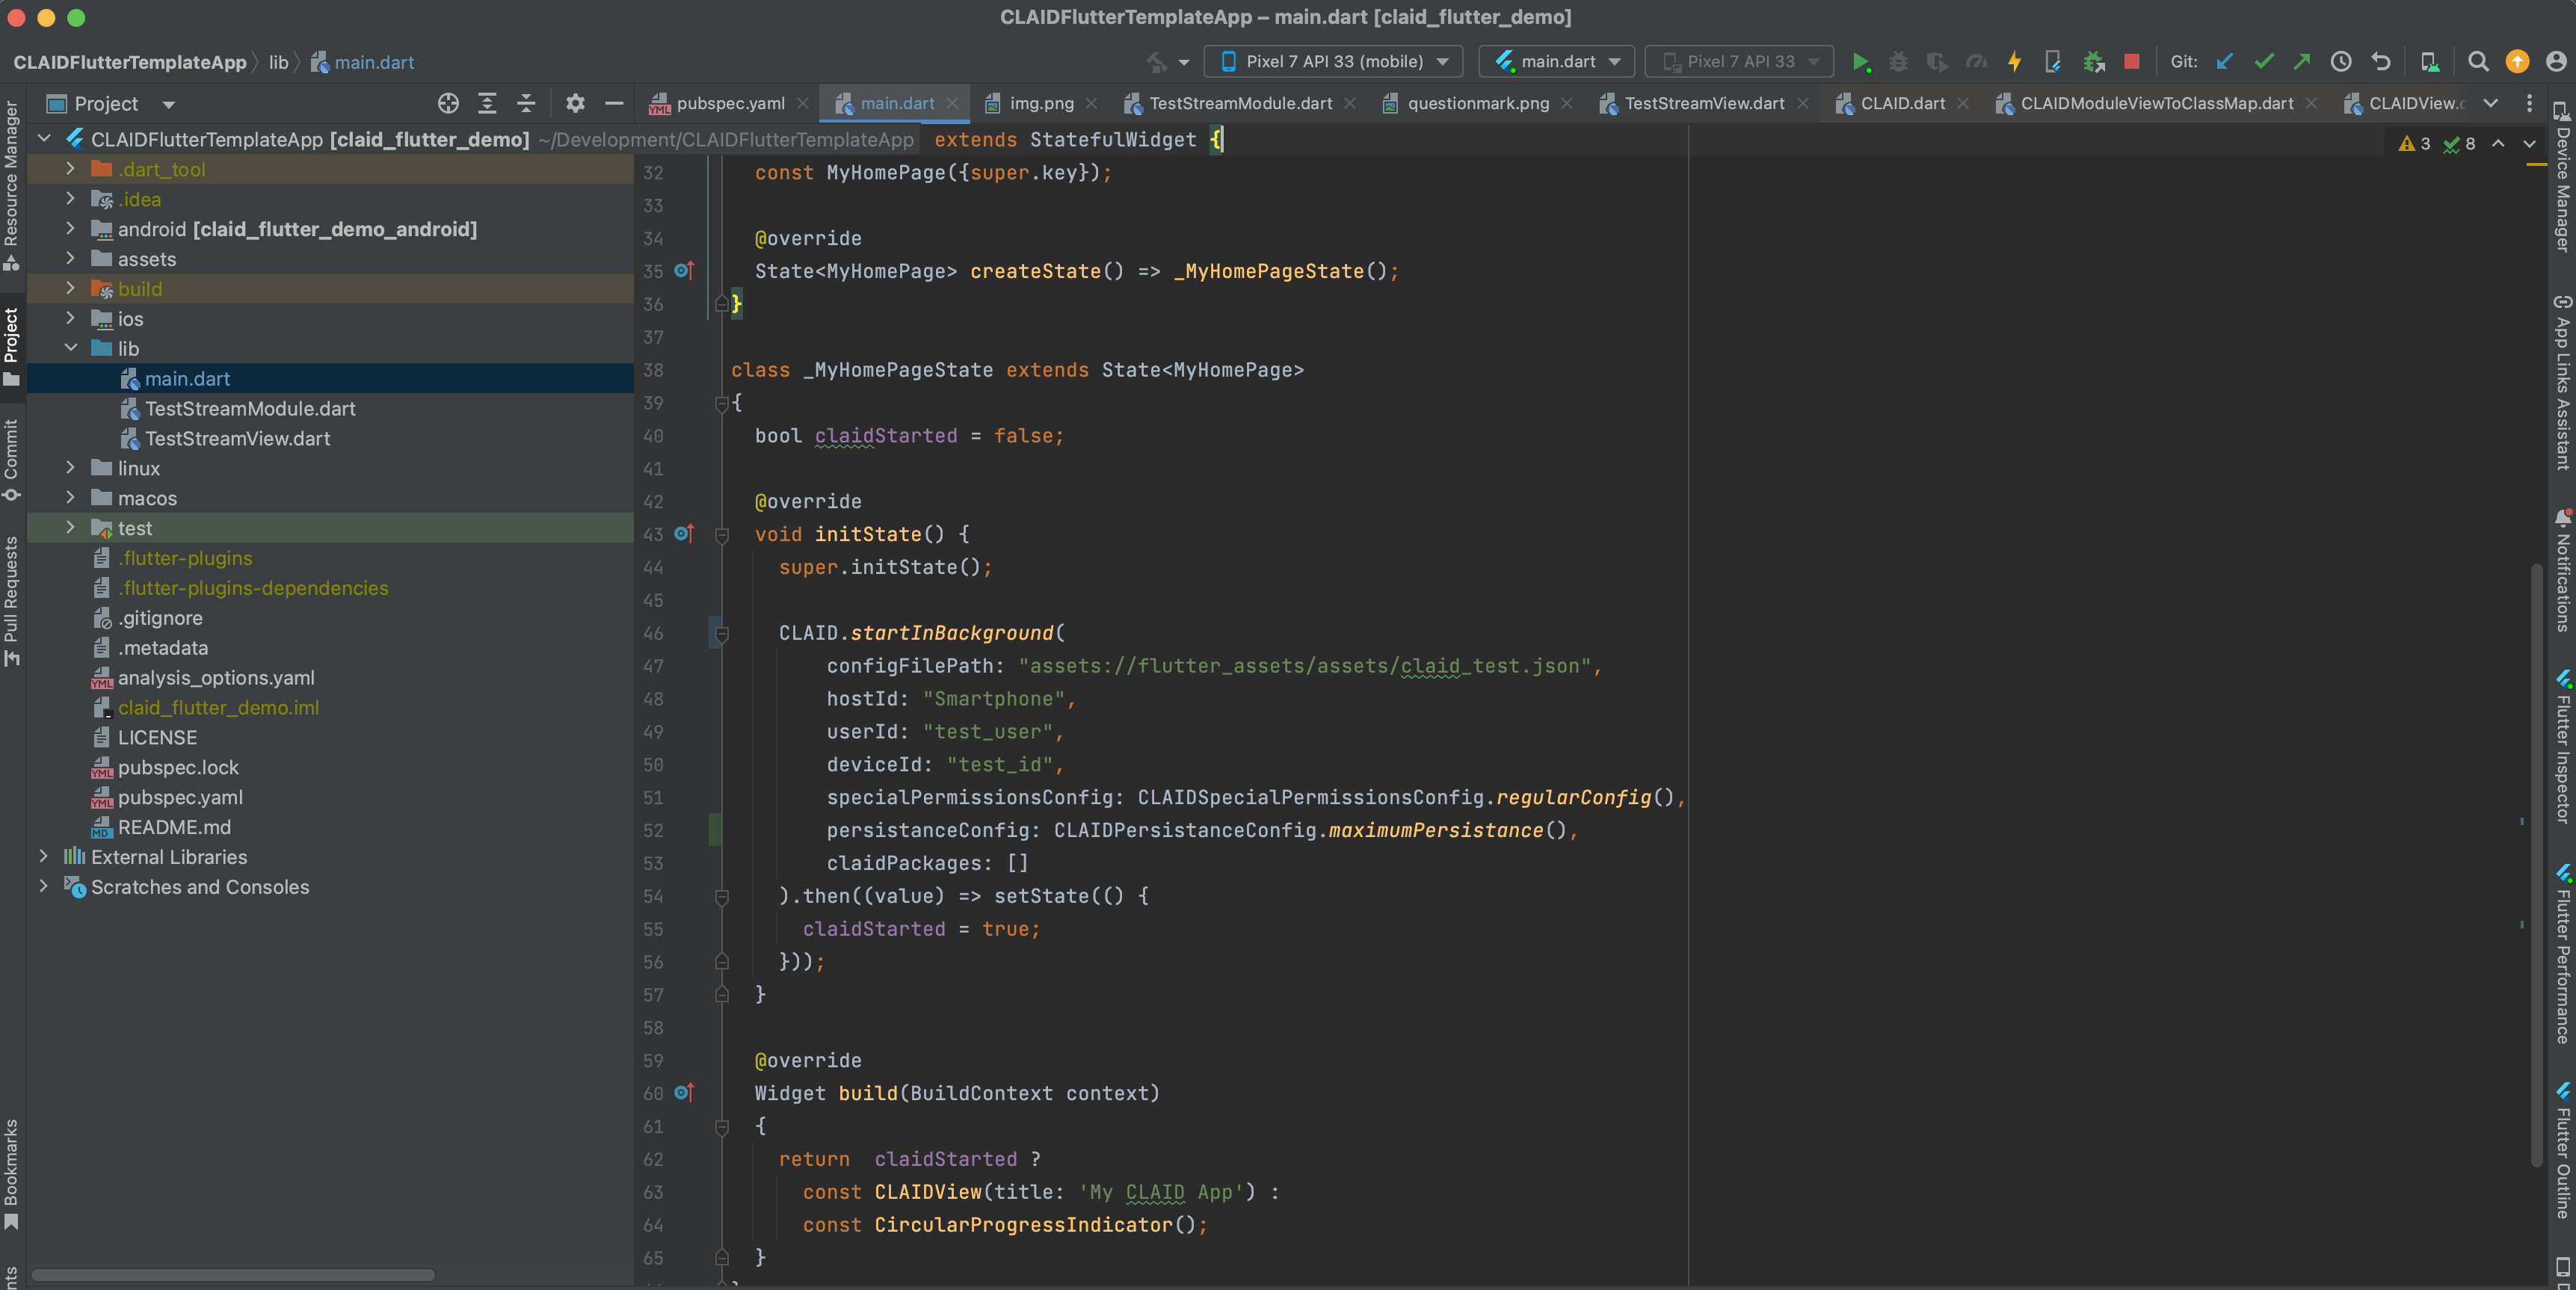
As you can see, when starting CLAID you can specify a CLAIDSpecialPermissionsConfig and a CLAIDPersistanceConfig (only for background). Check out the box below for information about these configs.
What are special permissions and the persistance strategy?
When starting CLAID, you can specify a CLAIDSpecialPermissionsConfig. Additionally, when starting CLAID to run in the background, you can specify a CLAIDPersistanceConfig. These special configuration enable CLAID to use advanced features and be as persistent as possible when running from the background.
Below is a short overview, for details check out the page about CLAID startup options.
CLAIDSpecialPermissionsConfig
Allows CLAID to request special permissions. Options are:
- CLAIDSpecialPermissionsConfig.regularConfig(): No special permissions.
- CLAIDSpecialPermissionsConfig.allStorageAccessConfig(): Allows CLAID to act as a storage manager, enabling access to the whole userspace file system. This is normally not required, as CLAID apps will store data in the respective App documents directory.
- CLAIDSpecialPermissionsConfig.almightyCLAID(): Registers CLAID to act as a device owner, enabling full device management (FDM). FDM Apps can fully control wifi, bluetooth and other modalities completely from the background without user interventions. This is helpful for ensuring that users during a study do not deactivate connectivity, for example. Additionally, FDM apps typically cannot be killed by the user, and can also not be simply uninstalled without using developer tools.
CLAIDPersistanceConfig
Specifies how "aggressive" (persistent) CLAID shall be against termination attempts by the operating system, when running in the background.
Options are:
- CLAIDPersistanceConfig.minimumPersistance(): CLAID will keep running in the background until either terminated by the operating system, by an exception or when device shut's down. The App will not automatically restart in any of the mentioned cases.
- CLAIDPersistanceConfig.maximumPersistance(): The CLAID App will automatically start during device boot. The App will register a watchdog to restart the App within 15 minutes after it has crashed or been terminated. The App will request exemptions from battery optimizations so that the OS is a lot less likely to terminate the App due battery persevation measures.