Creating, building and installing a new CLAID Package
Welcome to this tutorial on creating a new CLAID package. In this tutorial, we will show you how to create a new CLAID package using the CLAID development tools, how to build this package, and how to install it. CLAID packages enable you to implement new features using CLAID, such as creating new Sensor Modules or deploying machine learning models, structuring your code for reuse in other projects, and sharing your work with the community.
On the distribution of CLAID packages
CLAID packages can be compiled into Android (aar), Flutter (pub) and Python (pip) packages. If you intend to develop packages only for yourself, you can use CLAID packages completely offline. However, if you like to share your package with others, you can upload your package to maven central, pub.dev and/or pypi. Hosting Flutter (pub) packages is also possible via Github.
Before you continue with this tutorial, make sure you have set up the prerequisites:
Prerequisites
To create and build CLAID packages, you need to have the CLAID development tools and SDK installed. Further, you need to install Android Studio.
1. Creating a new CLAID package using the CLAID development tools
To create a new CLAID package you can use the CLAID development tools from the commandline. Check out the instructions below:
Creating a CLAID package
To start the process of creating a CLAID package, use the command below:
Upon executing this command, you will one after another be asked to choose a name, a namespace and a path for your package:
- name: A unique name for your package (e.g., "my_new_package").
- namespace: corresponds to Java or dart package namespaces and defines the namespace scope of your package when you later include it in your project (e.g., "com.your_organization.some_package").
- path: Path to a folder on your PC at which to create the package, for example "/home/your_users/CLAIDPackages/". All subdirectories will be created automatically.

Once you provided all the information and confirm, you should see your package being created successfulyl:

After creating the package, you should have a folder at the path that you specified on your file system. We will explore individual files and folders of a CLAID package in subsequent tutorials, but in brief, this is how a CLAID package looks like:
CLAID package folder structure (click to expand)
A CLAID package typically contains assets, datatypes definitions (protobuf) and source code in different languages.
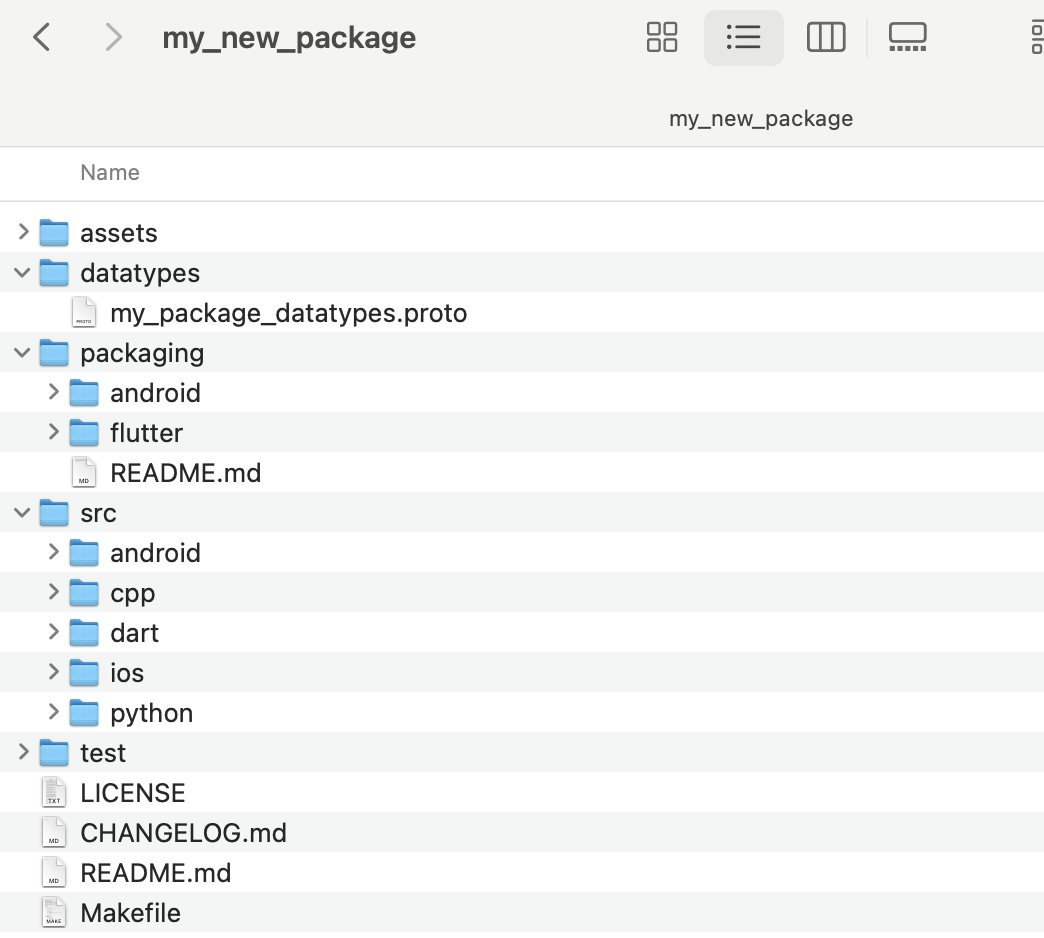
The individual files and folders are as follows:
- assets: Here you can put assets to include in the application (e.g., images or model files).
- datatypes: Here you can put .proto (Protobuf) files to define data types for your application.
- packaging: Contains build files to build your CLAID package into an android or flutter package. You do not need to consider these files, however you can open these folders in Android Studio to develop code for your package.
- src: Contains the source code for android (java), dart, iOS (Objective-C) and python
Not all folders are always needed. We explore how to use them in subsequent tutorials.
2. Building the package
To build a CLAID package into your desired package format (aar, pub or pip), check out the instructions below (we will use these further in subsequent tutorials):
Building CLAID packages
Individual build commands are available to compiled CLAID packages into pub, aar* or pip packages. Check out the instructions below mind the tabs!.
Open a terminal and navigate to your CLAID package:
To build the flutter (pub) package, execute the following command:
You should see the following output, indicating that the flutter package was built successfully:


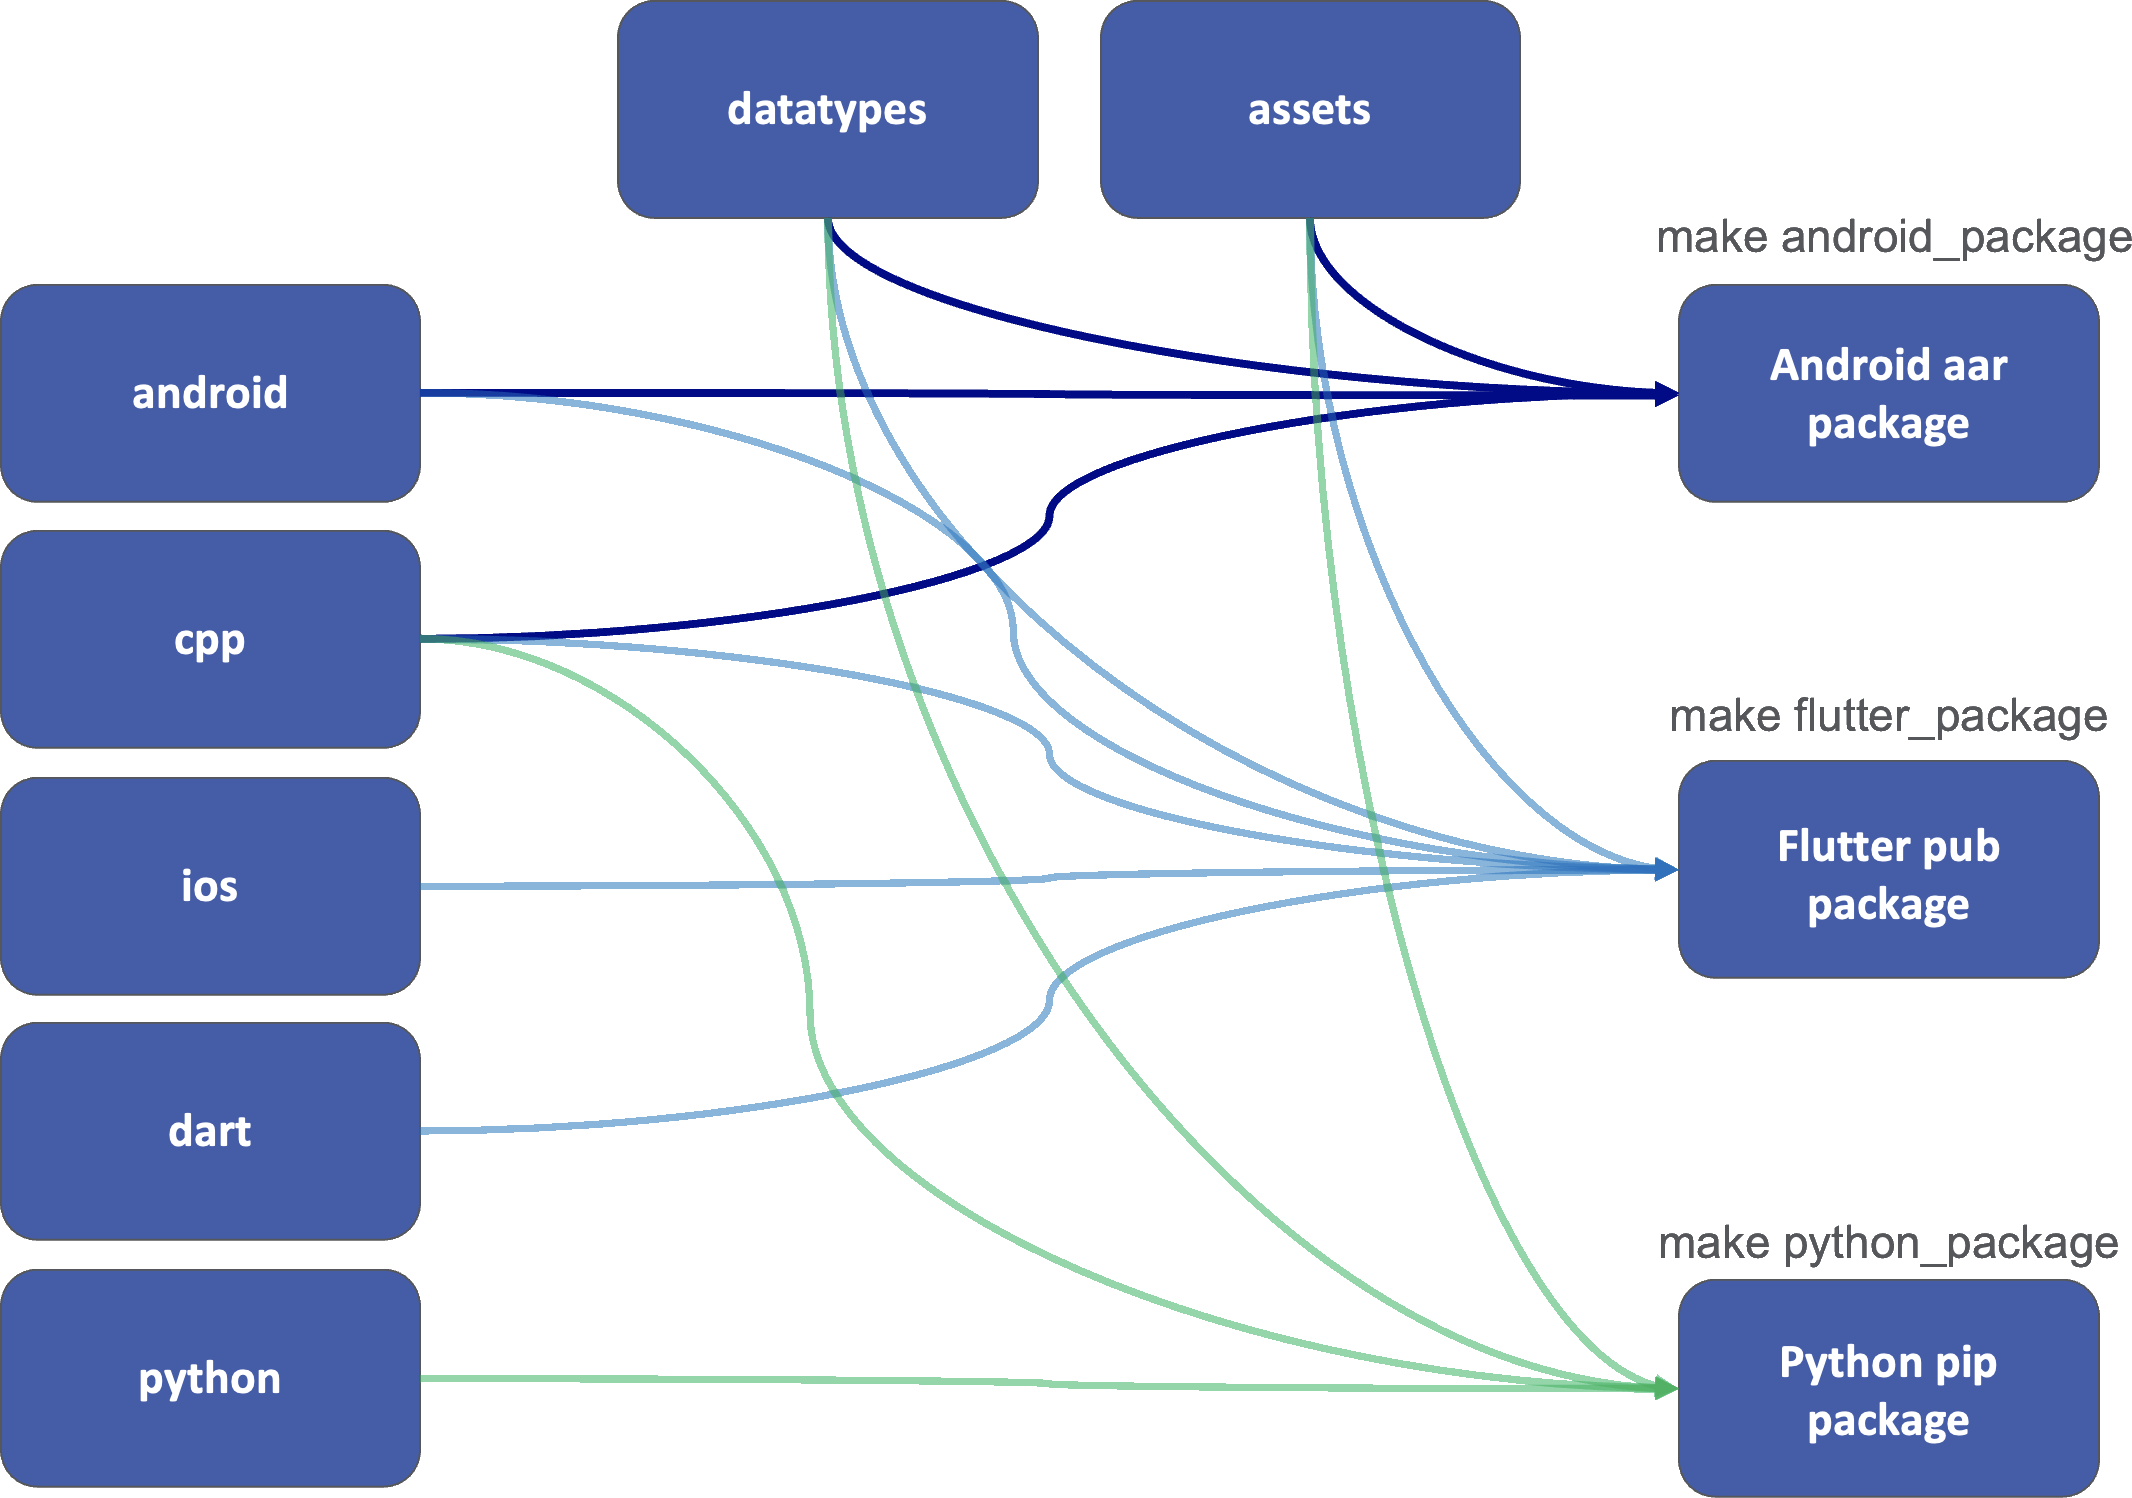
How CLAID packages are compiled (click to expand)
When you execute the build commands, the files contained in the CLAID package are compiled into the individual aar (android), pub (flutter) and python (pip) packages as follows:
3. Including the CLAID package into an existing project
Once you built the CLAID package, you can include it into an existing CLAID application. We assume that you have already set up a basic CLAID application before. If not, check out the instructions on how to set up a CLAID application. Depending on what application you created (a Flutter App or standalone Android/WearOS application), there are different ways of how the package can be included.
Option1 - for CLAID Flutter users: Including the CLAID package as pub package into a CLAID-Flutter-Application
If you are building a CLAID Flutter Application, you can include your new package via the pubspec.yaml file. Check out the instructions below.
Including the package in the pubspec.yaml file
With Flutter, you have multiple options to include the package. You can either include it from a local path, or via a Github repository (the latter requires you to upload your CLAID package to a private or public Github repo).
As you have created the new CLAID package on your file system, you can include it simply by specifying the path:
You can also upload the CLAID package you created to a new Github repository and include it from there. This makes it easy to collaborate on a CLAID package wiht other people, since Flutter will automatically check out the Github repository when building your application. Make sure to upload the build folder to Github as well (does not contain binary files except ones contained in the assets folder).
In addition to adding the package to the pubspec.yaml file, you will also need to register it to CLAID at startup in the main.dart file. In your startup code for CLAID, add the your package to the claidPackages parameter (check prior tutorial on how to start CLAID from a Flutter App).
...
import "package:my_new_package/my_new_package.dart";
...

@override
void initState() {
    super.initState();
    // Or startInBackground, as your require.
    CLAID.startInForeground(
        configFilePath: "assets://flutter_assets/assets/claid_test.json",
        hostId: "Smartphone", // Same as in the config file
        userId: "test_user", // Choose a user name / hash
        deviceId: "test_id", // Choose a device id / hash
        specialPermissionsConfig: CLAIDSpecialPermissionsConfig.regularConfig(),
        claidPackages: [
            my_new_package() // Add this line to register your package at runtime.
        ]
    ).then((value) => setState(() {
    claidStarted = true;
    }));
}
Option2 - for standalone Android/WearOS users: Including the CLAID package as aar package into an Android/WearOS application
If you are building a standalone CLAID App for Android/WearOS, you can include the compiled aar file into your Android project. Check out the instructions below:
Including the compiled aar package into an Android/WearOS application
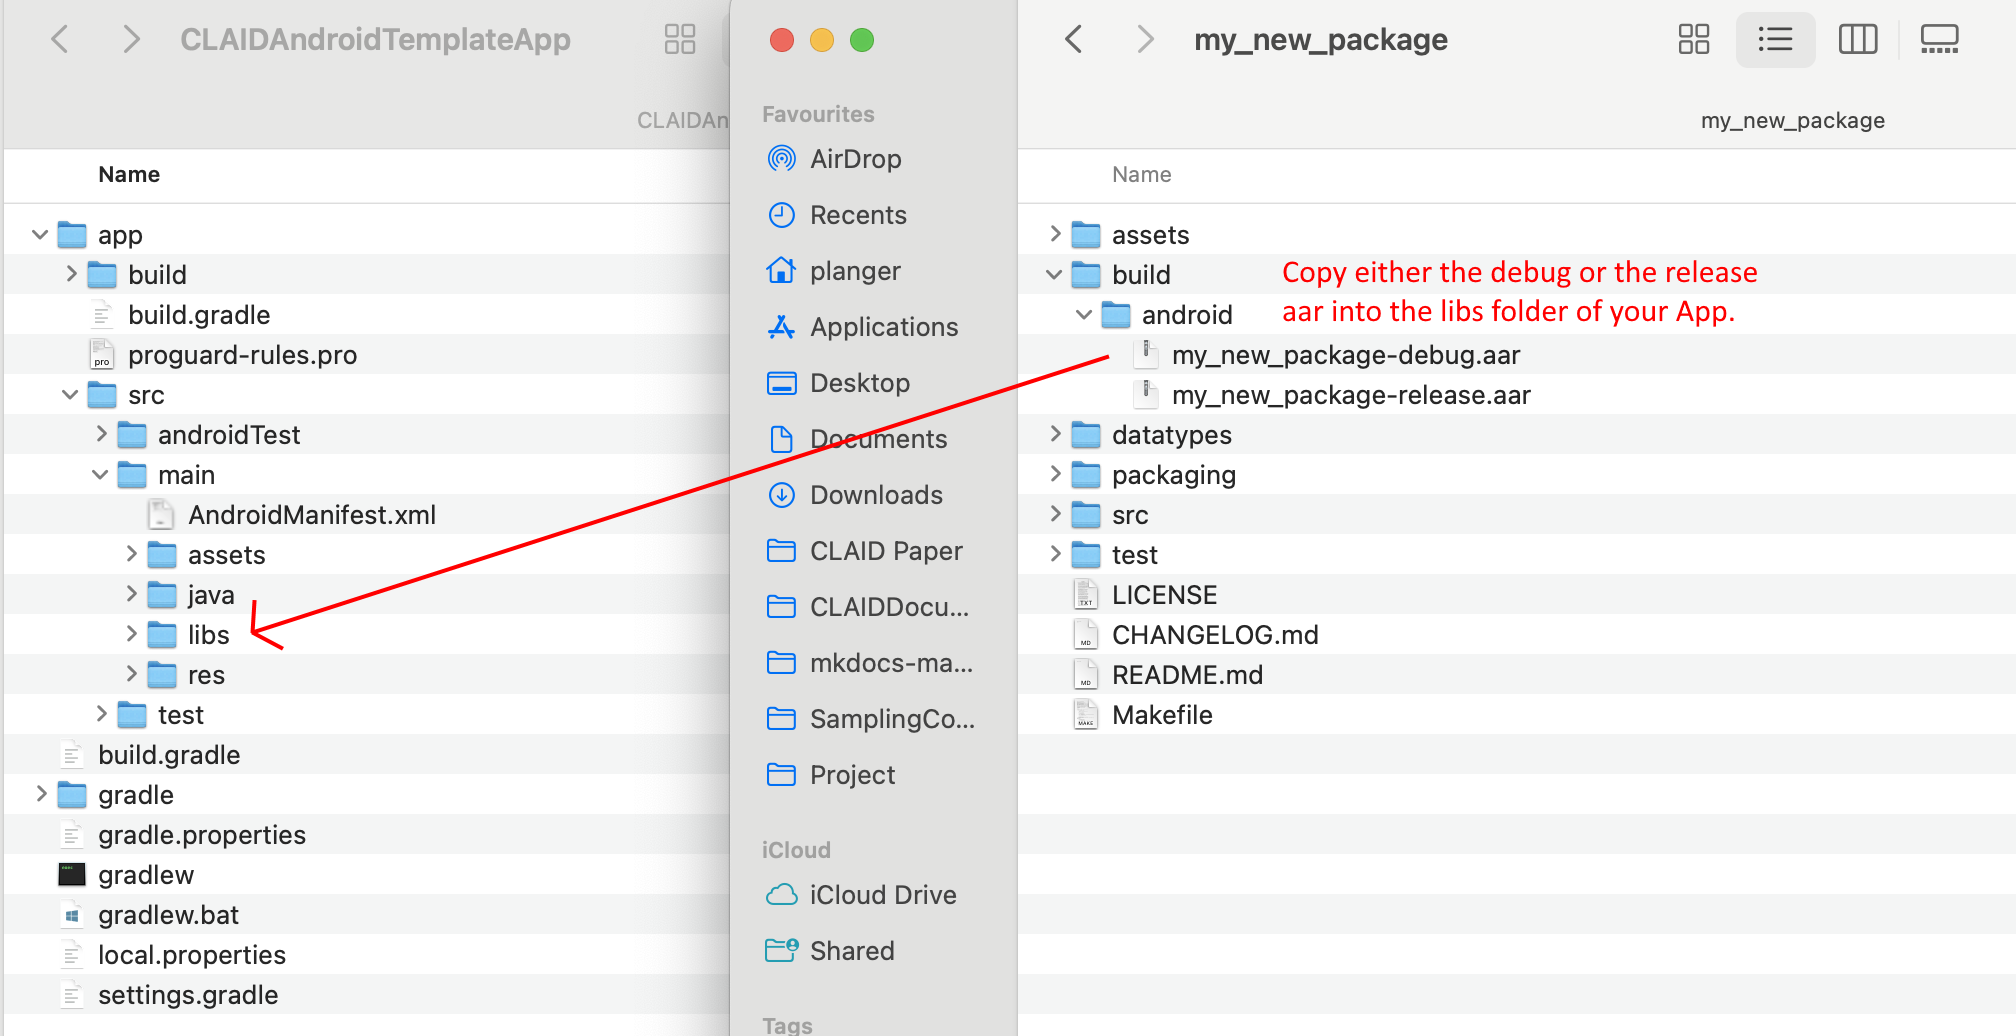
To include the compiled aar package into your project, do the following:
- Inside your Android App project, create a folder called "libs" under android/src/main
- From your CLAID package, open the folder build/android and locate the your_package-debug.aar and your_package-release.aar files.
- Copy either the release OR the debug aar file into the libs folder of your Android App project:
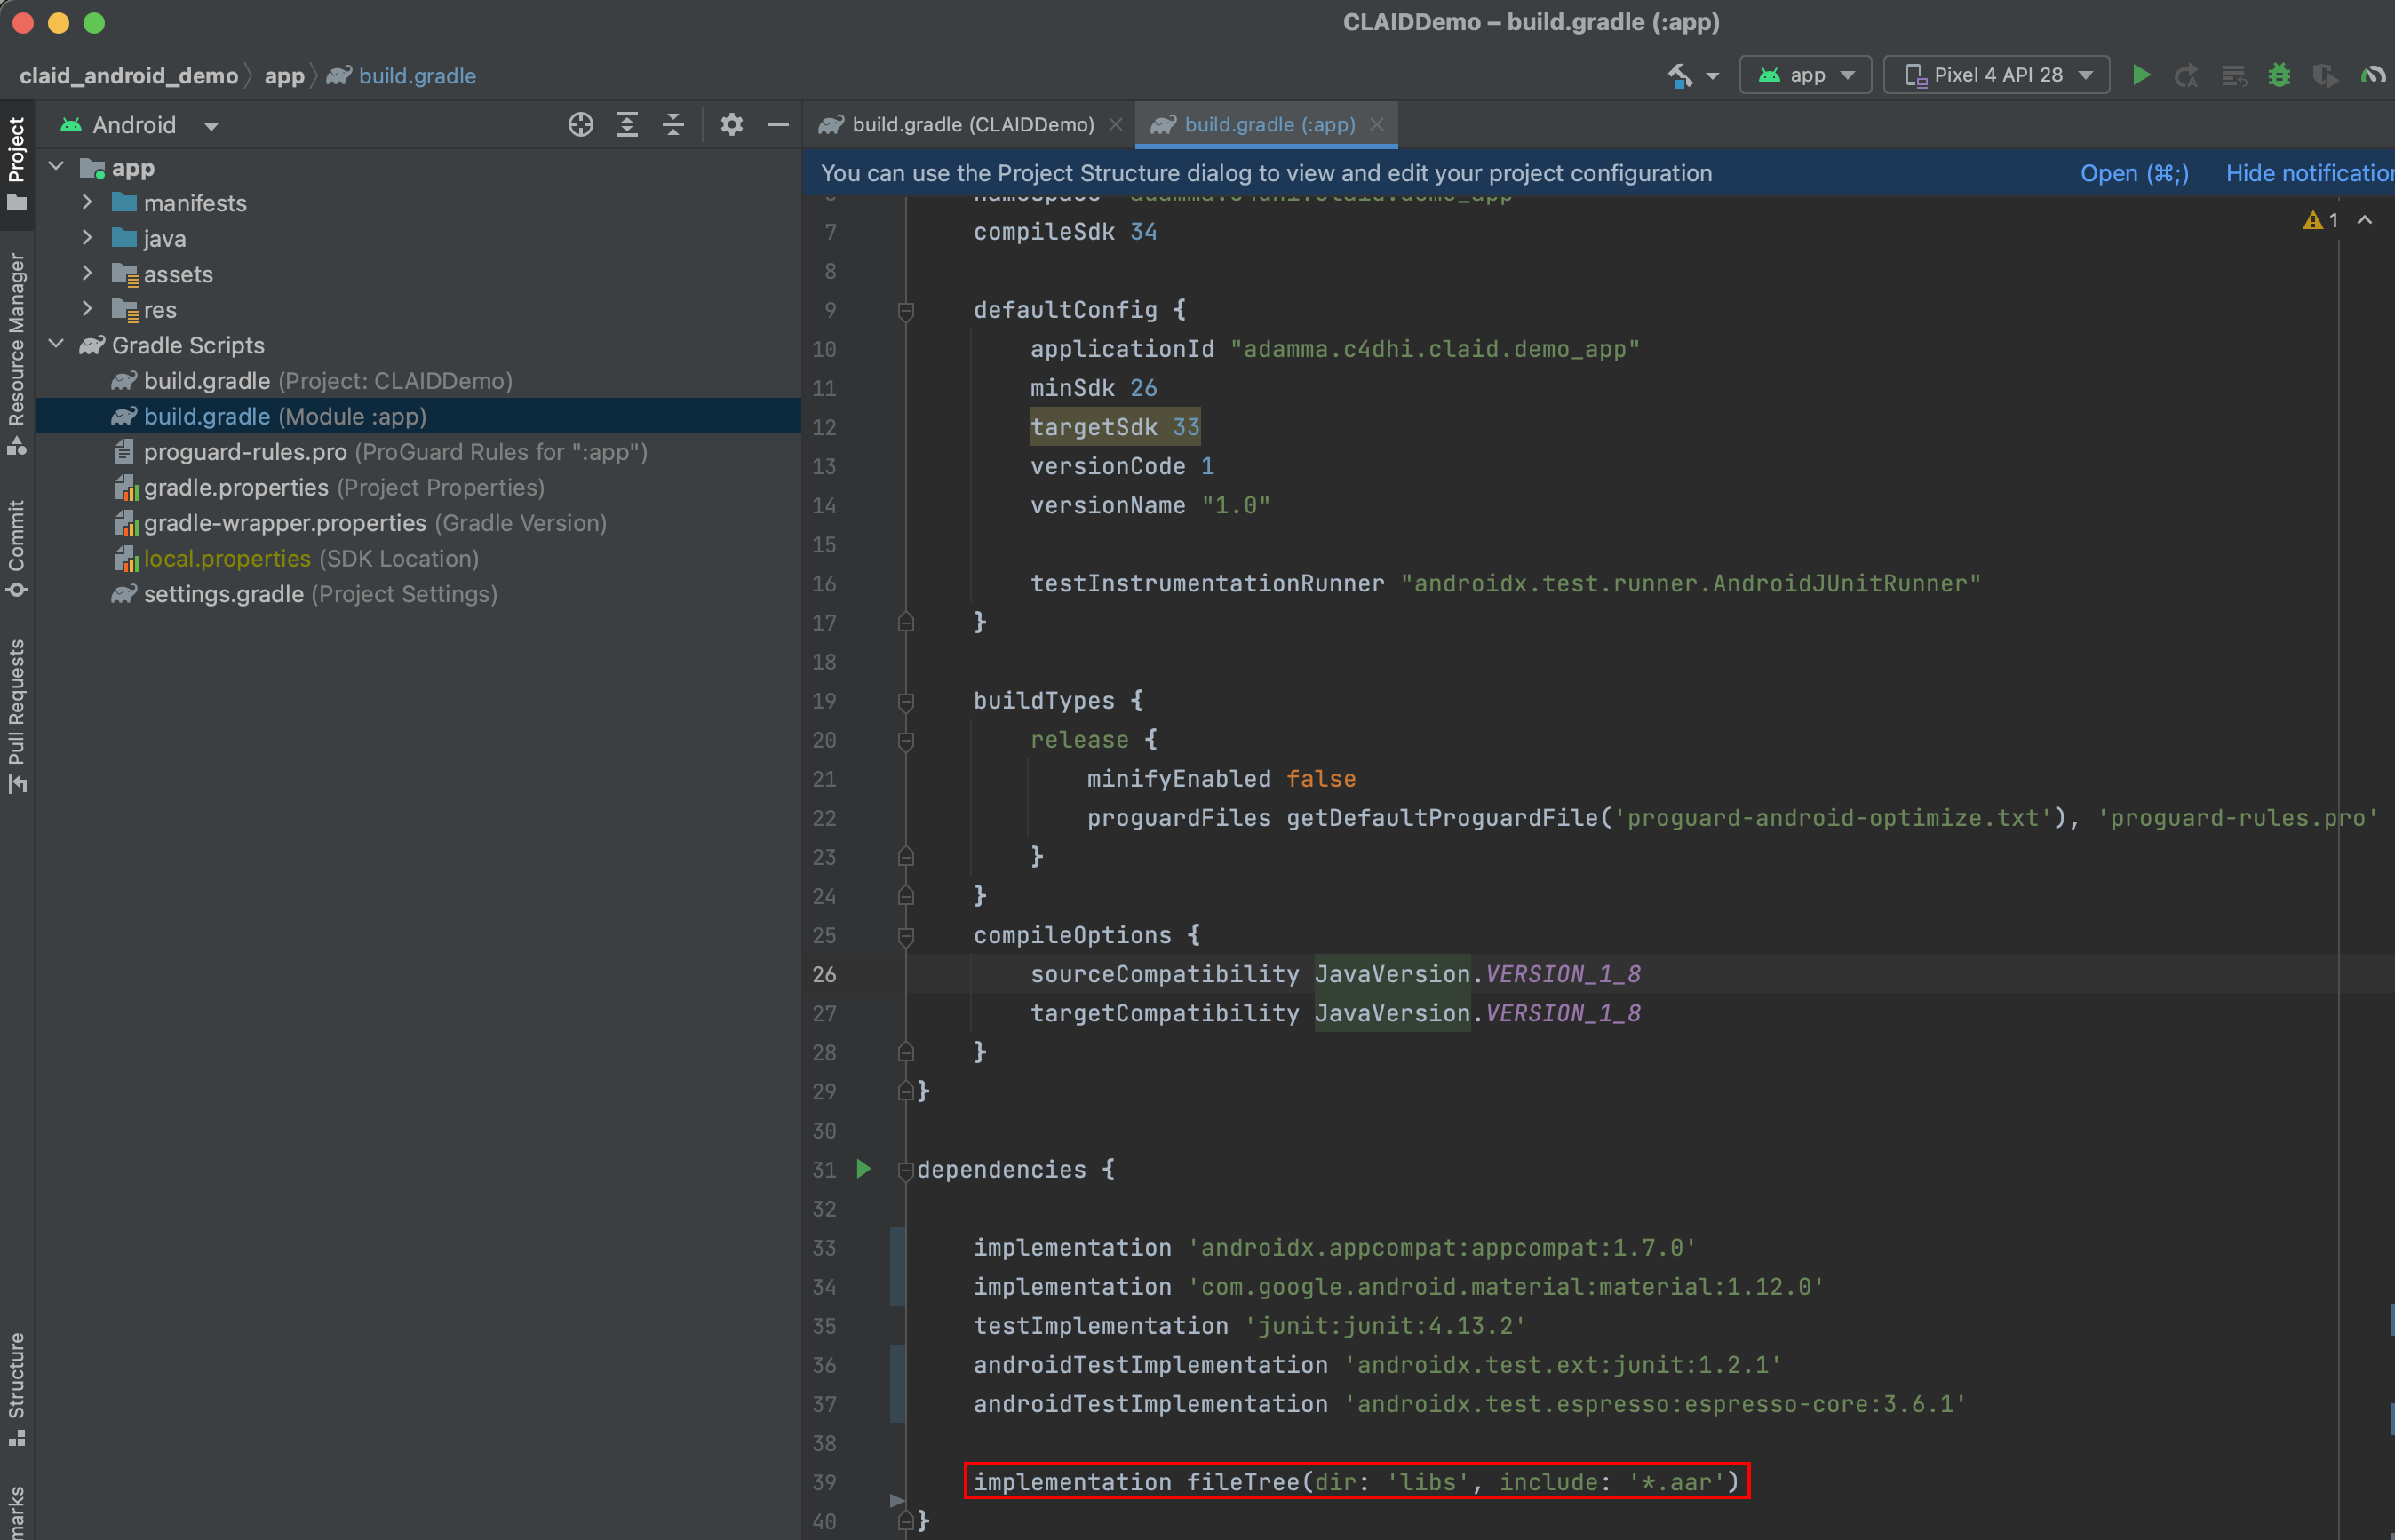
Next, inside your Android App project, open the build.gradle file and add the following to the depdendencies:
dependencies
{
    ...
    // Include all aar files inside of 'libs' folder
    implementation fileTree(dir: 'libs', include: ['*.aar'])
    ...
}
It should look as follows:
This concludes the tutorial on creating CLAID packages. In the next tutorials, we show you how you can add new Modules and Visualizations to the package.