CLAID EMBC2024 - Part 1: Getting to know the CLAID Designer
This part covers the basics of CLAID and introduces the CLAID Designer. The CLAID Designer can be used to configure CLAID applications on any device from a central user interface.
Objective for Part 1
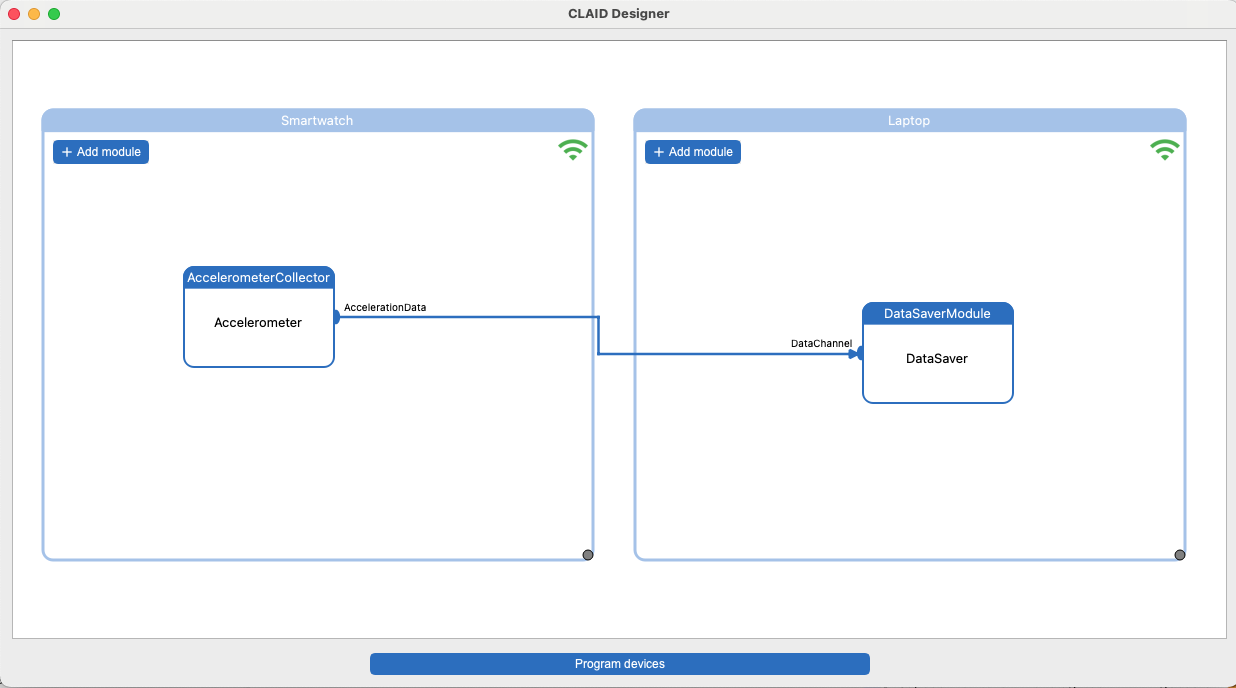
After having completed Part 1 of this workshop, you will be able to insert and configure CLAID Modules across your Laptop and the Smartwatch using the CLAID Designer, as depicted in the picture below:
Task: Running the CLAID Designer
To get you started with the workshop, we have created a template repository on GitHub which contains a simple CLAID Python project, which starts CLAID together with the CLAID Designer. We will cover the code in detail during Parts 2 and 3, but for now please run the template project by following the instructions below. Make sure you are still using the Python 3.9 environment which you set up in the preparation part.
Task: Installing the CLAID Designer
Clone the Workshop template repository:
Now open your terminal inside the repository:
Install the requirements: Finally, launch the program:Upon running the project, you should see the landing page of the CLAID Designer:

Task: Pairing the CLAID Designer with the Smartwatch
Using the CLAID Designer, you will be able to configure the Smartwatch. This requires to connect the Designer to CLAID running on the Smartwatch. To do so, you will have to enter the IP Adress of the Smartwatch into the CLAID Designer. Please take the Smartwatch that you have received at the beginning of the Workshop and follow the instructions below.
Connecting to the Workshop Wifi
Before you continue, make sure that both your Laptop/PC as well as the Smartwatch are connected to the same Wifi. During the workshop, we provide a local Wifi network for you to use (no network access!).
Task: Connect Laptop and Smartwatch to the same Wifi
Connect your Laptop and the Smartwatch to the same Wifi. You should be able to use the EMBC public Wifi.
We optionally provide a local Wifi network during the workshop, however without network access. Consider it a backup solution, if the Wifi provided by EMBC does not work. The credentials for our Wifi are below:
SSID: CLAID_EMBC_2024
Password: claidembc
Starting CLAID on the Smartwatch
Please follow the instructions below and be sure to write down the IP address in Step 3.
Task: Steps to start CLAID on the Smartwatch
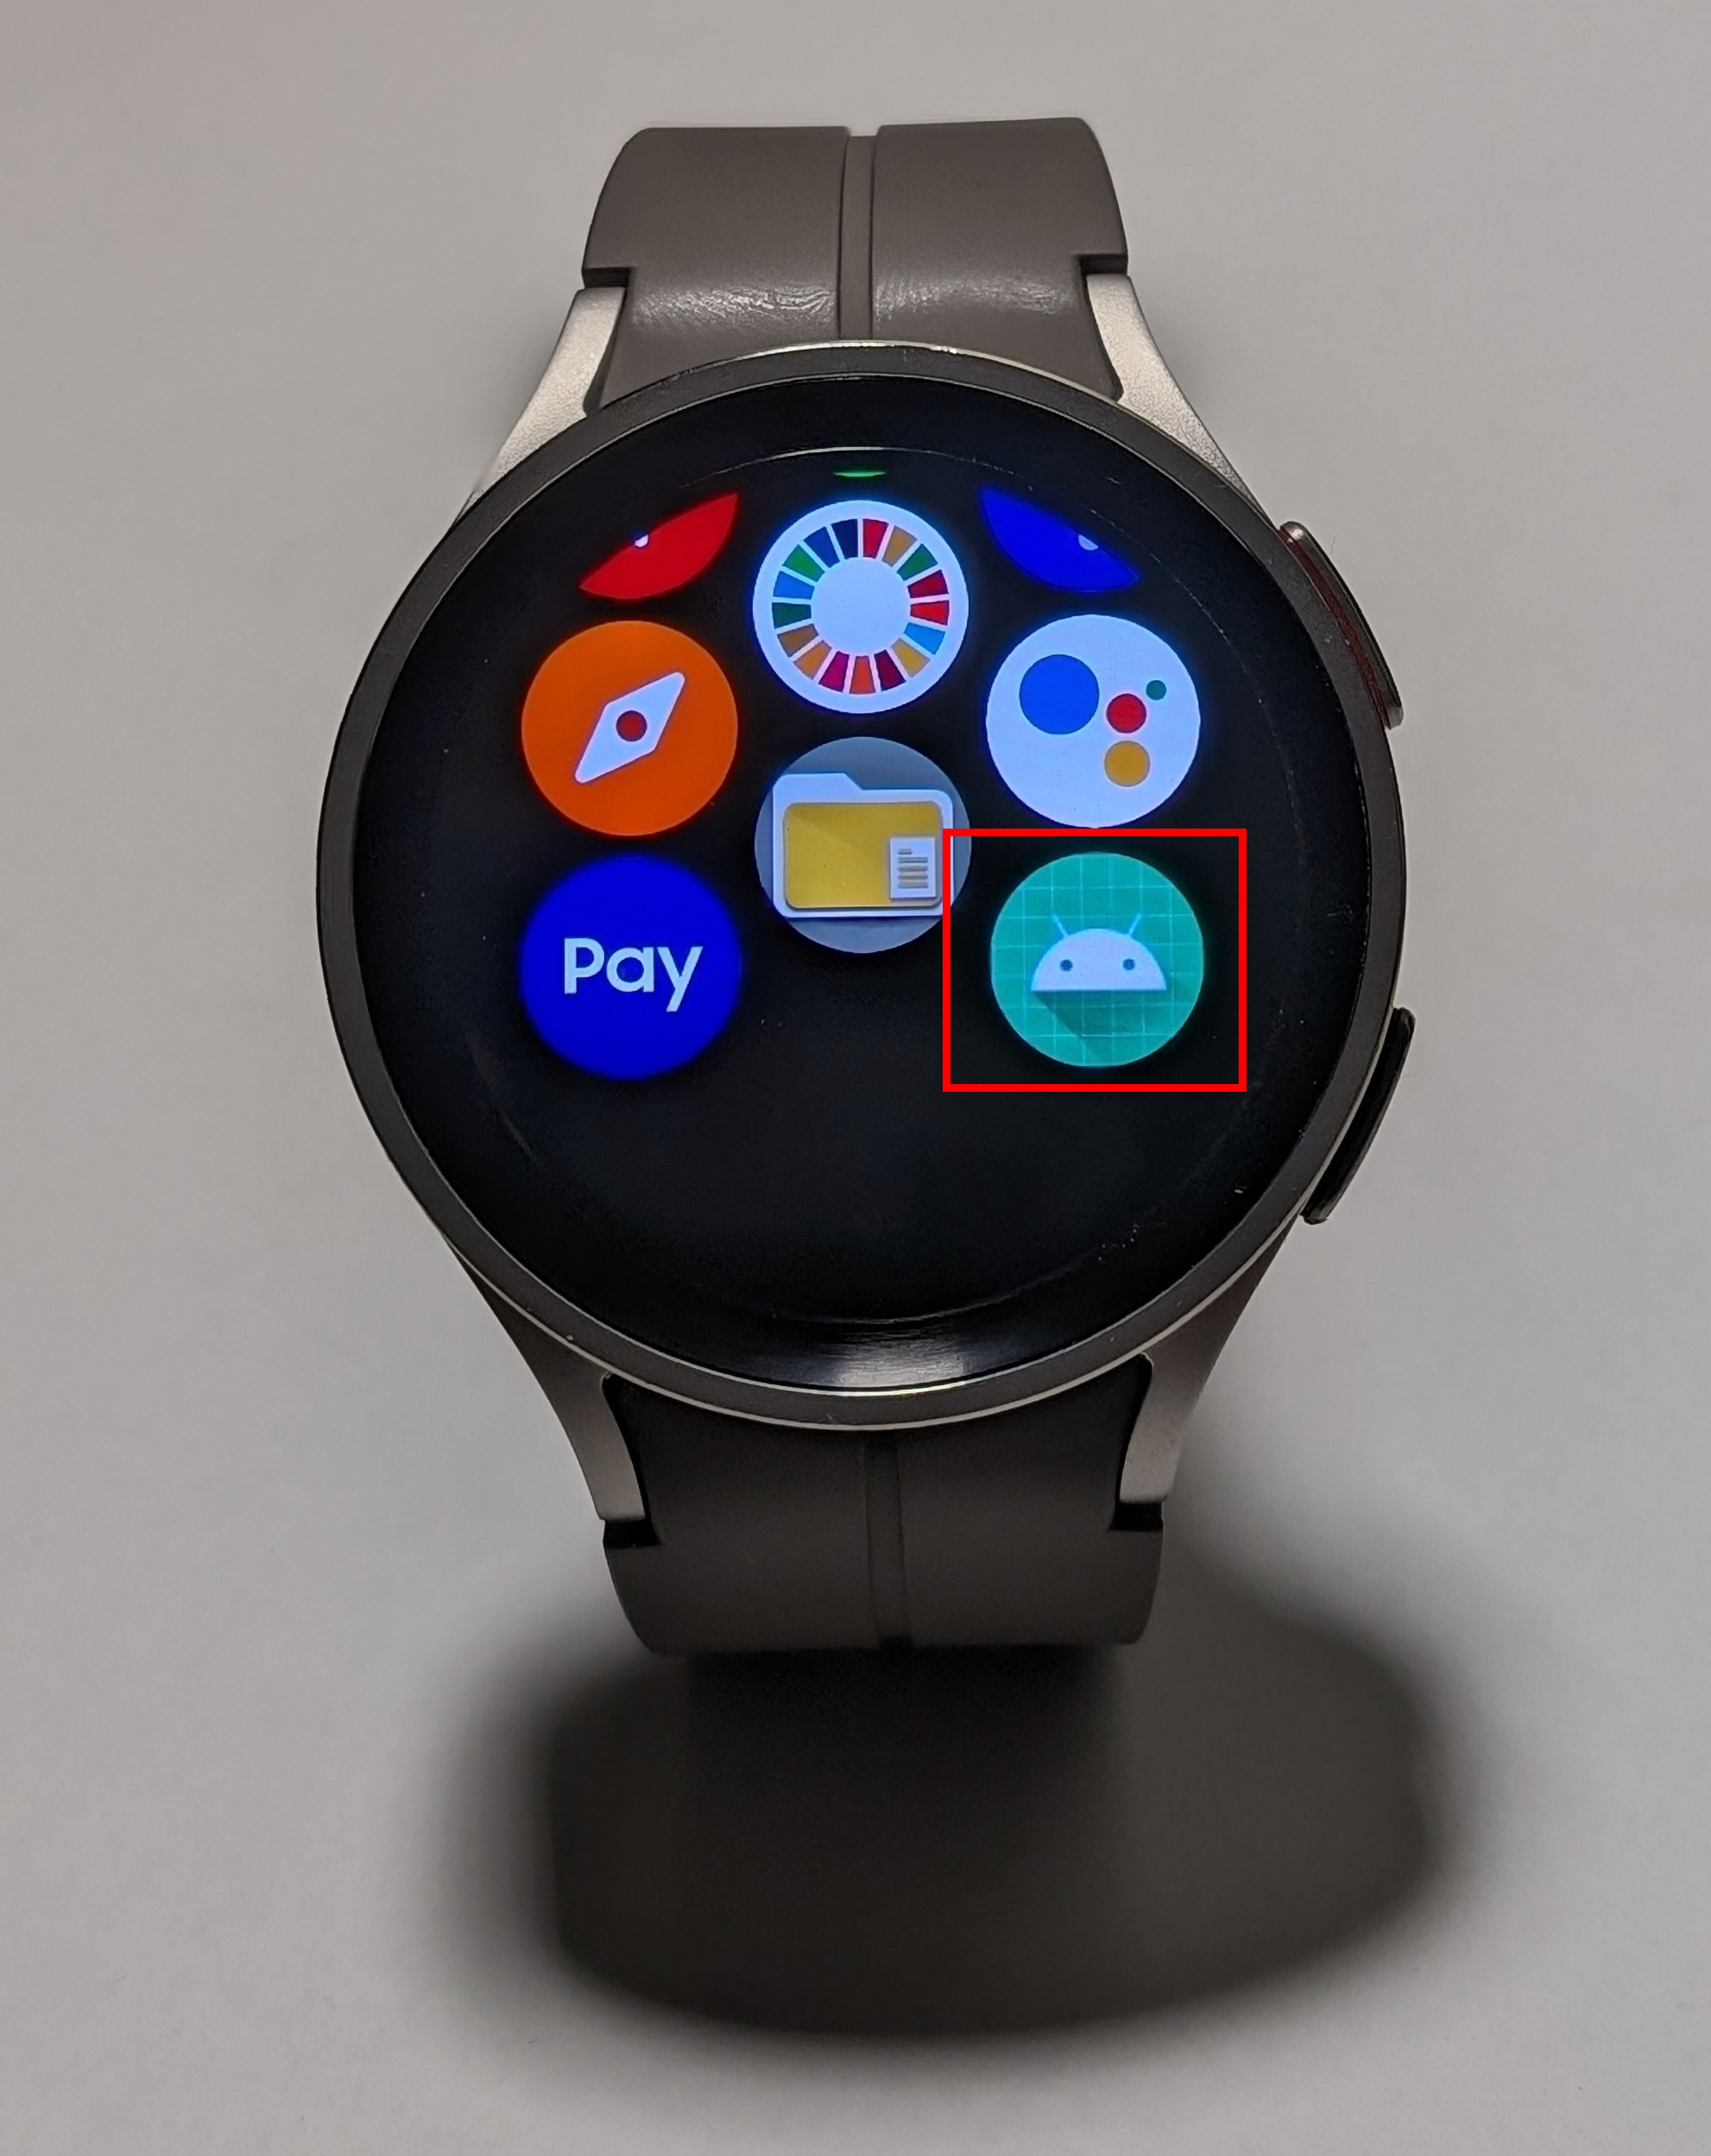
From the main page of the Smartwatch, swipe up and open the CLAID app:
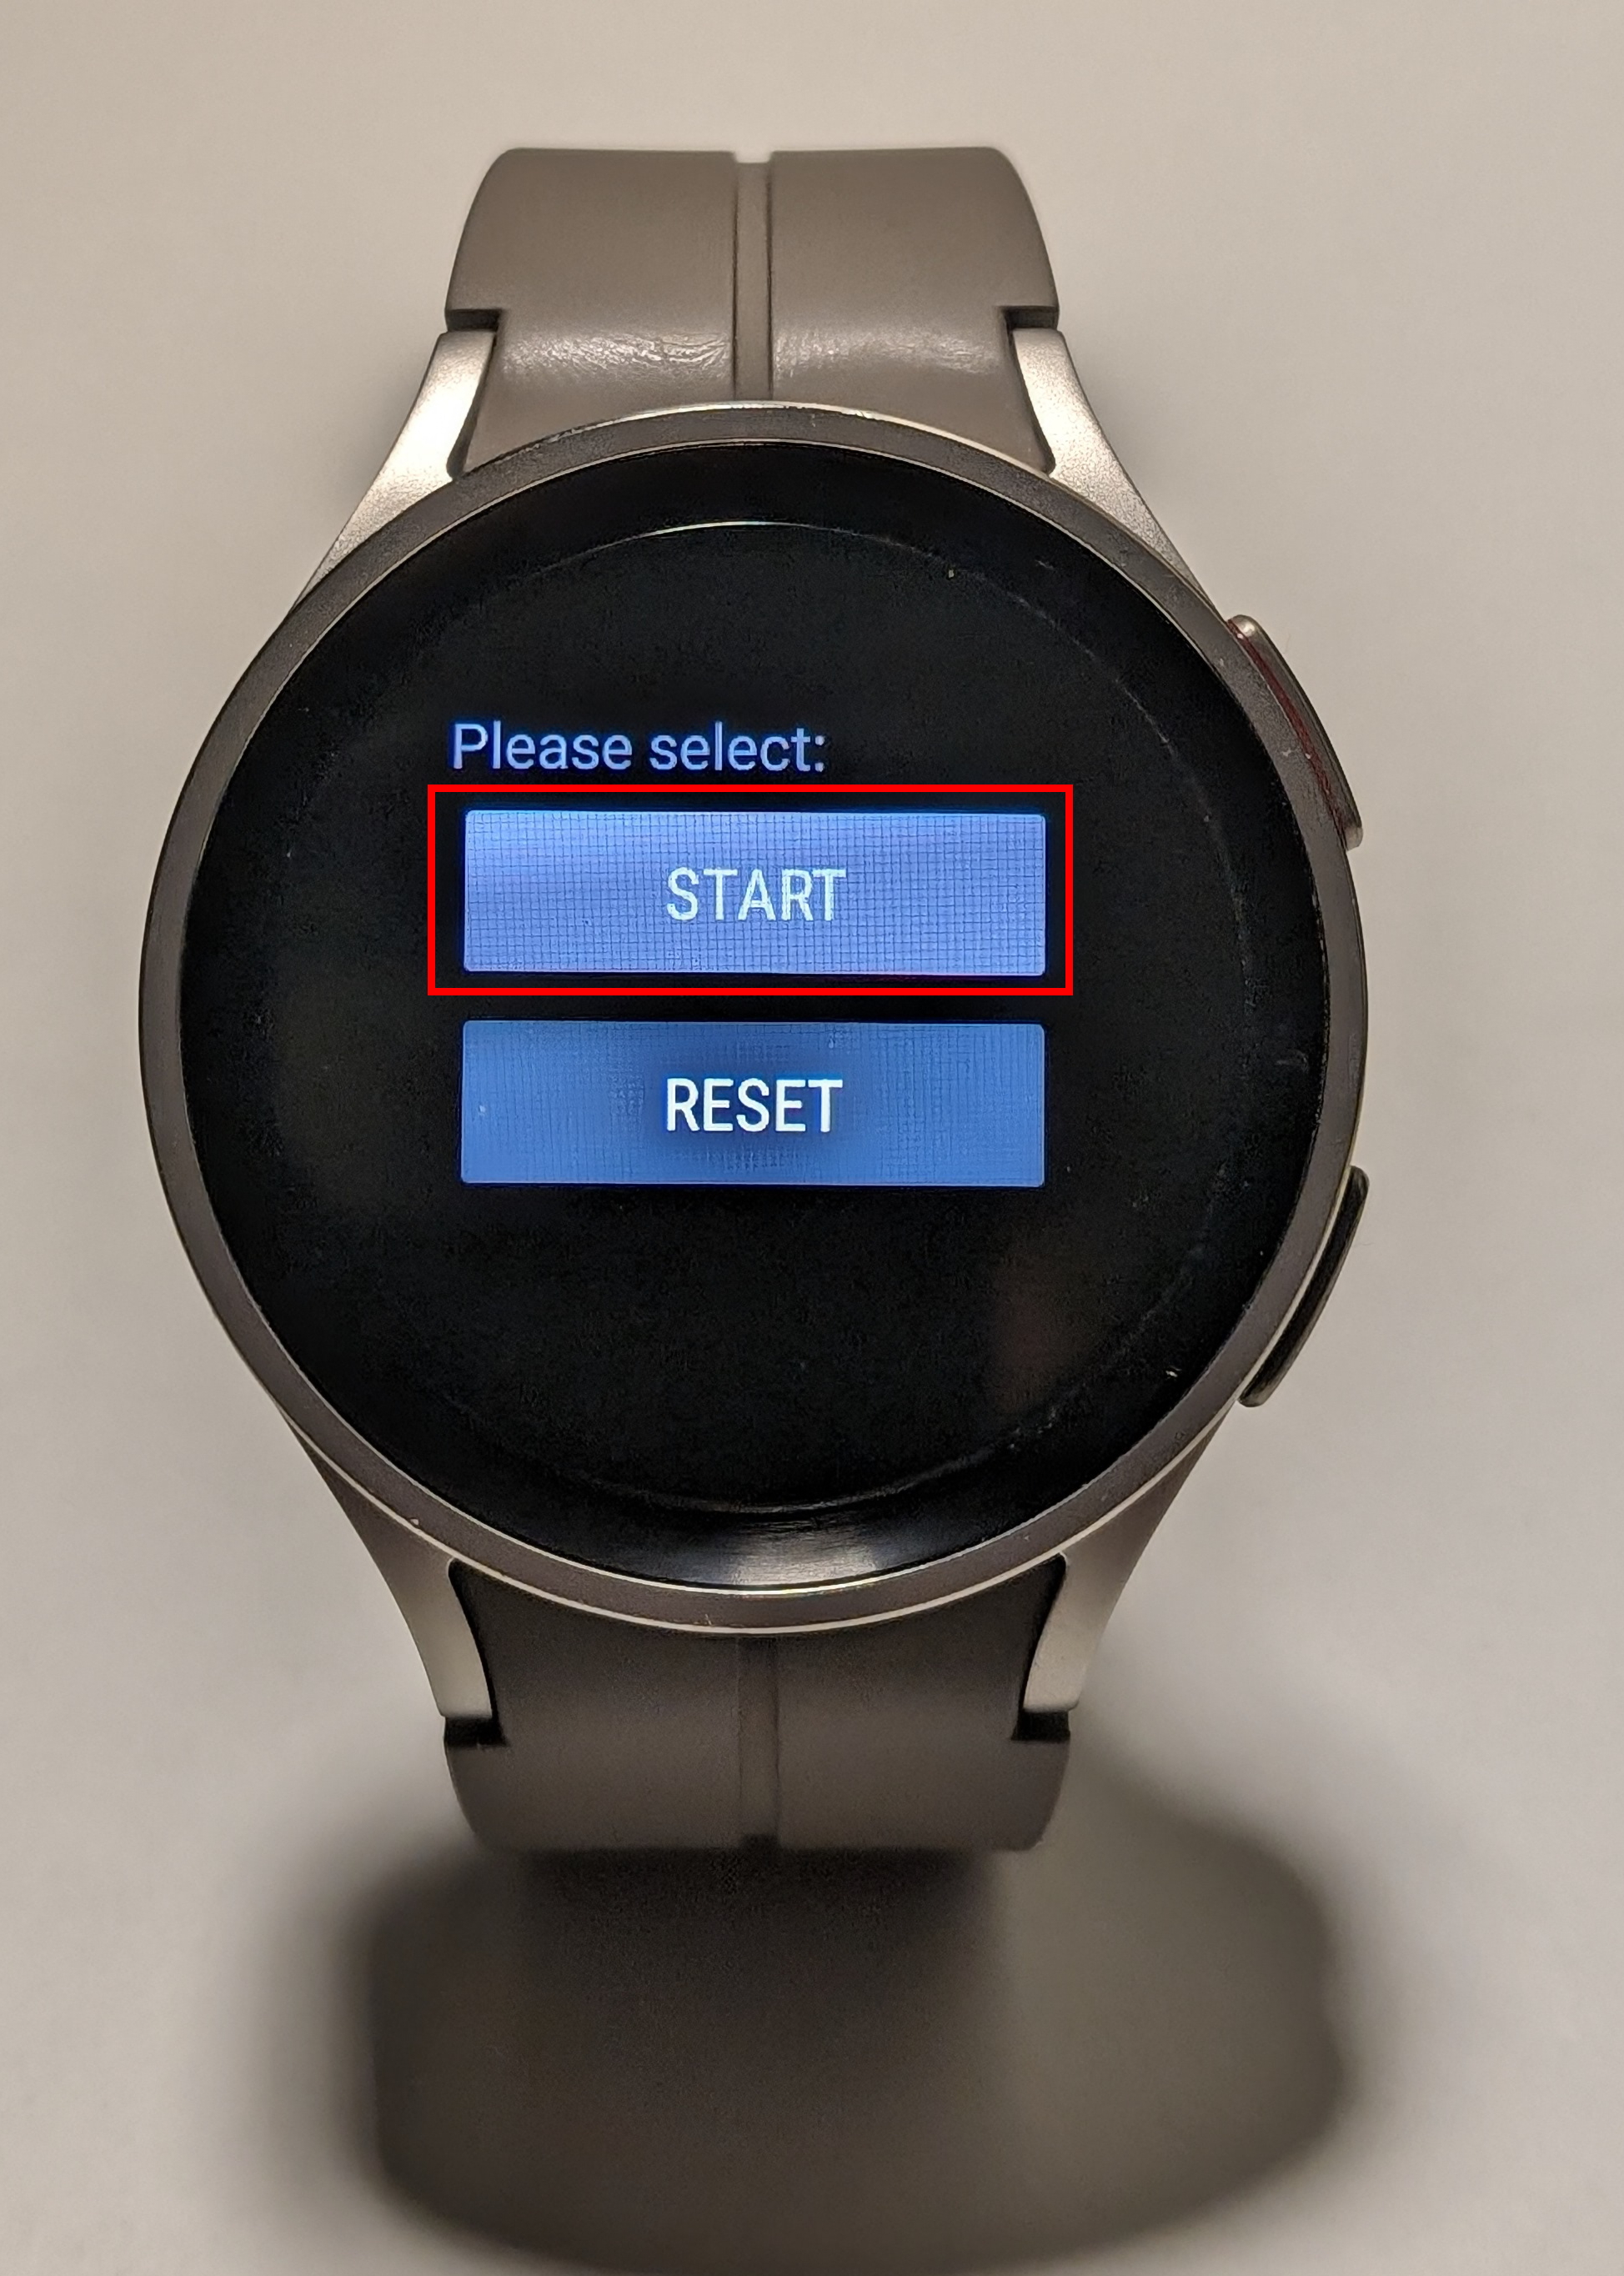
Once the App opened, click "Start". Allow up to 5 seconds for CLAID to start in the background.
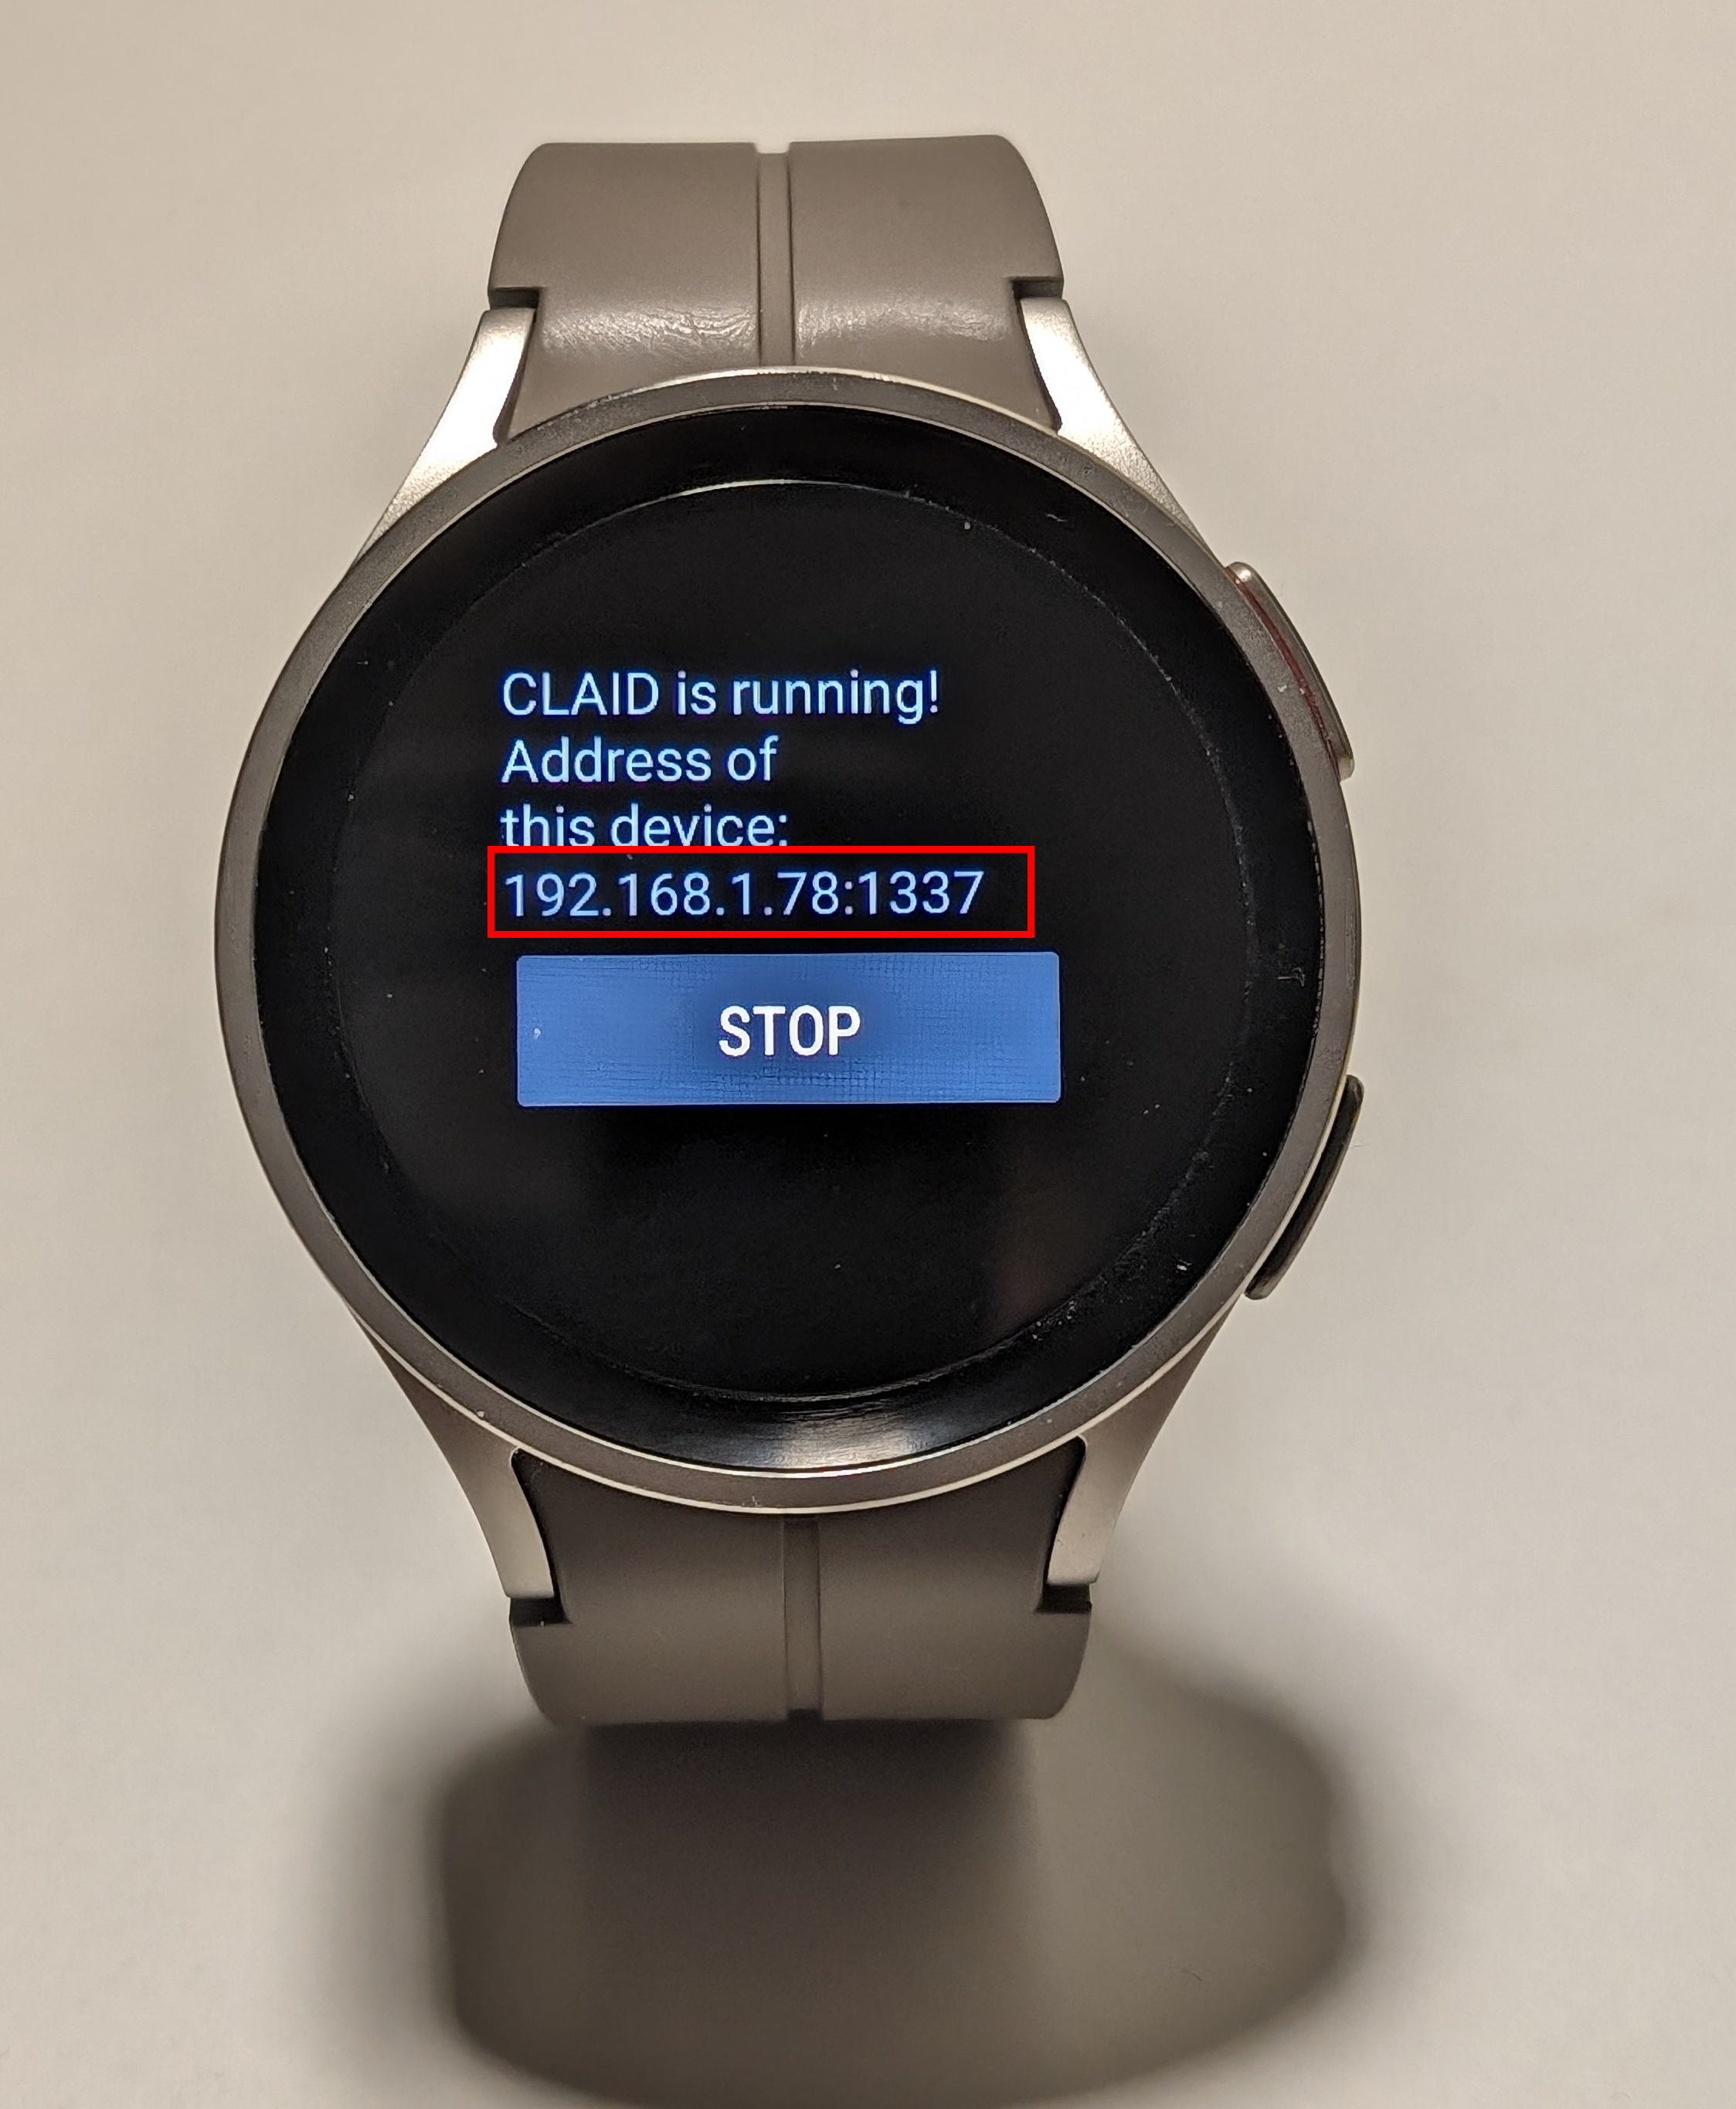
Once CLAID has started (may take up to 5 seconds), note down the IP Address and port as seen in the picture below. You will need to enter it into the CLAID Designer.
Connecting the CLAID Designer
You will now need to enter the IP Address of the Smartwatch into the CLAID Designer. Follow the instructions below.
Task: Steps to connect the CLAID Designer to the Smartwatch
From the landing page of the CLAID Designer, click "Begin"

Enter the IP Address of the Smartwatch that you wrote down in the previous step above and then click "Start CLAID". Make sure to use the IP Adress you wrote down in the steps above!

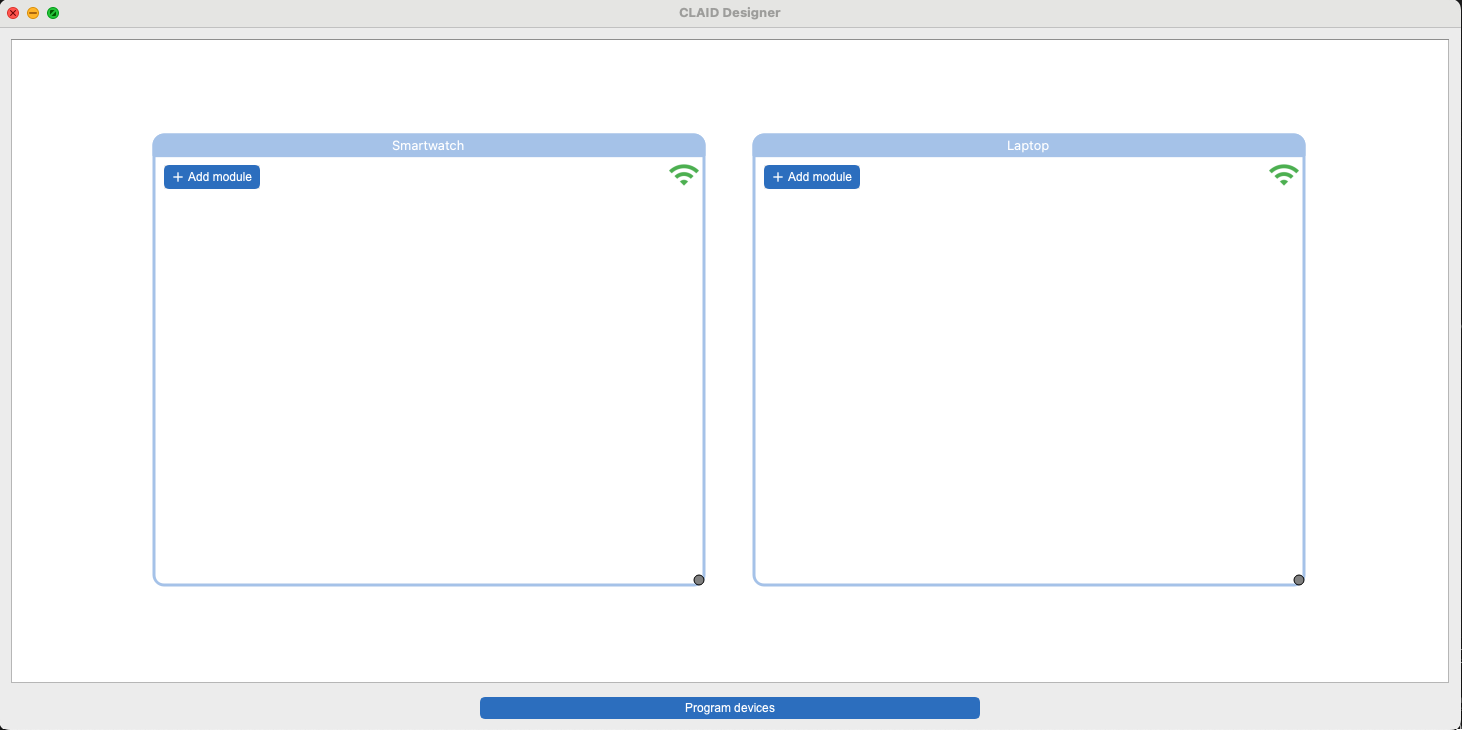
You should now see both devices in the CLAID Designer, your Laptop/PC and the Smartwatch. Initially, the smartwatch will be shown as disconnected (note the red frame and the wifi symbol), but should connect within a few seconds.
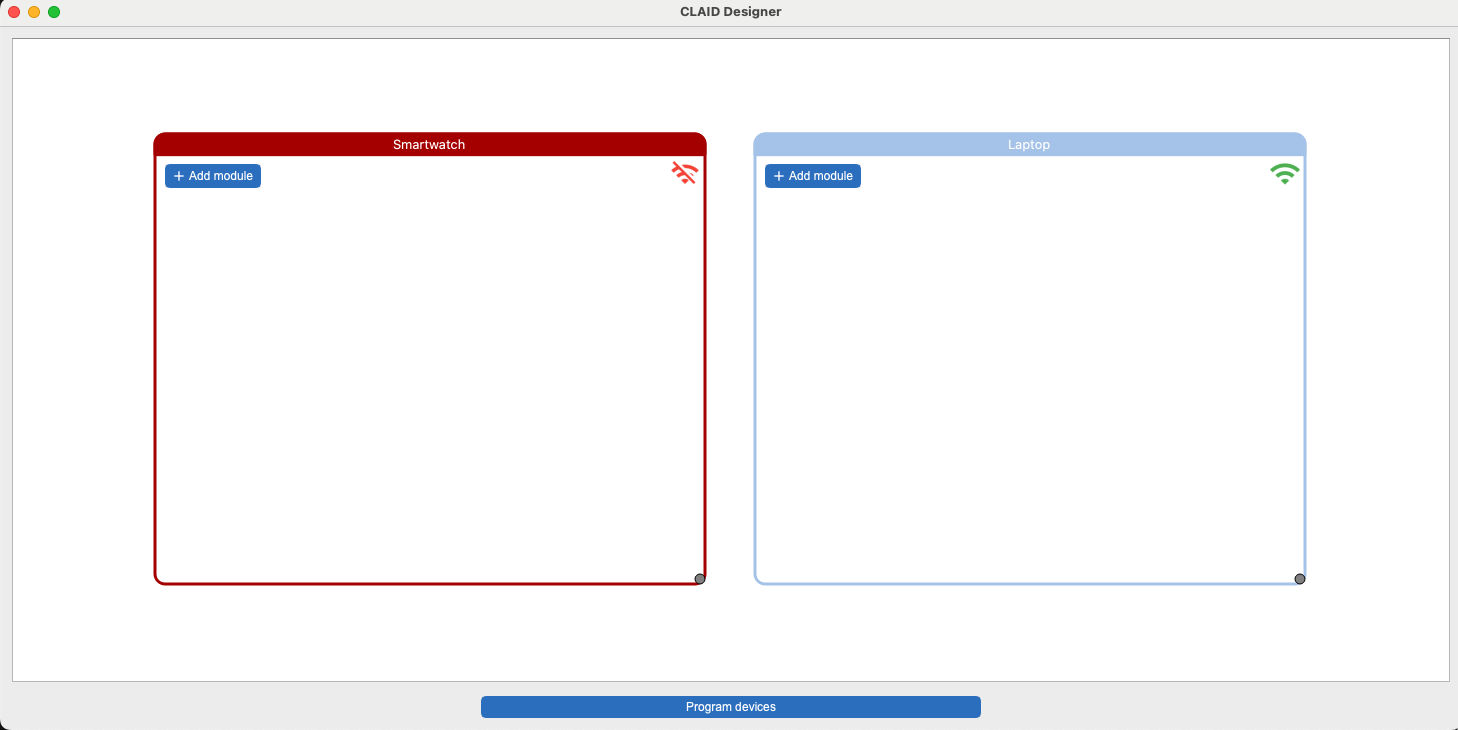
If you have connected both the Smartwatch and your Laptop to the same (workshop) Wifi, and if you entered the IP Address of the Smartwatch correctly into the Designer, then after a few seconds you should see that the Smartwatch is connected to the Designer:
The Smartwatch does not connect
If you cannot see the Smartwatch as connected in the CLAID Designer, please double check that you connected both your Laptop and the Smartwatch to the same wifi (e.g., the Workshop Wifi). The public wifi provided by EMBC might not work. If it does not work, please report to the workshop team.
Information: Overview about the CLAID Designer
The following section is only for your information to learn about the CLAID Designer. You will use it yourself in Part 2.
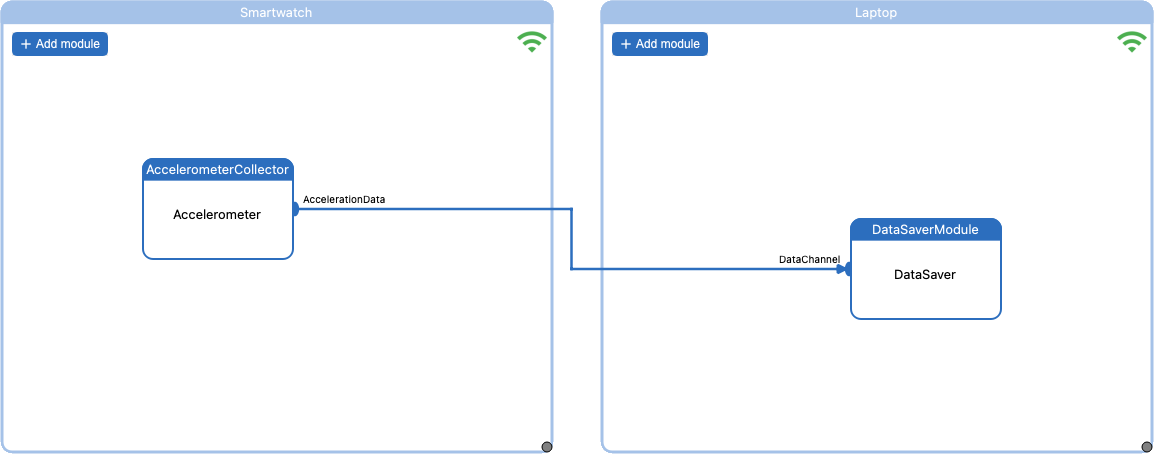
With CLAID, you can build applications from individual Modules. Modules are independent and self-running entities, which can perform functions such as data collection, data storage, visualization or run machine learning algorithms. Individual Modules can be connected to form data analysis, processing or data collection pipelines. For example, you could connect an AccelerometerCollector Module to a DataSaverModule to automatically record data from the accelerometer of the device:

With CLAID, this works even across multiple devices (with a network connection in between) or across different programming languages (e.g., Python, Java, Dart, C++):
ModuleCatalog
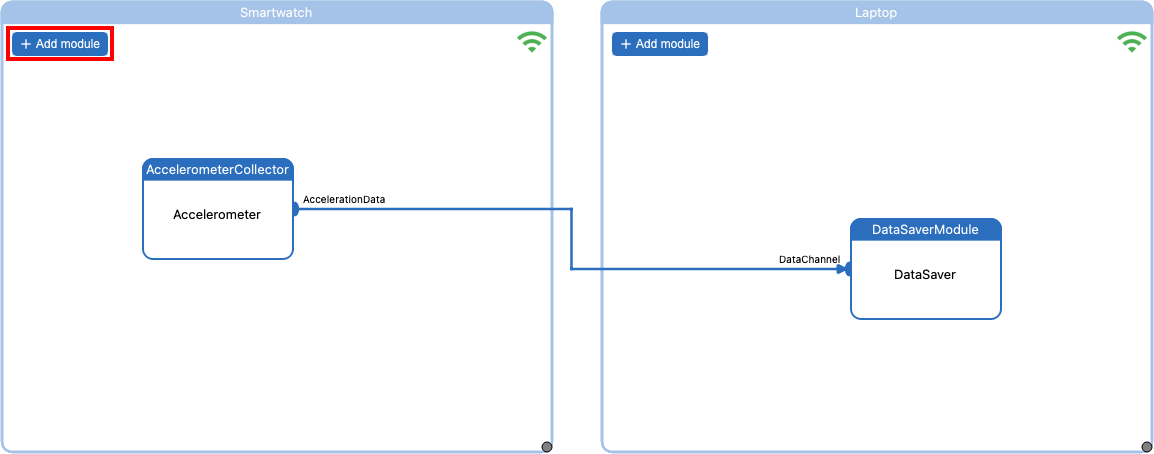
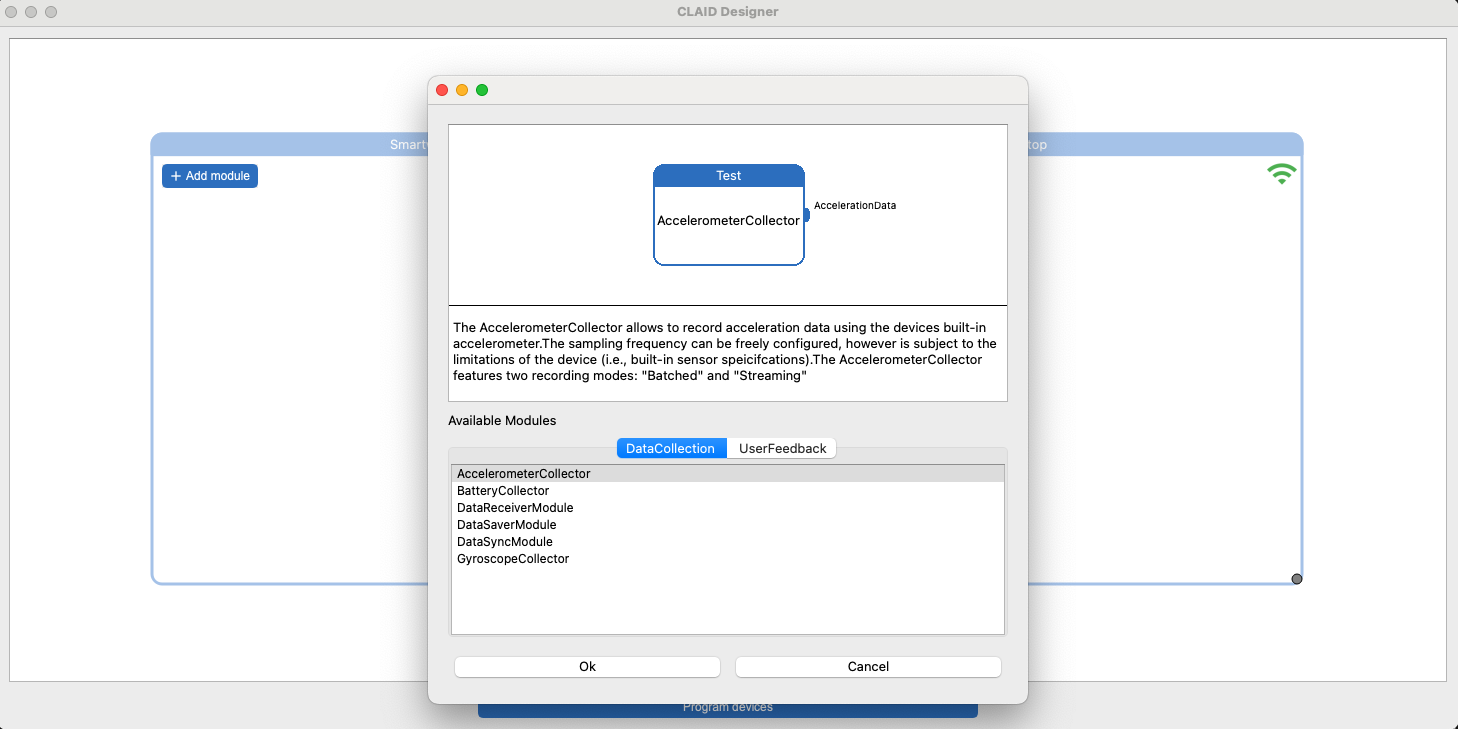
CLAID comes with various pre-existing Modules and provides a straightforward API to add custom Modules (as we will discover during Part 3). Different devices might have different Modules (e.g., on a Laptop, you might not expect to see an AccelerometerCollector Module). You can access all available Modules for each device using the ModuleCatalog in the CLAID Designer. You can open it by clicking the "Add Module" button on any device:
In the ModuleCatalog, you can see different Modules divded into differten categories (notice the "DataCollection" and "UserFeedback" tabs in the image below). Each Module has a description as well as properties, input and output channels, which are all described in the catalog when you click on an individual Module:
Module Properties
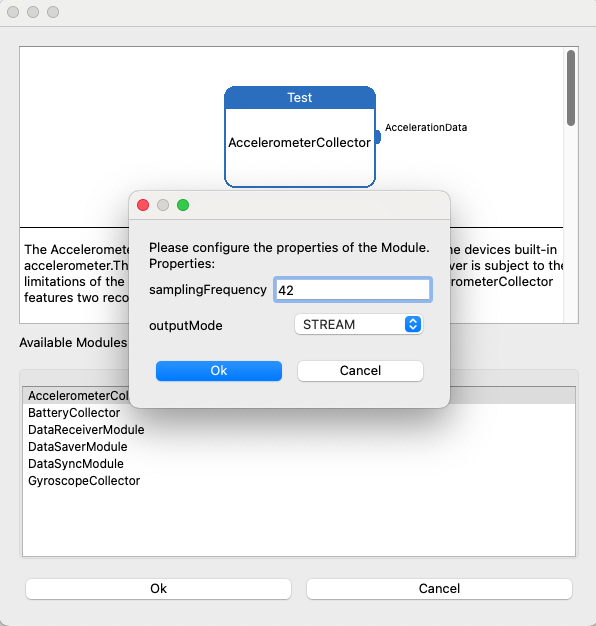
Most Modules have properties, which allow to specify how they shall perform certain tasks. For example in the case of the AccelerometerCollector, you might want to configure the sampling frequency to sample acceleration data at a specific rate (e.g., 20Hz). Whenever you select a Module in the ModuleCatalog, you will be asked to specify the corresponding permissions of the Module (in case it has any):
ErrorView
Currently hidden from you is another view, which only pops up when an error occures: The ErrorView. During Part 3, you will write your own Modules with CLAID in Python. In case you do a mistake during the programming of the Module, or anything else goes wrong, a separate window, the so-called ErrorView, will pop up:
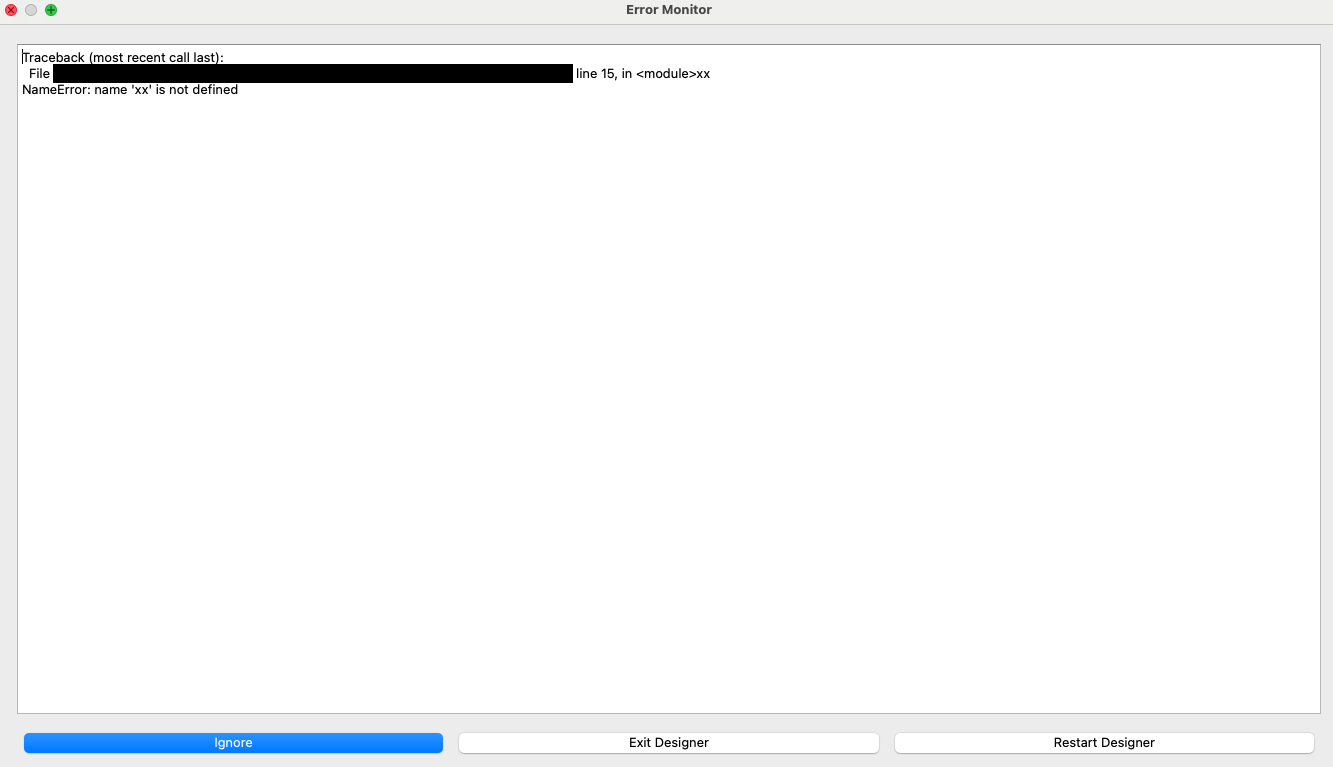
In this ErrorView, you can see all errors which are thrown by CLAID or the CLAID Designer. Some messages might be mere Warnings, which you can safely ignore using the Ignore button at the bottom. Others, like coding errors, might be more critical and might require you to exit and/or restart the CLAID Designer using one of the buttons below.
This concludes part 1 of the CLAID Workshop @ EMBC 2024.