CLAID EMBC2024 - Part 2: Data Streaming, Data Collection and Storage
Once you have familiarized yourself with the CLAID Designer, we can now put together a first application using CLAID. During Part 2 of this workshop, you will discover how you can use CLAID Modules to collect, stream and store data from the Smartwatch in realtime.
Objective for Part 2
During Part 2, you will learn how to livestream and record data, such as acceleration or heart rate data, with CLAID.
Before you continue, make sure your Smartwatch is still connected to the Laptop and shown in the CLAID Designer. If it is not connected, you may need to reopen the App or restart CLAID by pressing the Stop button.
Task: Streaming realtime data
As a demonstration, we now want to use CLAID to stream data in realtime and visualize it on your PC. The following DataCollection Modules on the Smartwatch are available for the purpose of this workshop (a subset of all data collection Modules in CLAID):
Available DataCollection Modules on the Smartwatch during the Workshop
- AccelerometerCollector: Allows to collect 3-axis acceleration data (X, Y, Z)
- GyroscopeCollector: Allows to collect 3-axis gyroscope data (X, Y, Z)
- HeartRateCollector: Allows to collect heart rate data
Furthermore, for CLAID running on your PC, some Visualization Modules are available:
Available Visualization Modules on the PC
- AccelerationView: Allows to live-plot 3-axis acceleration data.
- GyroscopeView: Allows to live-plot 3-axis gyroscope data.
- HeartRateView: Allows to live-plot heartrate data.
For instance, let's take the AccelerometerCollector to plot acceleration data in realtime from the Smartwatch. Follow the steps below:
Task: Steps to add the AccelerometerCollector to the Smartwatch
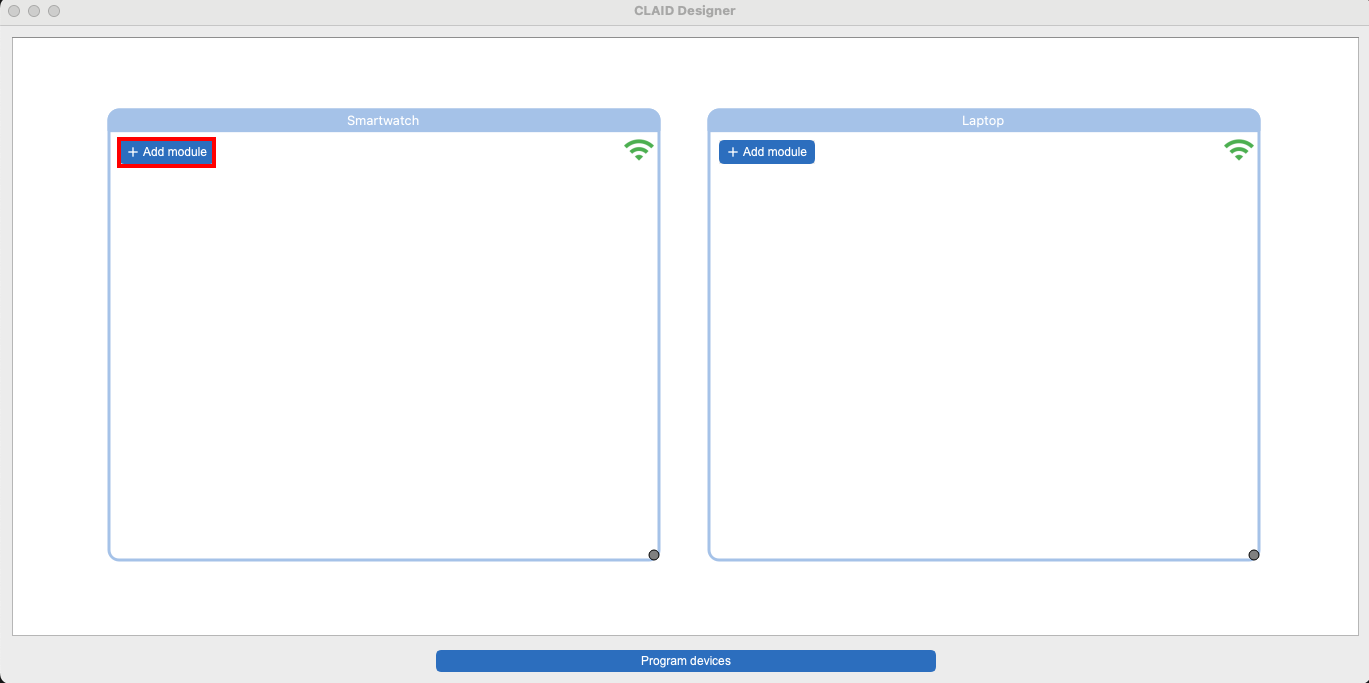
In the CLAID Designer, click "add Module" on the Smartwatch:
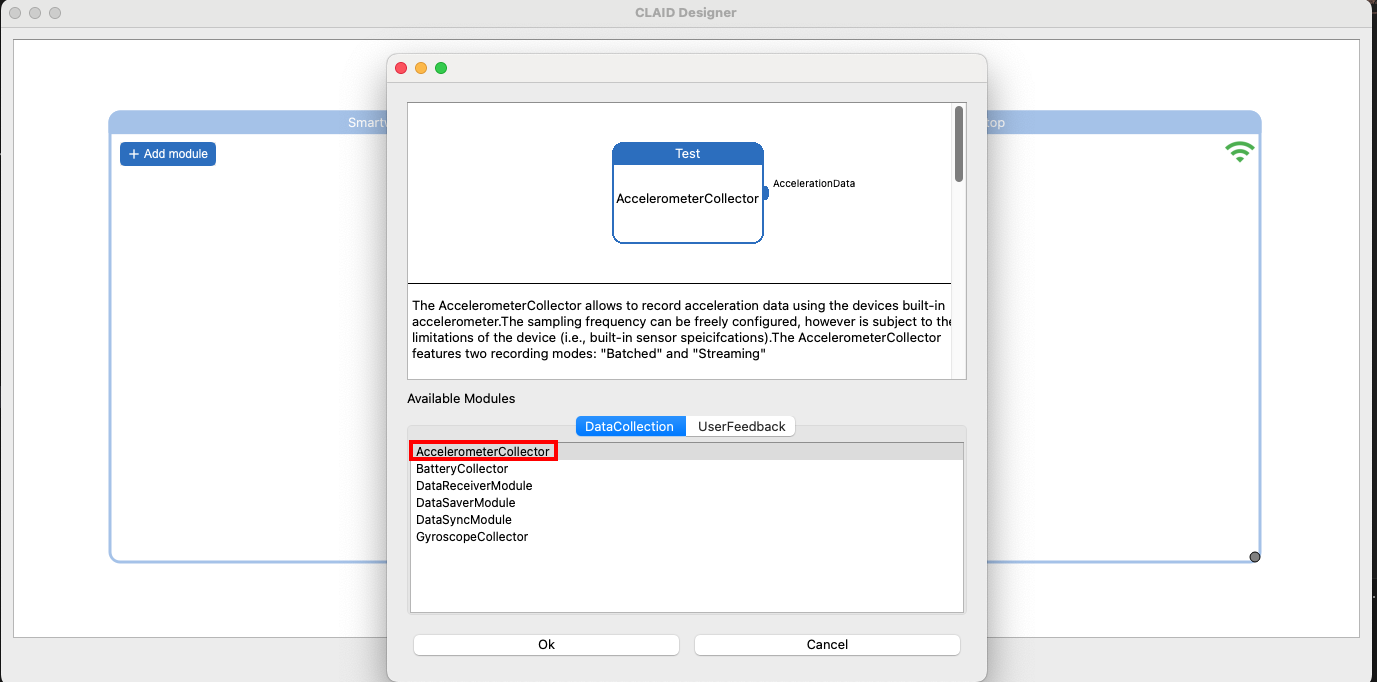
In the ModuleCatalog, choose the AccelerometerCollector and click "OK":
Enter a name for the Collector (choose whichever name you like, it just has to be unique across all Modules you add).
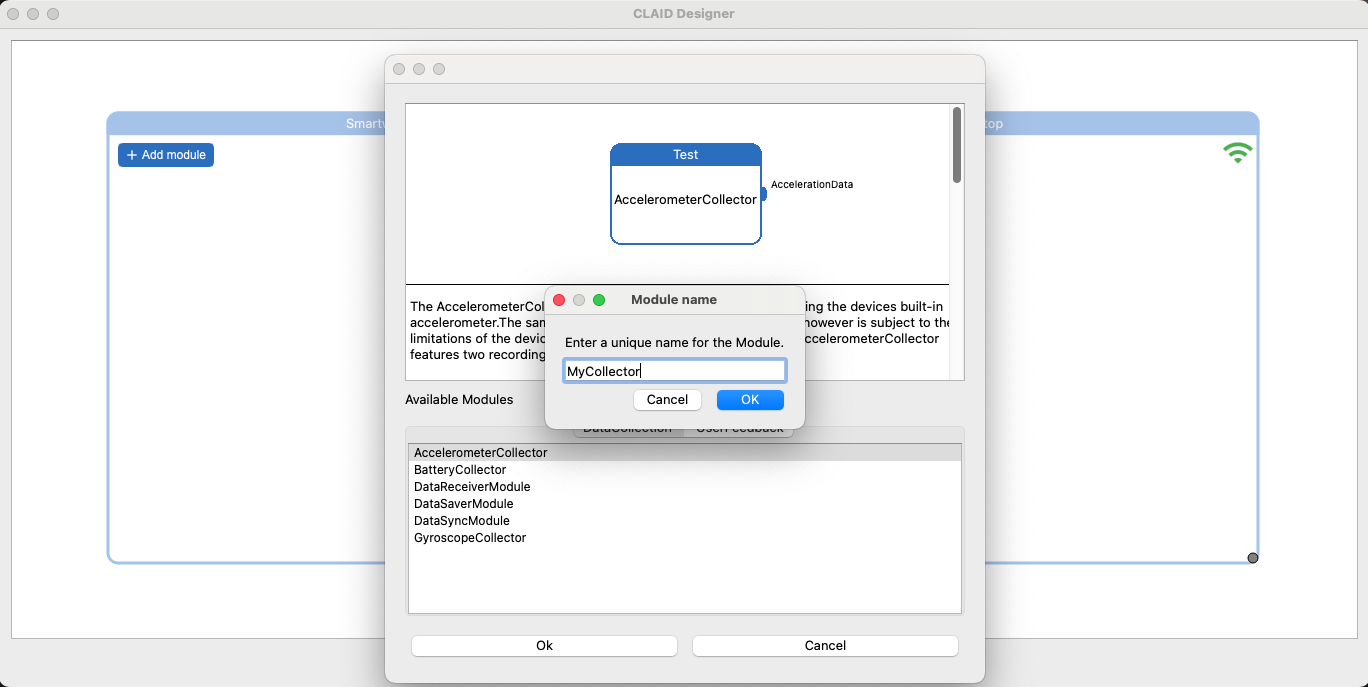
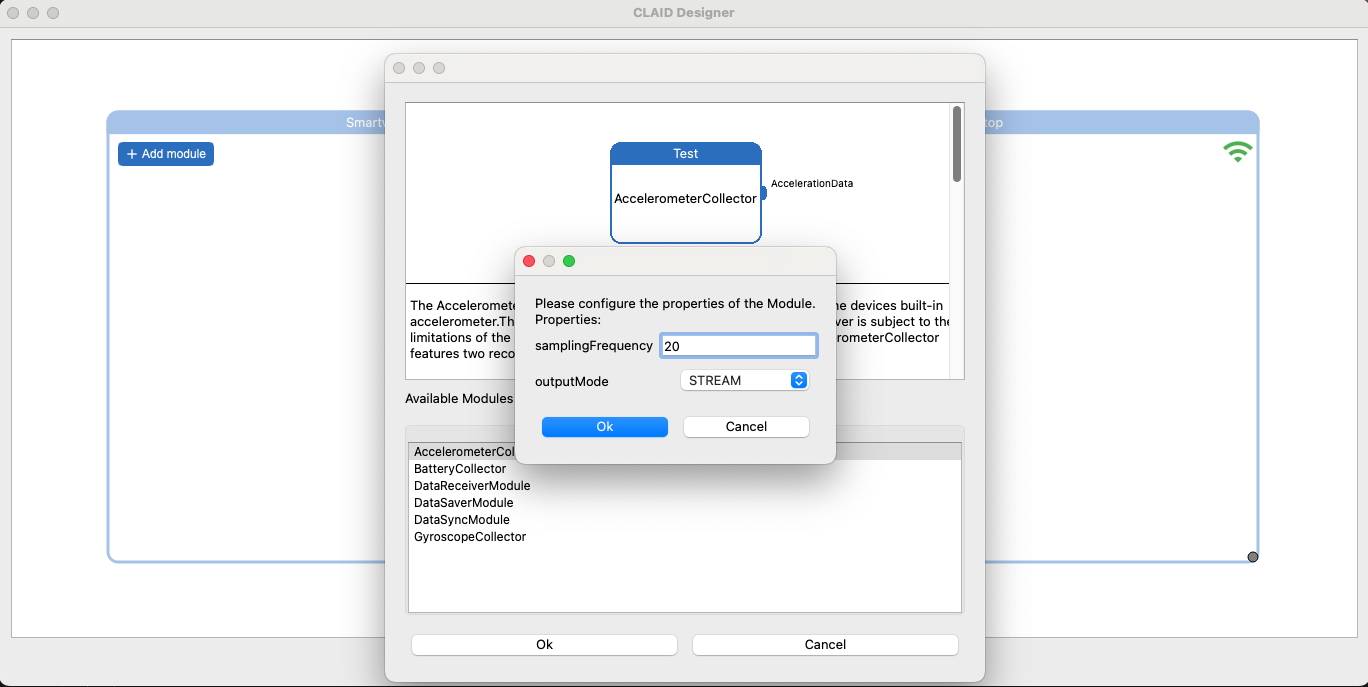
The AccelerometerCollector has some properties that you can configure:
- samplingFrequency: The sampling rate for the Accelerometer, a value between [1, 200]. You may choose any value you like, however if you want to plot the data in realtime, we recommend not to go above 20 for now (CLAID can output higher rates with ease in realtime, however the plotting might actually not be as fast).
- outputMode: Specifies how the Smartwatch will send data:
- STREAM: Each individually recorded sample will be send as soon as it was collected. E.g., if you select 20Hz, 20 individual samples will be send out each second. Best for realtime scenarios.
- BATCHED: Data of one second is aggregated and will be send once enough samples have arrived. If you select 20Hz, then every second 20 samples will be send at once. This is more efficient, however you only receive data with a 1 second delay.
For now, we recommend you to choose 20 for the samplingFrequency, and STREAM as outputMode. Once you are done, click "Ok".
Once you have the AccelerometerCollector added to the Smartwatch, you can connect it to an AccelerationView on the Laptop. Follow the steps below to add the AccelerationView and connect it to the AccelerometerCollector:
Task: Steps to add the AccelerationView on the Laptop
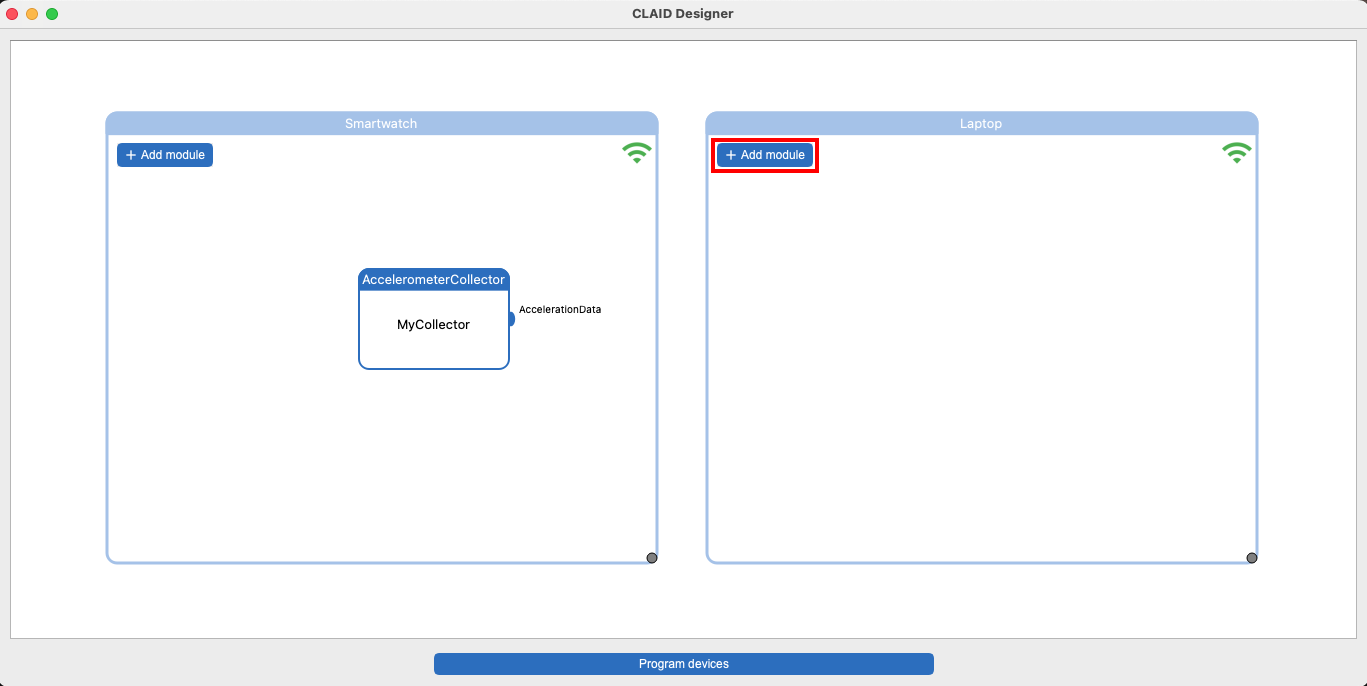
In the CLAID Designer, click "add Module" on the Laptop:
In the ModuleCatalog, choose the AccelerationView and click "OK":
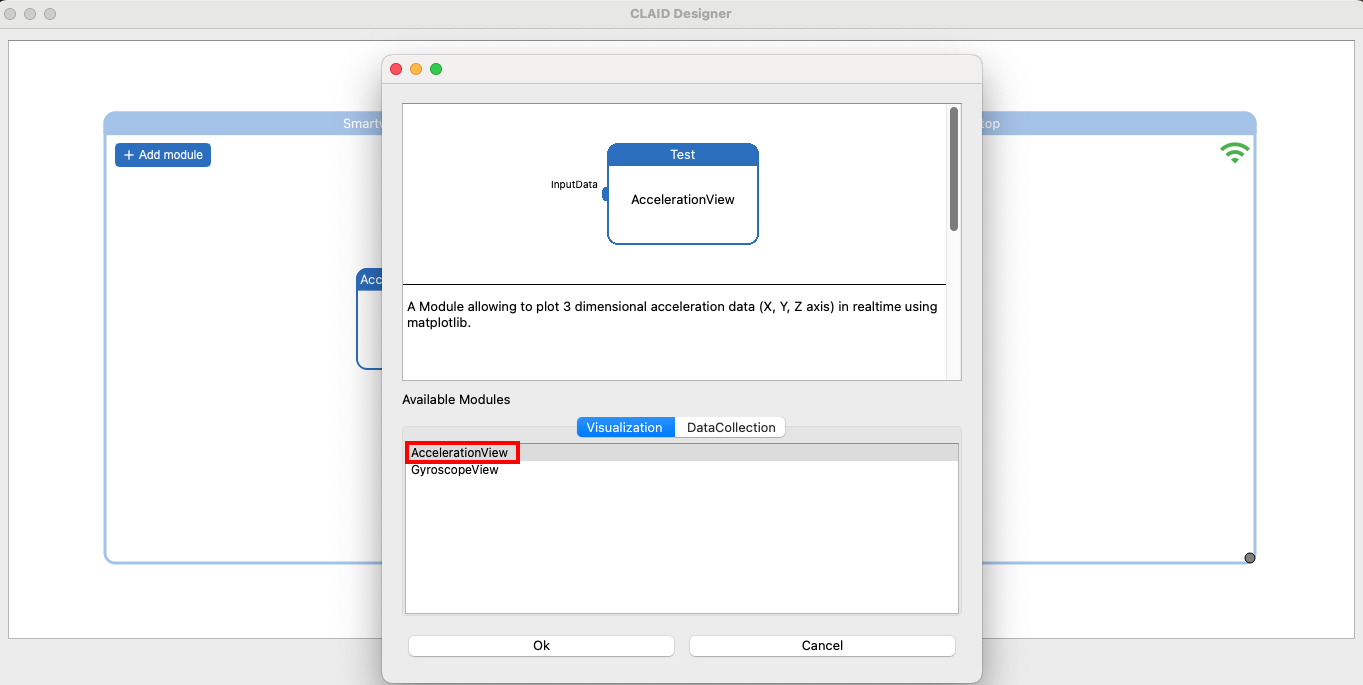
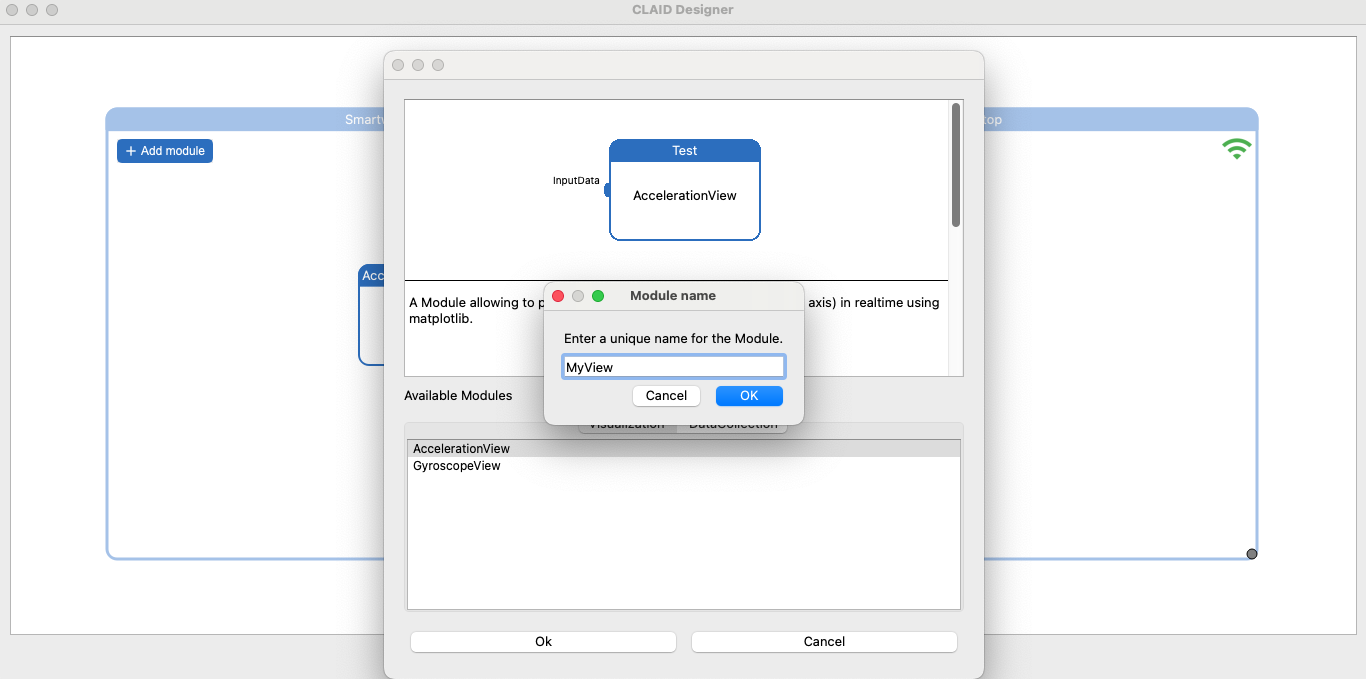
Enter a name for the AccelerationView. Choose whatever name you like, it just needs to be unique across all Modules.
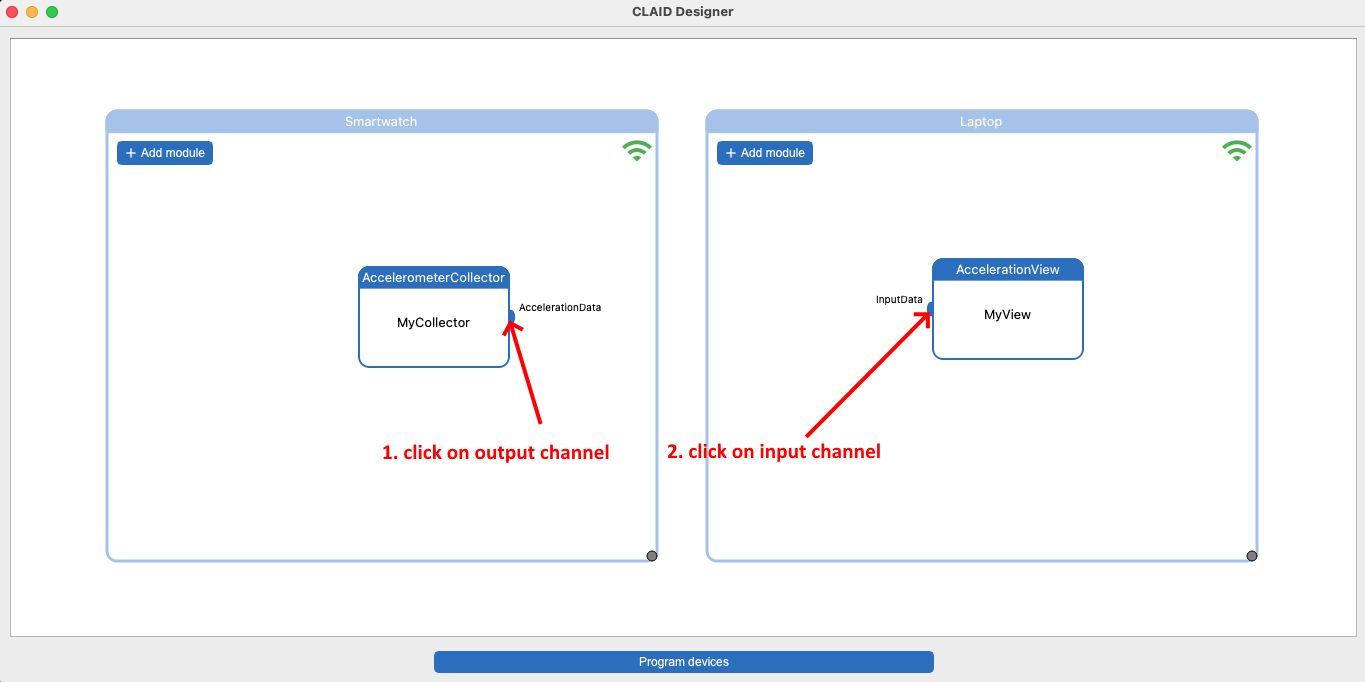
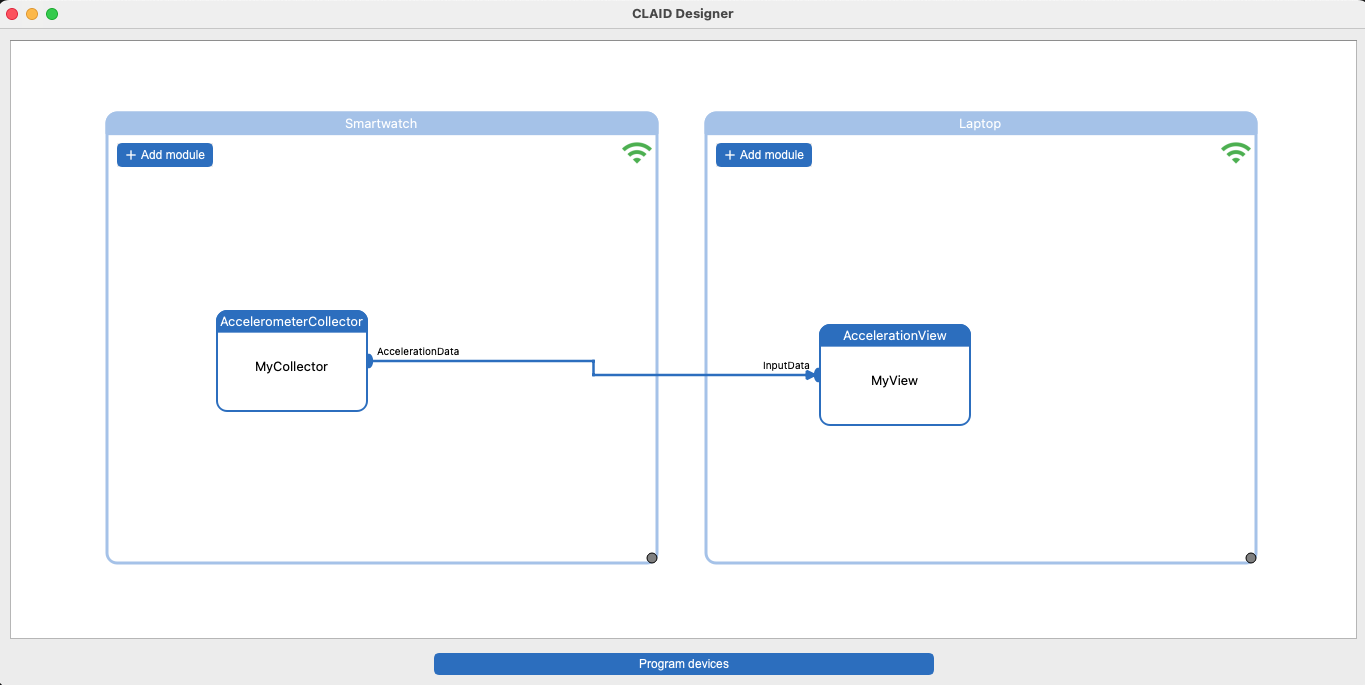
You should now have the AccelerometerCollector Module on the Smartwatch, and the AccelerationView Module on the Laptop. To connect the two, follow the instructions below:
Task: Steps to connect the AccelerometerCollector and the AccelerationView
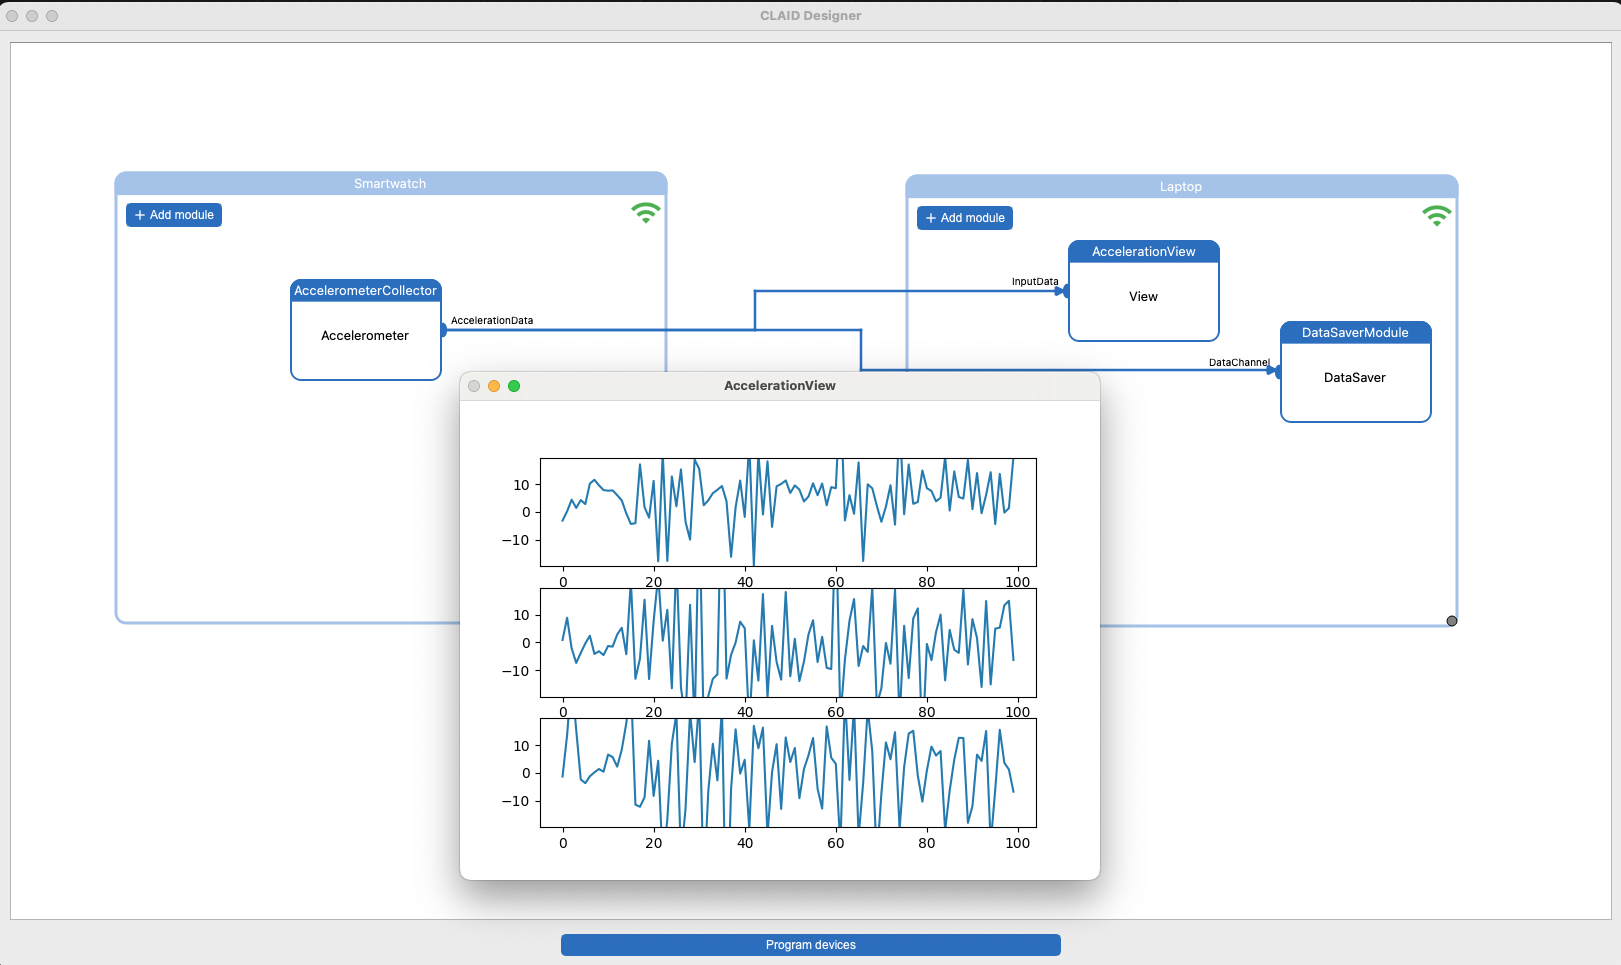
To connect the two Modules, you have to connect the output Channel of the AccelerometerCollector to the input Channel of the AccelerationView. To do so, first click on the "AccelerationData" Channel, and then on the "InputData" Channel:
The Modules should now be connected.
Saving your progress: Exporting the configuration (optional)
We advise you to save the current state of the configuration in the designer occassionally to a file. This allows you to load your current configuration later, should you exit the designer.
Saving and loading a configuration file
Saving a config
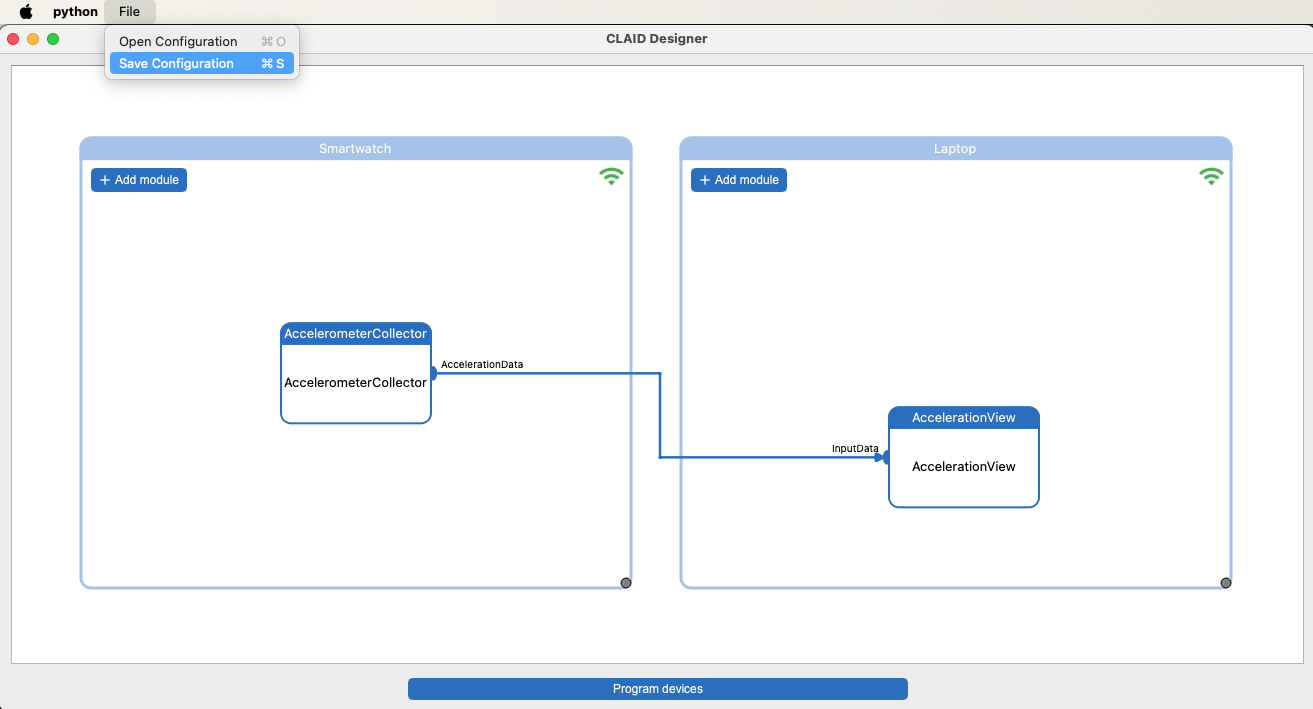
Saving a CLAID config allows you to load it back into the designer later, for example after you restarted it. To save a config, choose "File->Save Configuration" from the menu bar of the CLAID designer:
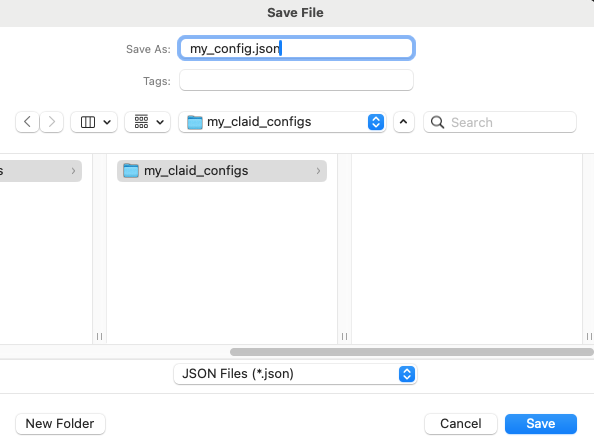
Choose a storage location and a name for your configuration file, e.g., "my_config.json". Afterward click "save":
Loading a config
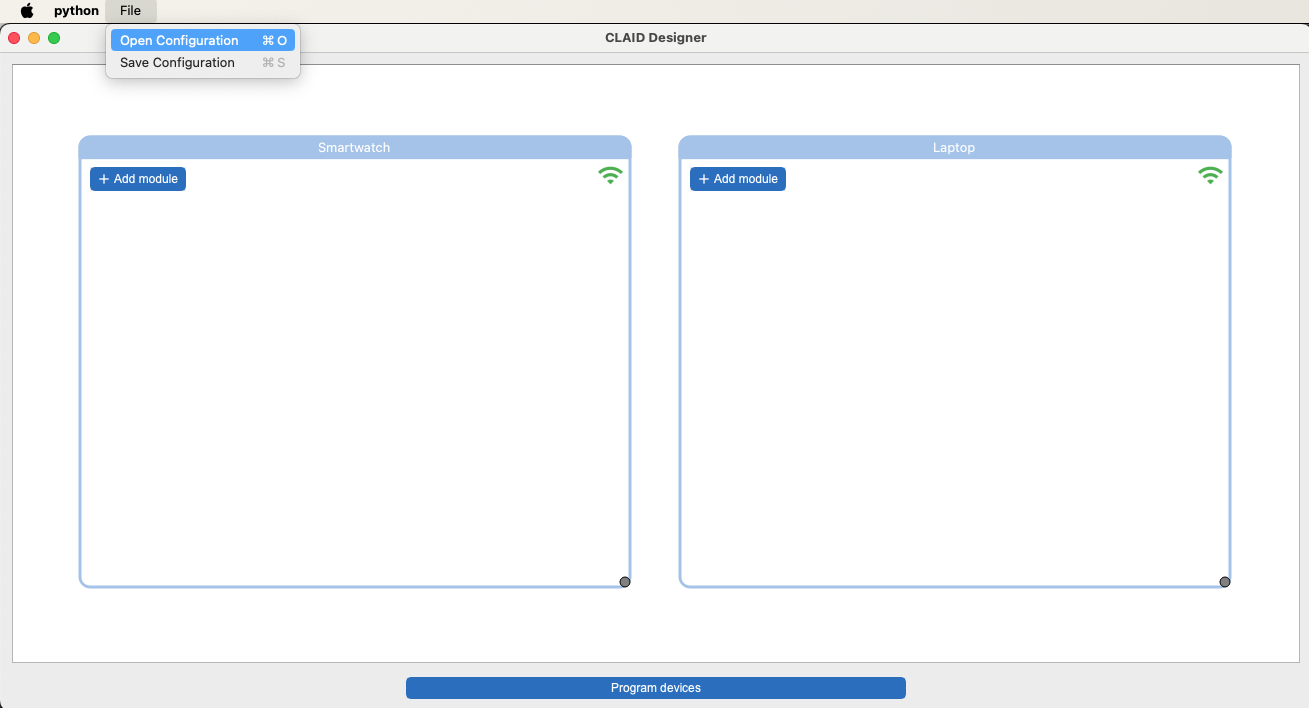
Before you load a config, please make sure that the smartwatch is connected. To load a config, choose "File->Open Configuration" from the menu bar:
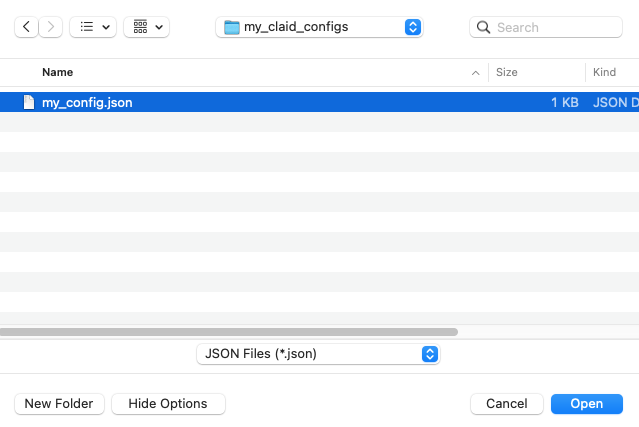
From the file menu, choose the config you stored previously. Afterward, click "Open".
Programming the devices
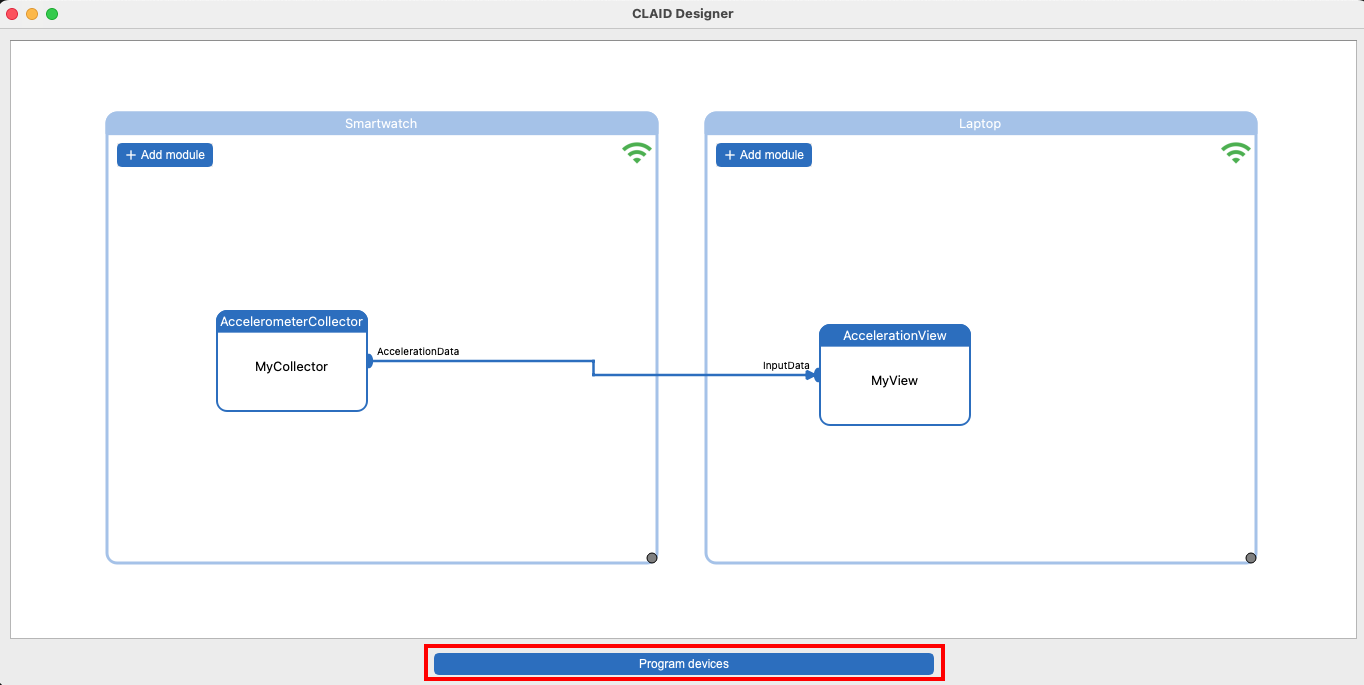
You now have created a CLAID configuration in the CLAID Designer. You can now upload and apply this configuration using the program devices button:
Task: Steps to reconfigure the devices
Confirm by clicking "Yes":
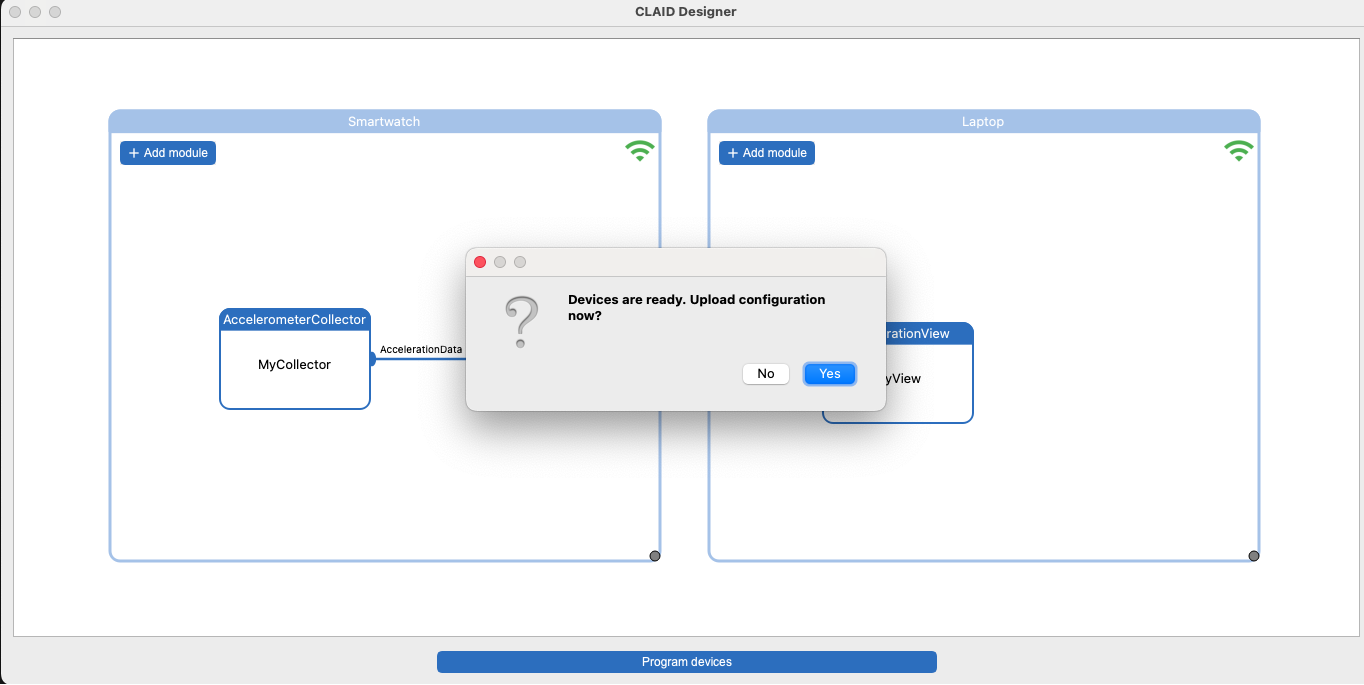
The configuration will now be uploaded to both, the Laptop as well as the Smartwatch. After a few seconds, you should see a plot opening showing realtime data from the Smartwatch. Please allow up to 10 seconds for CLAID to reconfigure itself and for data to come in.
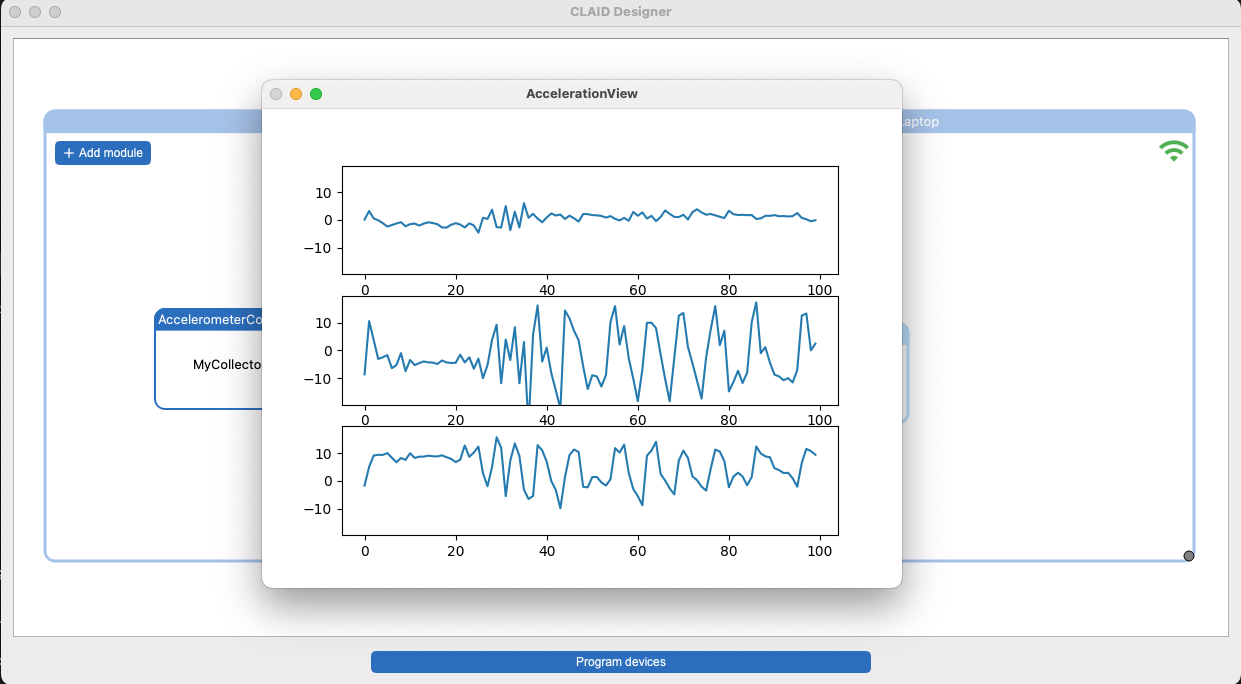
Congrats! You know now how to livestream data with CLAID. Feel free to play around with the other Collector and View Modules. Please note, that the bottleneck for livestreaming data is actually the Visualization of data with Matplotlib in the ViewModules. If you add too many Views and/or set the sampling rate too high, you will see that the Views are not able to plot all data in time. In that case, you can change the outputMode to "BATCHED" for the collectors, so that the view is updated less frequently.
Task: Recording data
Typically during Digital Biomarker studies, we want to reliably record longitudinal data over multiple days. With CLAID, you simply can put together the DataCollection Modules that you want to use, and store their data in the standardized Open mHealth format. Let's continue where we have left off in the previous section, and add a DataSaverModule to record data collected by the AccelerometerCollector:
Task: Steps to add and connect DataSaverModule
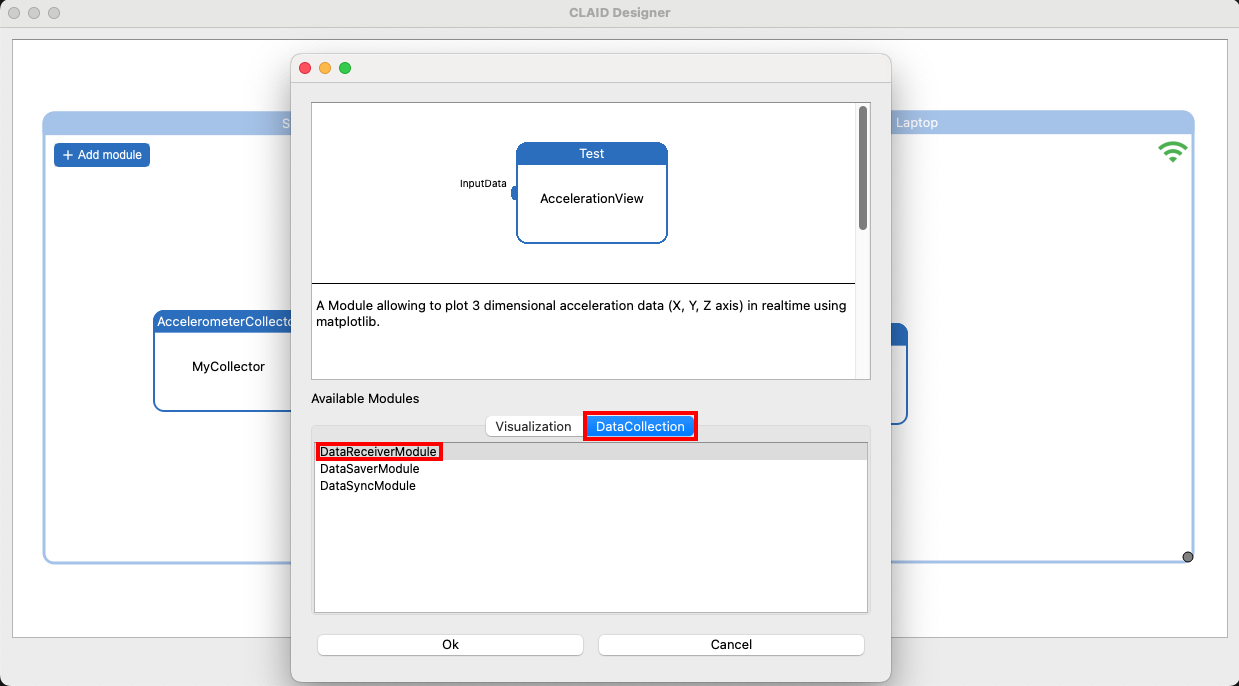
Open the ModuleCatalog on the Laptop and select the DataSaverModule (mind to switch to the "DataCollection" tab).
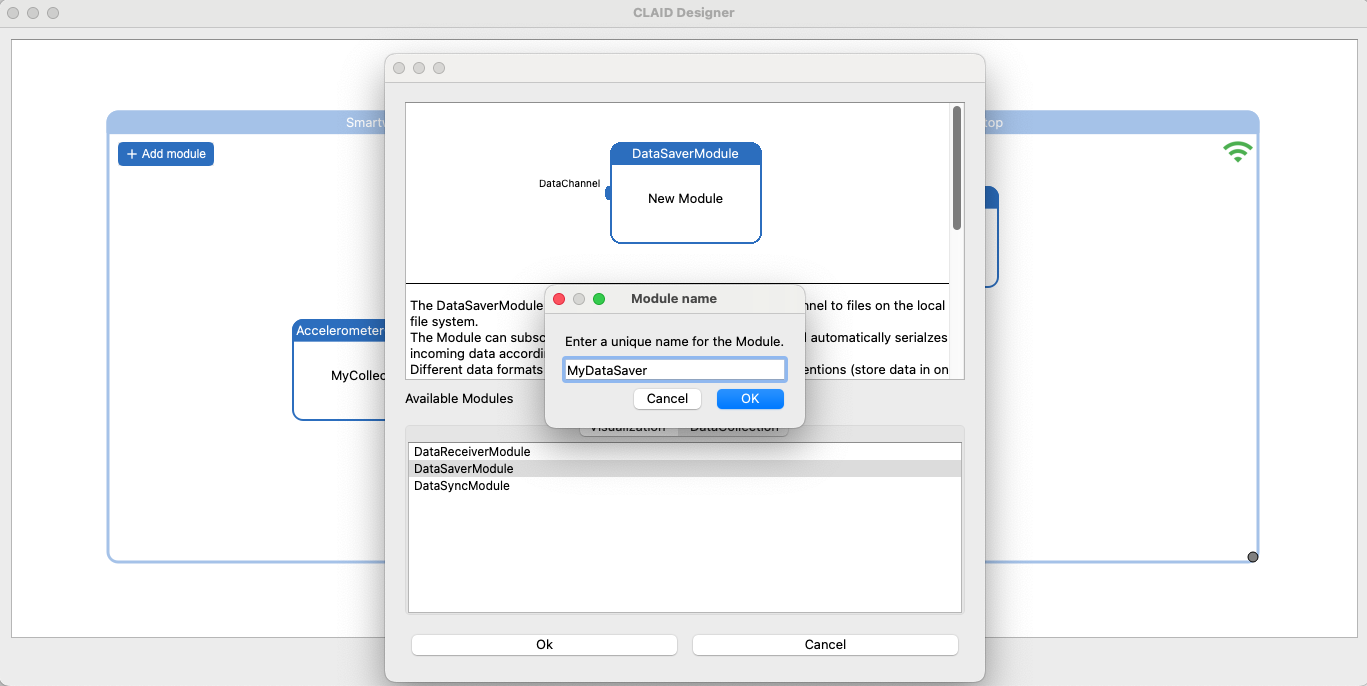
As always, choose a unique name for the DataSaverModule
On the properties page for the DataSavermodule, you can specify how data shall be stored. The following properties are available (see example on next page)
- storagePath: Path to store the data. This will be a path on your Laptop. By clicking on the three "..." on the right side, you can select a directory using a separate window.
- fileNameFormat: Specifies how individual files shall be named. You can use strftime identifiers to automatically name individual files based on the time they were recorded. See a concrete example on the next tab.
- fileType: Select the data type for the data. Common data types are json and binary. Note that the DataSaverModule can serialize data for any Module. For collectors, data is typically stored in the Open mHealth format, if you choose JSON. Some file types are only available for certain data types (e.g., PNG for images or MP3 for Audi).
- overrideExistingFiles: If set to true, the DataSaverModule overrides files with the same name based on the fileNameFormat, if they exist.
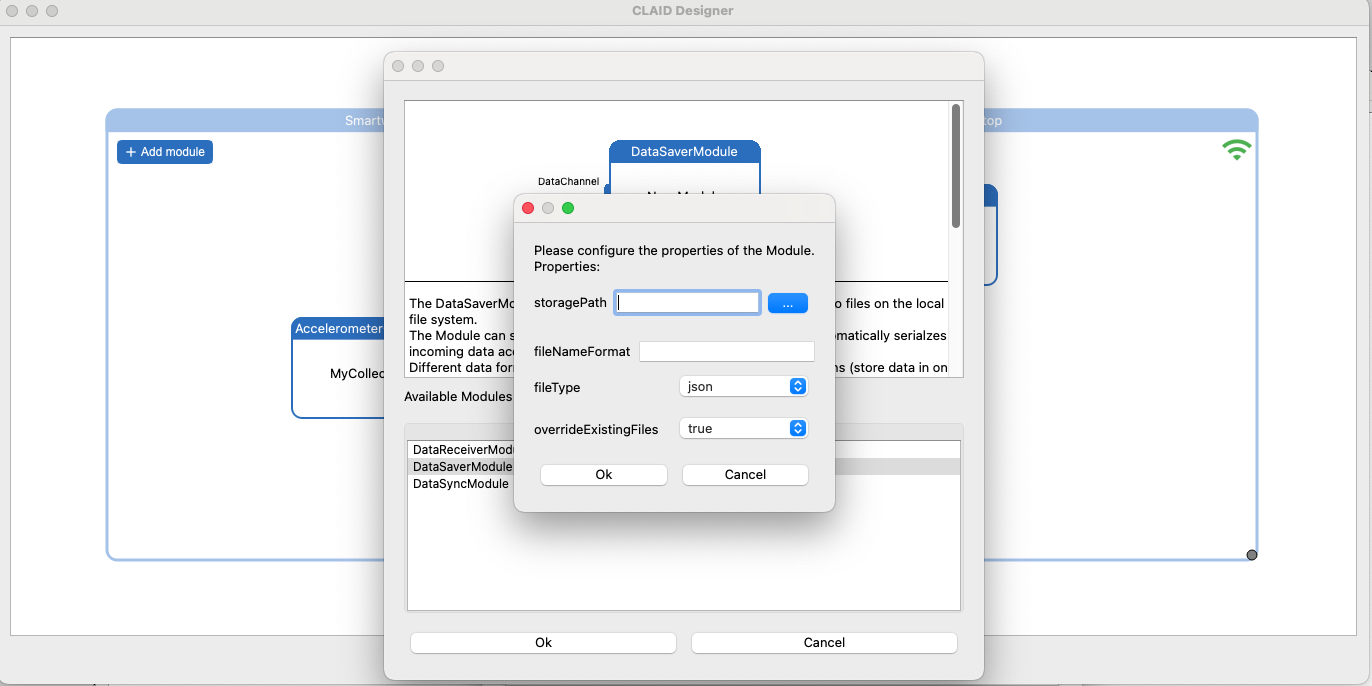
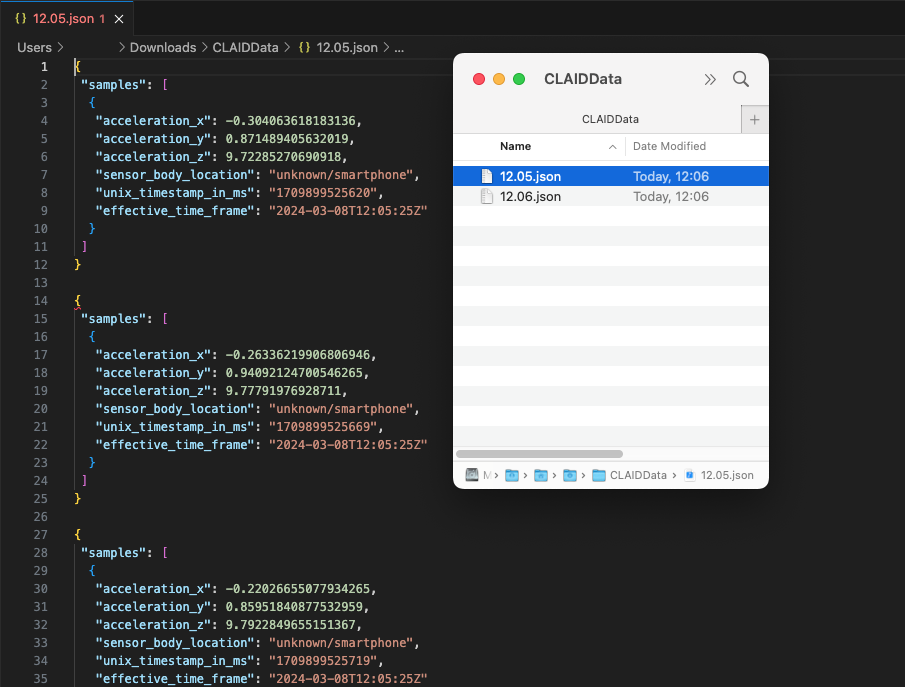
As an example, you may choose the following properties. Note that for the fileNameFormat, we recommend using "%H.%M.json". This will store files in the format "HOUR.MINUTE.json". For example, data recorded from 12:05:00 to 12:05:59 would be stored in a file "12.5.json".
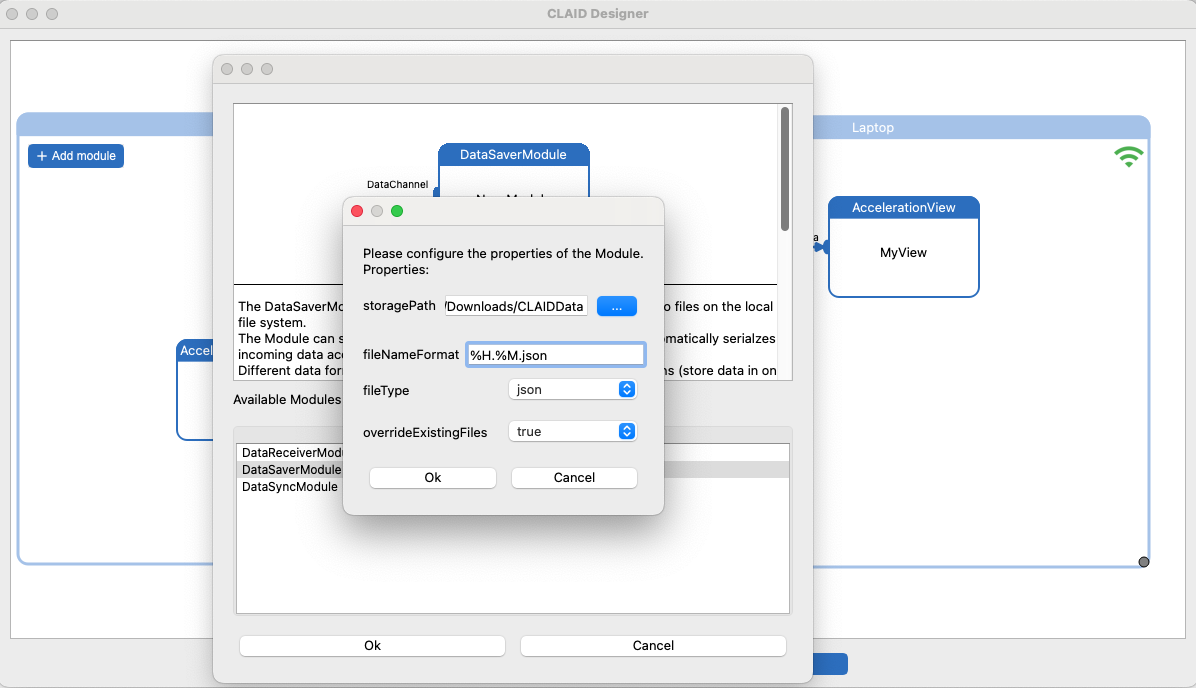
Connect the DataSaverModule to the AccelerometerCollector. To do so, first click on the "AccelerationData" channel of the AccelerometerCollector, and then on the "DataChannel" of the DataSaverModule.
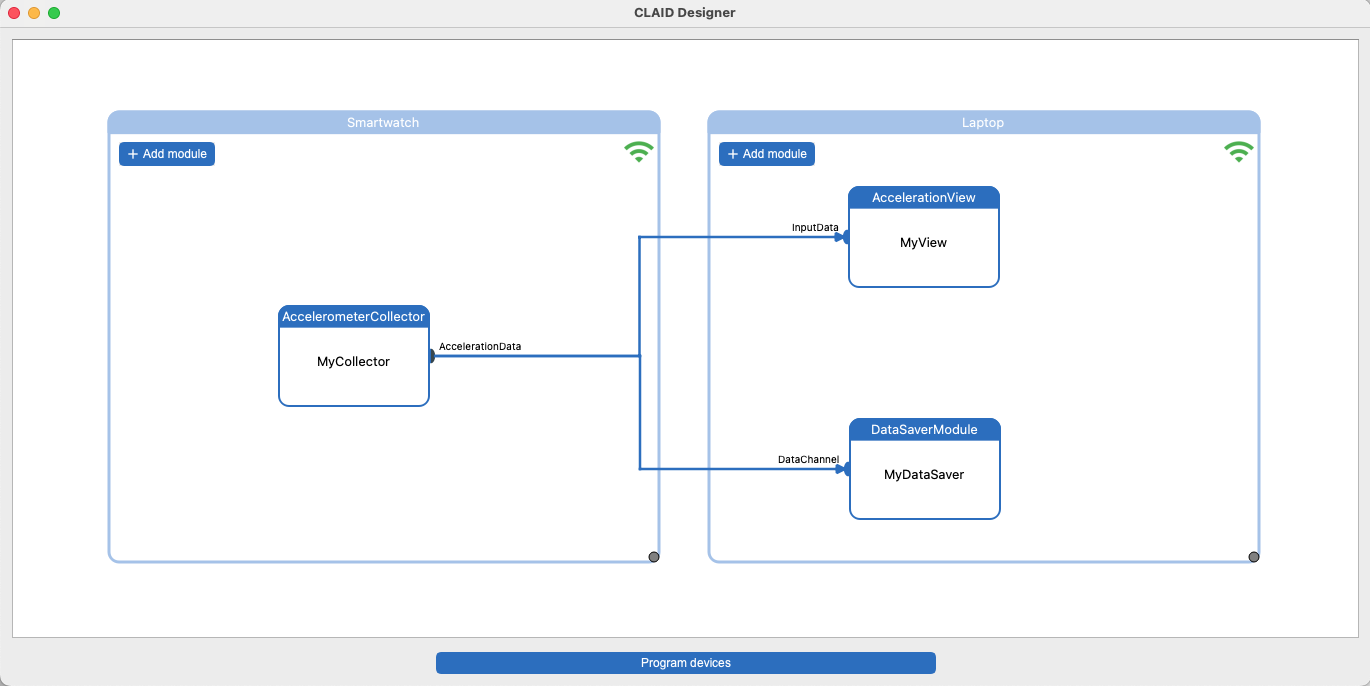
Once you are done, hit program devices to upload the new configuration! If you still have the AccelerationView connected, you should see it reopen after a short while. Additionally, if you open the folder that you specified as storagePath for the DataSaverModule, you should see data coming in as separate files:
This concludes part 2 of the CLAID Workshop @ EMBC 2024.
On stability and reliability of Data Collection with CLAID
DataCollection on mobile devices is by far not as trivial as it may sound. As outlined in our paper, mobile operating systems like Android, WearOS and iOS impose major limitations on running applications indefinitely. We spent countless hours on optimizing stability and mitigate the risks of data loss. CLAID implements best practices for long-running applications on Android and WearOS and offers advanced device management features, allowing to prevent users from terminating the App, enable or disable Wifi networks without user intervention, and more.