CLAID EMBC2024 - Part 3: Data processing - Live Processing Data from the Smartwatch in Python
In part 2, you have learned have you can livestream and record data with CLAID using existing Modules. The Modules you used are all precreated by us and available in CLAID. It is now the time to add your own Modules to process data from the Smartwatch.
Objective for Part 3
During Part 3, you will learn how to create and run your own Modules to analyze data from the Smartwatch, which you can use to provide information to the user via text or speech.

Task: Creating a new CLAID Module
Creating a new Module with CLAID requires three steps: 1. Creating a new Python file for the Module. One file should contain one CLAID Module. 2. Creating a class for your Module, which inherits from the CLAID base class. 3. Annotating the Module, so that it can be seen in the CLAID Designer.
1. Creating a new Python file for the Module
Check out the instructions below to add a new file for your Module.
Task: Creating a new PythonModule
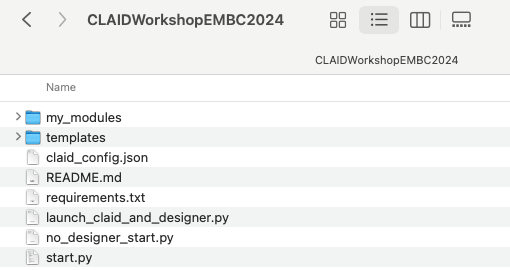
During Part 1, you have cloned the CLAIDWorkshopEMBC2024 project, which you are using to run the CLAID Designer. This folder has the following contents:

For the workshop, we set it up so that all Modules contained in the folder "my_modules" are automatically included. If you check out the folder, you can see the following files:

Please create a new Python file for it, e.g., "MyModule.py" (make sure the file name ends on .py, otherwise CLAID will not recognize it later):

2. Creating a new class for your Module
Open the file you just created (i.e., "MyModule.py") with a text editor of your choice. You can now start implementing your own Module. A simple CLAID PythonModule looks as follows:
Task: Implementing a basic CLAID Module in Python
Step-by-step explanation of the Code
To create your own Modules, you need to create a class which inherits from the CLAID Module base class. The base class is included using the following line:
Next, we create a class "MyModule" which inherits from Module. MyModule is the name your new Python Module, which you can later see in the ModuleCatalog.
When your Module is created, you need to make sure that it calls the super constructor during the init constructor. This makes sure that your Module inherits all properties of the base class (Module):
Once CLAID loads your Module at runtime (e.g., after you added it in the CLAID Designer from the ModuleCatalog and you program the devices), CLAID will initialize the Module by calling the initialize function. The initialize function is always called during startup of the Module and it receives a parameter "properties", which is a dict (a map) containing the specified properties for that Module (e.g., as specified from the CLAID Designer). By default, properties are strings. However, you can cast them to other data types liker number (int) or floating point numbers (float, double).
Note, that you can add arbitrary properties in the initialize function. In the code above, we set a property "my_property" as an example. A property can be defined later in the CLAID Designer. Important: The Name of the Module as shown in the ModuleCatalog is the name of the class in the code above (NOT the name of file).
3. Annotating the Module
Normally, the code above would be enough to create your Module and use it with CLAID. However, since we are using the CLAID Designer during this workshop, there is one more step to do: Annotating the Module. The Annotation describes to the CLAID Designer which category this Module belongs to, what properties it expects and what Channels it has.
Task: Annotating the Module
from claid.module import Module
class MyModule(Module):
# Constructor of the class.
def __init__(self):
    super().__init__()
def initialize(self, properties):
    self.my_property = int(properties["my_property"])
@staticmethod
def annotate_module(annotator):
annotator.set_module_category("Custom") # Could be anything like Visualization, Feedback, DataCollection, ..
annotator.set_module_description("A custom Module created for EMBC 2024.")
# Make sure properties are called EXACTLY the same as in initialize function.
annotator.describe_property("my_property", "An example property.")
Step-by-step explanation of the Code
To create your own Modules, you need to create a class which inherits from the CLAID Module base class. The base class is included using the following line:
Next, we create a class "MyModule" which inherits from Module. MyModule is the name your new Python Module, which you can later see in the ModuleCatalog.
When your Module is created, you need to make sure that it calls the super constructor during the init constructor. This makes sure that your Module inherits all properties of the base class (Module):
Once CLAID loads your Module at runtime (e.g., after you added it in the CLAID Designer from the ModuleCatalog and you program the devices), CLAID will initialize the Module by calling the initialize function. The initialize function is always called during startup of the Module and it receives a parameter "properties", which is a dict (a map) containing the specified properties for that Module (e.g., as specified from the CLAID Designer). By default, properties are strings. However, you can cast them to other data types liker number (int) or floating point numbers (float, double).
To use your Module with the CLAID Designer, you need to annotate it. An Annotation describes the Module and specifies Channels and properties. To create the annotation, you have to create a static function called "annotate_module". This function receives as parameter an object of type "ModuleAnnotator". The annotator has functions to describe the module, it's category, description, which will be visible from the ModuleCatalog (note, that we will cover how to describe channels in the next section).
@staticmethod
def annotate_module(annotator):
annotator.set_module_category("Custom") # Could be anything like Visualization, Feedback, DataCollection, ..
annotator.set_module_description("A custom Module created for EMBC 2024.")
# Make sure properties are called EXACTLY the same as in initialize function.
annotator.describe_property("my_property", "An example property.")
Once you are done adding the code and annotating the Module (feel free tho choose any category and provide a description as you like), you can restart the CLAID Designer. Note, that any changes you make to the code of your Module requires to restart the CLAID Designer to reload the changes! Always restart the CLAID Designer after you made changes to your Module, otherwise the changes will not take effect.
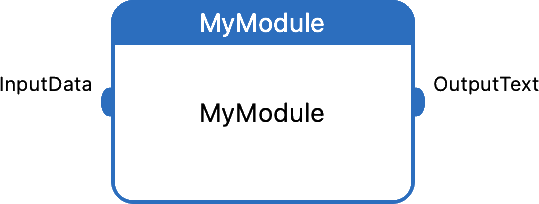
If you reopen the CLAID Designer, you should be able to see your Module from the ModuleCatalog on the Laptop:

Task: Live-processing Acceleration Data
Once you have created a basic Module, it is time to let it do some actual work.
Since you are already familiar with the AccelerometerCollector, we will use data produced by the AccelerometerCollector Module as an example to perform some calculations in our own Module. Let's create Module which takes in the Accelerometer and outputs "moving" or "not moving", based on the mean magnitude of previous data. This would mean our Module has one input and one output. The input would be the AccelerationData, and the output would be a string.

The code for this Module could look something like this:
Task: Creating a Module to process AccelerationData
from claid.module import Module
from claid.dispatch.proto.sensor_data_types_pb2 import *
from claid.dispatch.proto.claidservice_pb2 import *
import numpy as np
import time
class MyModule(Module):
# Constructor of the class.
def __init__(self):
    super().__init__()
# Called by CLAID when an instance of the Module is loaded.
def initialize(self, properties):
# Get threshold from the properties
self.threshold = float(properties["threshold"])
# Publish and subscribe channels
self.input_channel = self.subscribe("InputChannel", AccelerationData(), self.on_data)
self.output_channel = self.publish("OutputChannel", str())
self.samples_x = []
self.samples_y = []
self.samples_z = []
# This function is called whenever new data is received from the Smartwatch.
def on_data(self, data):
acceleration_data = data.get_data()
for sample in acceleration_data.samples:
self.samples_x.append(sample.acceleration_x)
self.samples_y.append(sample.acceleration_y)
self.samples_z.append(sample.acceleration_z)
# Only execute if we have enough samples (e.g., 20Hz -> 1 second)
if len(self.samples_x) < 20:
return
magnitude = np.sqrt(np.array(self.samples_x)**2 + \
np.array(self.samples_y)**2 + \
np.array(self.samples_z)**2)
magnitude_mean = np.mean(magnitude)
if magnitude_mean > self.threshold:
self.output_channel.post("Moving")
else:
self.output_channel.post("Not moving")
self.samples_x.clear()
self.samples_y.clear()
self.samples_z.clear()
@staticmethod
def annotate_module(annotator):
annotator.set_module_category("Custom") # Could be anything like Visualization, Feedback, DataCollection, ..
annotator.set_module_description("A Module which takes in AccelerationData and outputs a string saying \"moving\" or \"not-moving\".")
# Make sure properties are called EXACTLY the same as in initialize function.
annotator.describe_property("threshold", "A threshold value to determine whether the person is moving or not.")
annotator.describe_subscribe_channel("InputChannel", AccelerationData(), "Channel to receive AccelerationData")
annotator.describe_publish_channel("OutputChannel", str(), "Channel with output result")
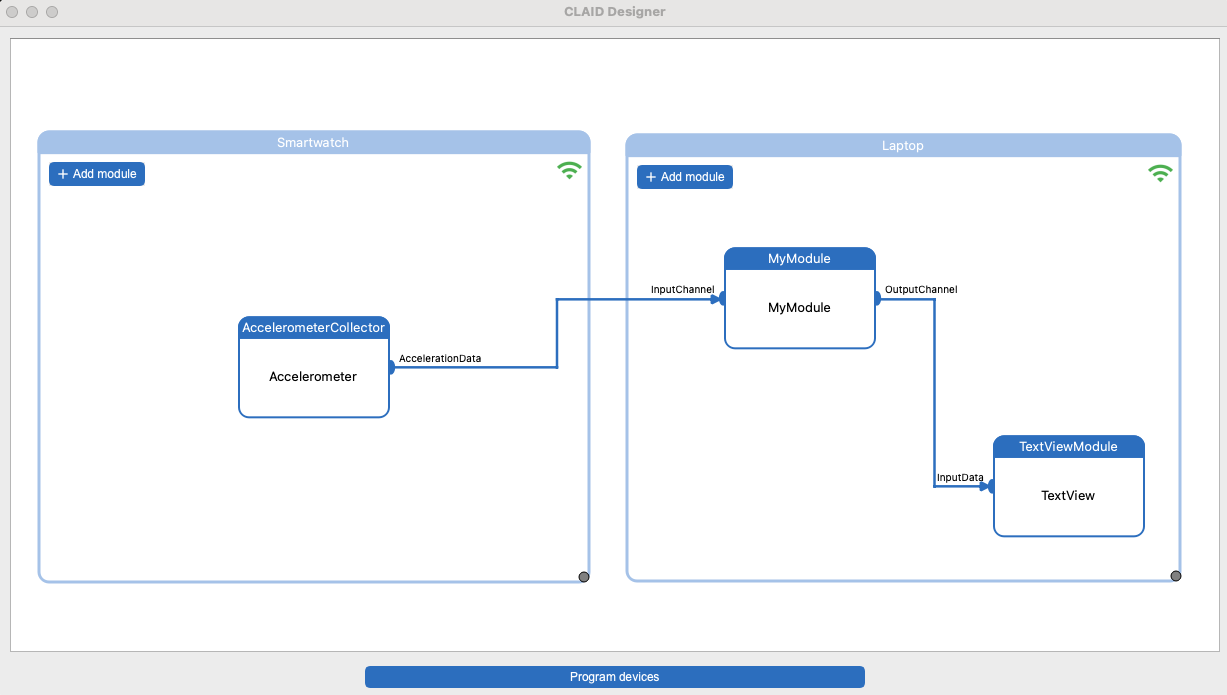
In the code above, we create a simple Module which takes in Acceleration data and outputs a string. It judges whether a person is moving or not based on a threshold, which is specified as property (hence, it can be set via the CLAID Designer). Make sure that the property in the initialize function is called exactly the same as in the annotate_module function. As you can see, both in the initialize function and in the annotate_module function, we specify the data types AccelerationData() for the input channel and str() (String) for the output Channel. Whenever you define a Module which subscribes/publishes a Channel, you explicitly have to specify the data types. You can now go ahead and add the Module from the ModuleCatalog. To visualize the output, you can use the "TextViewModule":
Task: Add the Module from the ModuleCatalog
Go ahead and add your Module from the ModuleCatalog on the Laptop. Connect it to the AccelerometerCollector. To visualize the output of the Module, you can use the TextViewModule which you find in the "Custom" tab in the ModuleCatalog on the Laptop.
Important: A good threshold for the Module is 15 to distinguish moving and not moving.

If you use the TextViewModule, a window should open displaying the text output of your Module:

Task: Get creative!
For the remainder of Part 3, we would like you to get a little creative! Adopt your own Module in Python, which uses one or more of the available sensor data from the smartwatch (e.g., acceleration, gyroscope and/or heart rate data) to deliver an intervention via the Smartwatch. For example, you could do a Module which takes in acceleration data and outputs a sound, text or speech when it takes movements (or the lack of movement). Another idea would be to take the HeartRateModule and use the OFF_BODY status of the HeartRateStatus data type, to detect when you put on or off your Smartwatch. We provide some "UserFeedback" Modules you can use from the ModuleCatalog:
UserFeedback Modules
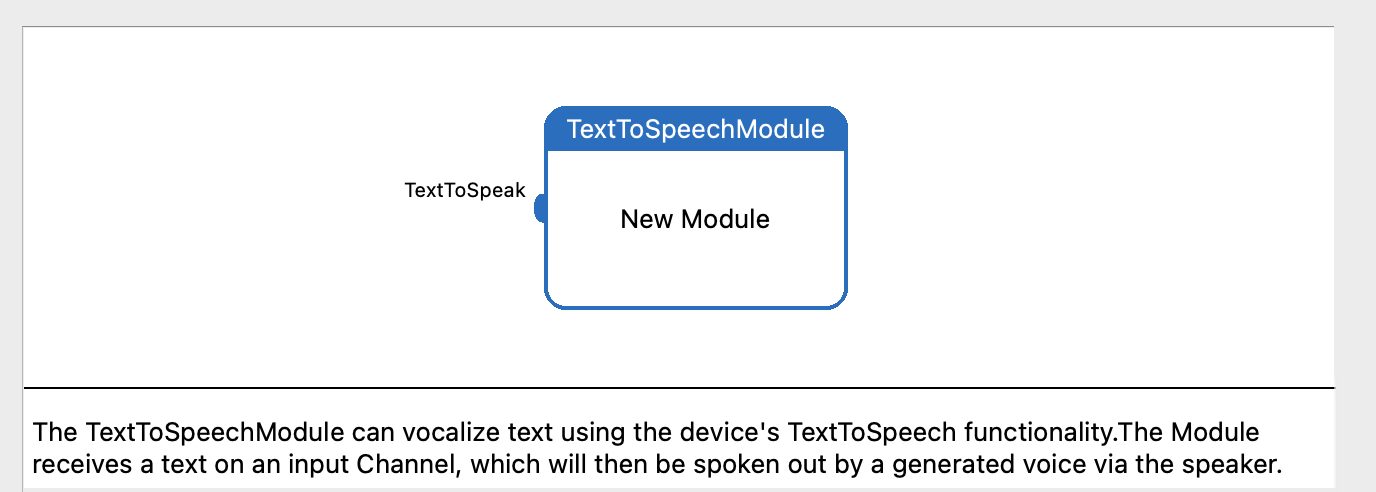
The TextToSpeechModule will vocalize any text (string) it receives via it's InputChannel using the text to speech engine.

The NotificationModule will display any text (string) it receives via it's InputChannel as notification to the user.

Additional information (fyi): The CLAID Module API
This section is only for your information and covers some background knowledge of CLAID and it's API. If you are interested further in what you can do with CLAID Modules, we would like to introduce you to the CLAID Module API, parts of which you already have used in the sections before. CLAID offers API bindings for Python, Java, Dart, C++ and Objective-C++. Our goal is to provide a simple, yet powerful API, that works uniformly across all supported languages and operating systems, without that you have to deal with specific characteristics of the different operating systems.
API Overview
The following mechanisms are available within the CLAID API:
CLAID Module API (click to expand)
class Module:
    # Called by CLAID when the Module is loaded, contains values for properties set in the designer or config file.
    void initialize(properties: dict)
    # Allows to publish Channels (output Channels)
    def publish(channel_name: str, data_type: Any)
    # Allows to subscribe Channels (input Channels)
    def subscribe(channel_name: str, data_type: Any, callback: function)

    # Allows to register functions to be executed periodically in a certain interval.
    def register_periodic_function(function_name: str, function: function, period: time_delta)
    # Allows to register functions to be executed ONCE at an EXACT time.
    def register_scheduled_function(function_name: str, function: function, when: datetime)
    # Unregisters a previously registered periodic function
    def unregister_periodic_function(function_name: str)
    # Unregisters a previously registered scheduled function
    def unregister_scheduled_function(function_name: str)

    # Tells the CLAID middleware that a fatal error occured and that the execution of the App cannot continue.
    def module_fatal(message: str)
    # Tell sthe CLAID middleware that an error occured. The Module will be suspended, other Modules will continue to work.
    def module_error(message: str)
    # Tells the CLAID middleware that an error occured. All Modules will continue to run.
    def module_warning(message: str)
    # To print information and debug messages.
    def module_info(message: str)

    # Allows to annotate the Module so that it can be accessed via the ModuleCatalog in the CLAIDDesigner.
    def annotate_module(annotator):
abstract class Module
{
    // Called by CLAID when the Module is loaded, contains values for properties set in the designer or config file.
    void initialize(Map<String, String> properties)
    // Allows to publish Channels (output Channels)
    <T> Channel<T> publish(String channelName, Class<T> dataType)
    // Allows to subscribe Channels (input Channels)
    <T> Channel<T> subscribe(String channelName, Class<T> dataType, Consumer<T> callback)

    // Allows to register functions to be executed periodically in a certain interval.
    void registerPeriodicFunction(String functionName, Runnable function, Duration period)
    // Allows to register functions to be executed ONCE at an EXACT time.
    void registerScheduledFunction(String functionName, Runnable function, LocalDateTime dateTime)
    // Unregisters a previously registered periodic function
    void unregisterPeriodicFunction(String functionName)
    // Unregisters a previously registered scheduled function
    void unregisterScheduledFunction(String functionName)

    // Tells the CLAID middleware that a fatal error occured and that the execution of the App cannot continue.
    void moduleFatal(String msg)
    // Tell sthe CLAID middleware that an error occured. The Module will be suspended, other Modules will continue to work.
    void moduleError(String msg)
    // Tells the CLAID middleware that an error occured. All Modules will continue to run.
    void moduleWarning(String msg)
    // To print information and debug messages.
    void moduleInfo(String msg)

    // Allows to annotate the Module so that it can be accessed via the ModuleCatalog in the CLAIDDesigner.
    void annotateModule(ModuleAnnotator annotator):
}
abstract class Module
{
    // Called by CLAID when the Module is loaded, contains values for properties set in the designer or config file.
    void initialize(Map<String, String> properties);
    // Allows to publish Channels (output Channels)
    Channel<T> publish<T>(String channelName, Type dataType);
    // Allows to subscribe Channels (input Channels)
    Channel<T> subscribe<T>(String channelName, Type dataType, void Function(T) callback);

    // Allows to register functions to be executed periodically in a certain interval.
    void registerPeriodicFunction(String functionName, void Function() function, Duration period);
    // Allows to register functions to be executed ONCE at an EXACT time.
    void registerScheduledFunction(String functionName, void Function() function, DateTime dateTime);
    // Unregisters a previously registered periodic function
    void unregisterPeriodicFunction(String functionName);
    // Unregisters a previously registered scheduled function
    void unregisterScheduledFunction(String functionName);

    // Tells the CLAID middleware that a fatal error occurred and that the execution of the App cannot continue.
    void moduleFatal(String msg);
    // Tell sthe CLAID middleware that an error occurred. The Module will be suspended, other Modules will continue to work.
    void moduleError(String msg);
    // Tells the CLAID middleware that an error occurred. All Modules will continue to run.
    void moduleWarning(String msg);
    // To print information and debug messages.
    void moduleInfo(String msg);

    // Allows to annotate the Module so that it can be accessed via the ModuleCatalog in the CLAIDDesigner.
    void annotateModule(ModuleAnnotator annotator);
}
class Module
{
    // Called by CLAID when the Module is loaded, contains values for properties set in the designer or config file.
    virtual void initialize(std::map<std::string, std::string> properties) = 0;
    // Allows to publish Channels (output Channels)
    template <typename T>
    Channel<T> publish(std::string channelName, Class<T> dataType);
    // Allows to subscribe Channels (input Channels)
    template <typename T>
    Channel<T> subscribe(std::string channelName, Class<T> dataType, std::function<void(T)> callback);

    // Allows to register functions to be executed periodically in a certain interval.
    void registerPeriodicFunction(std::string functionName, std::function<void()> function, std::chrono::duration<int> period);
    // Allows to register functions to be executed ONCE at an EXACT time.
    void registerScheduledFunction(std::string functionName, std::function<void()> function, std::chrono::system_clock::time_point dateTime);
    // Unregisters a previously registered periodic function
    void unregisterPeriodicFunction(std::string functionName);
    // Unregisters a previously registered scheduled function
    void unregisterScheduledFunction(std::string functionName);

    // Tells the CLAID middleware that a fatal error occurred and that the execution of the App cannot continue.
    void moduleFatal(std::string msg);
    // Tell sthe CLAID middleware that an error occurred. The Module will be suspended, other Modules will continue to work.
    void moduleError(std::string msg);
    // Tells the CLAID middleware that an error occurred. All Modules will continue to run.
    void moduleWarning(std::string msg);
    // To print information and debug messages.
    void moduleInfo(std::string msg);

    // Allows to annotate the Module so that it can be accessed via the ModuleCatalog in the CLAIDDesigner.
    virtual void annotateModule(ModuleAnnotator annotator) = 0;
}
By using few API calls, CLAID abstracts most of the complexity of (mobile) Operating Systems. For example, setting up functions to be executed at an exact time is not necessarily straightforward to do on mobile operating systems due to strong battery preseveration mechanisms. With CLAID, all the complexity is managed in the background and functions are automatically scheduled as you request it. It simply works.
Data types
Modules in CLAID in general can pass around any type of data via Channels, from simple texts, lists or arrays to complex data types like Audio, Images or whole input LayerData for machine learning applications. Many pre-existing data types are integrated with the CLAID framework, and you can add data types at any time when you build your own applications with CLAID. For the sake of this workshop, we will however stick to pre-existing datatypes. We consider the following data types to be useful for the workshop:
Relevant data types
The following default data types are supported:
- string
- flaot
- bool
- list[float]
- list[string]
- dict[str:str]
- dict[str:float]
class AccelerationSample:
    acceleration_x: double
    acceleration_y: double
    acceleration_z: double
    unix_timestamp_in_ms: int # Timestamp of data sample in milliseconds since 01.01.1970
    effective_time_frame: str # String representing during what second this sample was recorded, e.g., 24-03-08T12:05:25Z
    sensor_body_location: string # String describing where the sensor was worrn (irrelevant for this workshop)
class GyroscopeSample:
    acceleration_x: double
    acceleration_y: double
    acceleration_z: double
    unix_timestamp_in_ms: int # Timestamp of data sample in milliseconds since 01.01.1970
    effective_time_frame: str # String representing during what second this sample was recorded, e.g., 24-03-08T12:05:25Z
    sensor_body_location: string # String describing where the sensor was worrn (irrelevant for this workshop)
Including existing data types
The available data types can be imported as follows (in the example code above, this is already done).
This concludes Part 3 of the Workshop.